When you search for "how to enhance video quality" on the internet, you will get a large number of results. Most of them are online video enhancers. However, in addition to the online tools, are there any other ways to make video quality better? If you want to get more methods for video quality enhancement, this guide will be a must-read. We will lead you to learn about 7 types of 13 video enhancers, including their pros, cons, and how to use them.
- Part 1: What Types of Tools Can Enhance Video Quality?
- Part 2: How to Enhance Video Quality via Desktop Video Editing Software
- Part 3: How to Improve Video Quality via Plugins for Professional Software
- Part 4: How to Make Video Quality Better via Online Video Enhancers
- Part 5: How to Improve Video Resolution via Mobile Video Editing Apps
- Part 6: How to Increase Video Quality via Video Capture Cards
- Part 7: How to Make a Video Higher Quality via Video Players
- Part 8: How to Fix Video Quality via Cloud-Based Editing Platforms
Part 1: What Types of Tools Can Enhance Video Quality?
If you need to edit videos usually, you will know that increasing video quality is just a common operation. What's more, a suitable video enhancer can increase the efficiency. If you want to select the most suitable video enhancing tool, it will be necessary to understand how many types of tools can enhance video quality before the selection. According to our testing, there are 7 types of video enhancers:
- Desktop Video Editing Software: You can run these programs on your computer, and enhance your video quality offline.
- Plugins for Professional Software: Many image and video editing software has plugins, which can enhance their capabilities. When you find that your video editor cannot meet your needs, you can search for its plugins for extensions.
- Online Video Enhancers: You can upload your videos to their websites via a network, and then directly improve the resolution without downloading software.
- Mobile Video Editing Apps: If you want to fix your video quality on your mobile phone without a computer, you can download a video editing app from your phone app store.
- Hardware Solutions: You can use video capture cards or a better camera to create high-quality videos directly.
- Video Players: Some video players have simple video editing features, so you can use them to improve the quality.
- Cloud-Based Editing Platforms: These platforms are similar to oneline video enhancers, but they allow you to upload and edit videos with powerful remote servers.
Part 2: How to Enhance Video Quality via Desktop Video Editing Software
If you intend to enhance the quality of a video that is very important and private, you'd better choose an offline video editing program. In this part, we have provided 2 desktop applications for video enhancement.
2.1 Using Video Enhancer
Video Enhancer is an AI-powered program to improve your video quality with ease. As long as you install it on your PC, you can import your video directly, and upscale the video resolution in 1 click. You can also add effects, crop, and rotate your videos on your computer.
Pros:
+ Enhance video quality with AI technology offline.
+ Support various video formats, such as MP4, AVI, MOV, MXF, TS, HEVC, MPEG, VP9, etc.
+ Allow you to convert your video format directly.
+ Enable you to add watermarks to your videos to make them special.
+ Edit videos with multiple practical features, like cropping, removing video noise, reducing video shaking.
Cons:
- Cannot select a resolution.
Download Video Enhancer.
Here's how to make the quality of a video better with Video Enhancer:
Step 1: Install Video Enhancer on a computer, and then launch it.
Step 2: Click "Add File" to import your videos to the software, and click one video.
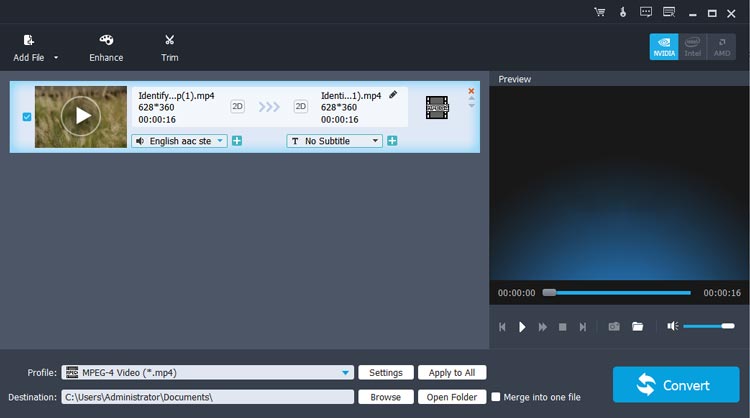
Step 3: Choose the "Enhance" tab, and check off the "Upscale Resolution" option. If needed, you can check all options. Next, click "Apply" > "Close".
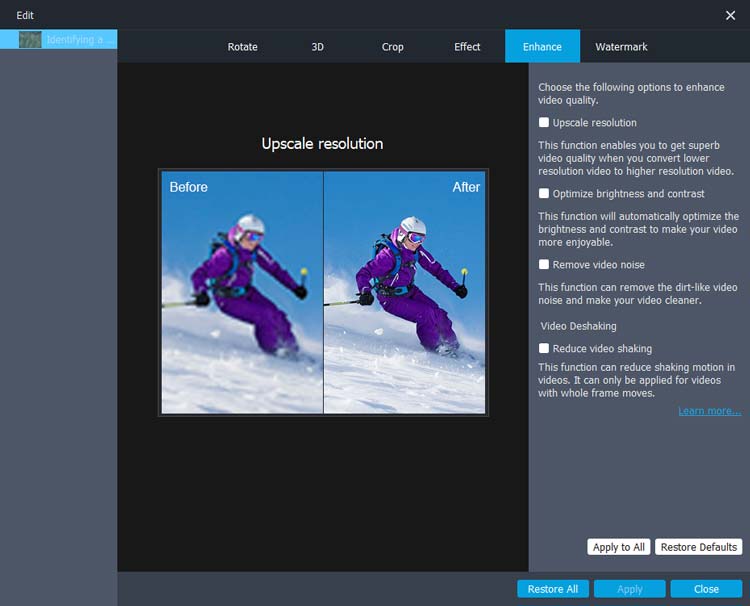
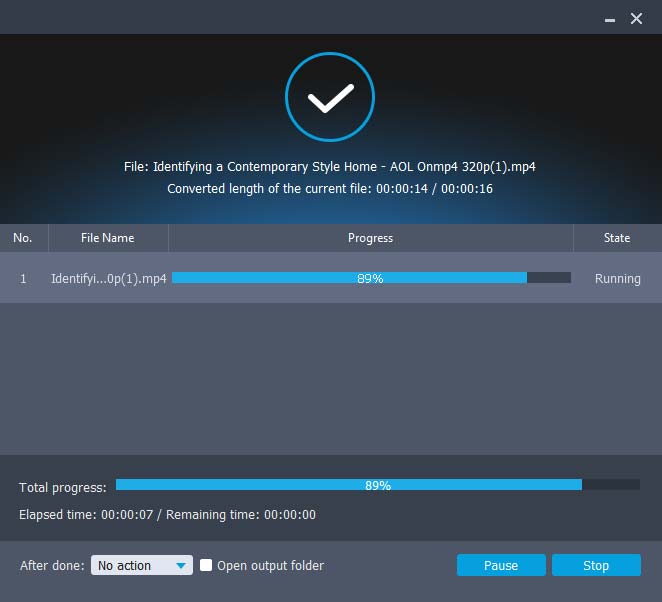
Step 4: Tap "Convert" to save the enhanced video on your computer.
2.2 Using Adobe Premiere Pro
Adobe Premiere Pro is a professional video editor with a variety of editing features. With it, you can make a low quality video look better with ease. Besides, it has many eye-catching effects and title styles, making your video more special than before.
Pros:
+ Enhance video quality by upscaling resolution, sharpening, reducing noise, adjusting colors, etc.
+ Allow you to adjust the tone and color freely.
+ Make the speech in videos clearer.
Cons:
- Expensive.
- Too many features to make it slightly difficult to use for beginners.
Here's how to use Adobe Premiere Pro to increase video quality:
Step 1: Open Adobe Premiere Pro on your computer, and click "File" > "Import" to add the video that you want to improve. Or drag it into the project panel directly.
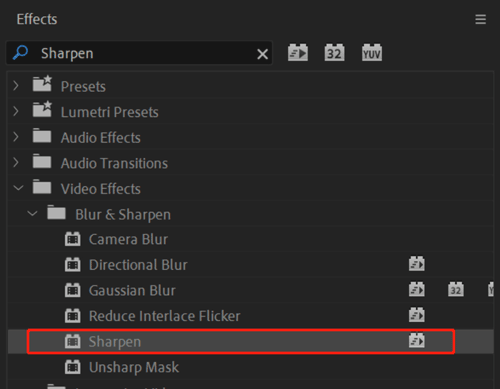
Step 2: Choose the "Effects" tab, and locate the "Blur & Sharpen" folder.
Step 3: Select the "Sharpen" effect, and set the "Sharpen Amount" value. A value between 10-20 is usually enough.
Step 4: After that, click "File" > "Export" > "Media", choose a format, and save the output video. By the way, you can also adjust layers, enhance audio, etc., for your video with this software.
Part 3: How to Improve Video Quality via Plugins for Professional Software
If you have installed Photoshop or Adobe After Effects on your computer, you can directly use their plugins to improve video quality. By the way, you can use these tools directly without plugins, but if you want more features to enhance your video, please install the plugins.
3.1 Using Neat Video
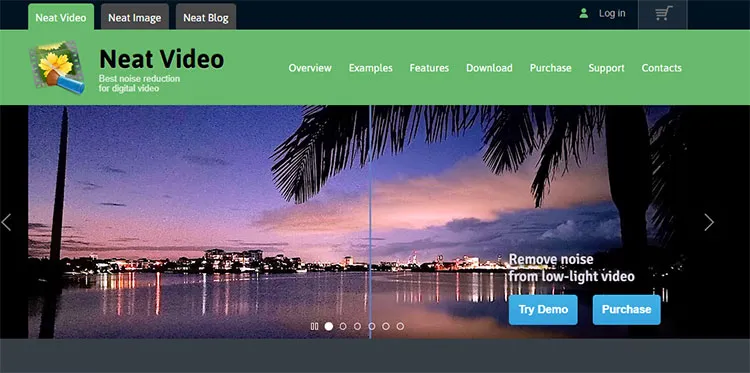
Some plugins can be installed for Photoshop to increase video quality, such as Neat Video, a useful video filter to reduce pixel noise, grains, and more. Thus, you can use it to make your video clearer than before.
Pros:
+ Effectively reduce video grains.
+ Automatically detect the installed PS software on a computer, and configure the appropriate file path.
+ Support high-resolution footage.
+ Work well on Windows and Mac computers.
Cons:
- The license is expensive.
- Take much time to reduce grains for high-resolution videos.
- Not easy to understand how to use it for beginners.
Here's how to use Neat Video to enhance video quality:
Step 1: Download Neat Video on your computer, and install it to the "Plug-ins" folder of PS.
Step 2: Open PS, and add your video to the software.
Step 3: Click "Filter" > "Neat Video" > "Reduce Noise v5" to open the "Neat Video" plugin window.
Step 4: Select a uniform area of your video that you want to enhance the quality, and click "Auto Profile" to let Neat Video analyze and build a profile for the selected area. You can also adjust the "Noise Reduction Amount" sliders to your preference. Then click "Apply".
Step 5: Repeat the process for each frame layer. After that, export the frames as a video by clicking "File" > "Export" > "Render Video".
3.2 Using Red Giant Universe
Red Giant Universer is a collection of video transitions and effects plugins. You can install it in Adobe After Effects to make a video quality higher. It supports Windows, macOS, and Linux, so you can download the version you need without limits.
Pros:
+ Support many multiple non-liner editing systems, like Adobe After Effects, Premiere Pro, Final Cut Pro X, etc.
+ Offer over 90 tools for video editing needs.
+ The GPU acceleration feature makes most effects render quickly.
Cons:
- The subscription pricing is high for individual users.
- Many complex effects make it resource-heavy.
- Rely on updates very much.
- The download requires registration.
Here's how to fix video quality with Red Giant Universe:
Step 1: Make sure you have installed After Effects or other video editors on your computer. Then go to https://www.maxon.net/en/try to download and install this plugin. It will require you to sign in with your Maxon account.
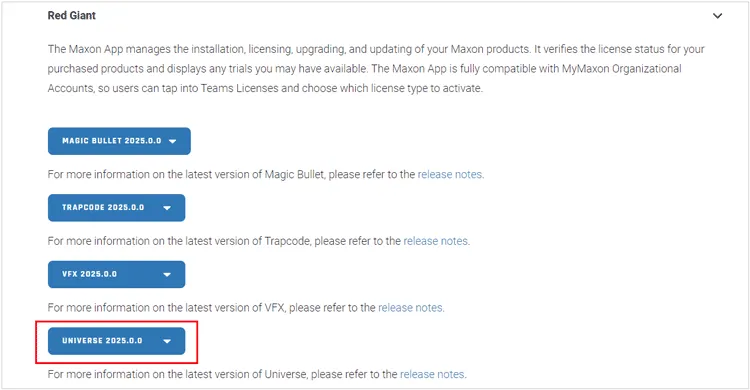
Step 2: Unzip the file, and install it. After that, open AE, and drag and drop the video you want onto the "New Composition" area.
Step 3: In the timeline, select the layer that contains your video, and then go to "Effects" > "Finisher" > "RG Universe". Next, drag the "Finisher" effect onto your video layer in the "Timeline".
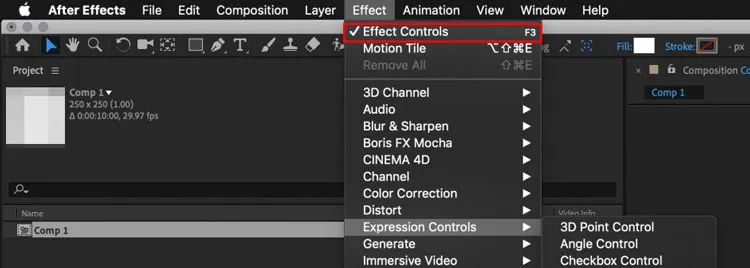
Step 4: Navigate to "Effect Controls", and locate the "Finisher" effect settings. Then look for the "Sharpness" slider to adjust it.
Step 5: Once done, go to "Composition" > "Add to Render Queue" and set your output settings to export your sharpened video. Also, you can enhance your video through color correction and grading, reducing noise, and more.
Part 4: How to Make Video Quality Better via Online Video Enhancers
Some online video enhancers are practical for making video quality better. With these online tools, you don't need to install resource-heavy plugins on your computer. However, there is a risk of your video information being leaked, especially if the platform does not have robust privacy policies.
4.1 Using Kapwing
Kapwing is a popular online video editing platform with a variety of tools for video creating and editing. If you want to enhance video quality quickly without additional requirements, you can use it with ease.
Pros:
+ Enhance and edit videos online without downloading any software.
+ The user-friendly interface is suitable for beginners.
+ Allow you to edit video contacts, saturation, blur, speed, brightness, etc.
Cons:
- Cannot reduce noise in videos.
- Try it for free without registration.
Here's how to use Kapwing:
Step 1: Open a browser on your computer, and access https://www.kapwing.com/tools/video-enhancer.
Step 2: Tap on "Click to upload" to select and import your video from your computer.
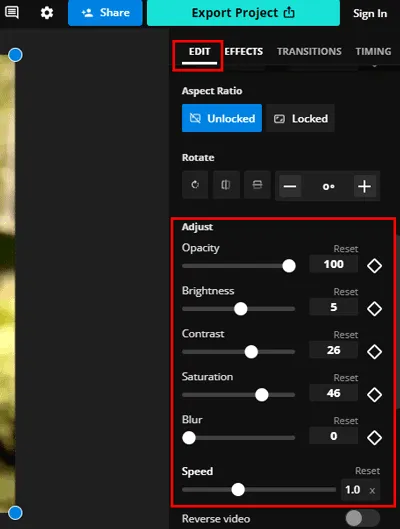
Step 3: Click "EDIT" to adjust the values of opacity, brightness, and more.
Step 4: Once done, click "Export Project" to save the enhanced video.
4.2 Using Flixier
Flixier is another useful oneline video editing platform, allowing multiple users to work on the same project simultaneously. Thus, it is suitable for team projects.
Pros:
+ Allow you to import 10 minutes of videos for free per month.
+ Select video resolutions easily.
Cons:
- Support importing a video by drag and drop only.
- Rely on network. If the network is not stable, it will fail to import your video.
- The video uploading is slow, and easy to fail.
- The effects cannot make videos clearer.
Here's how to improve the quality of a video with Flixier:
Step 1: Go to https://flixier.com/ on your computer, and click "Get Started".
Step 2: Drag your video to the website, and it will automatically upload your video file.
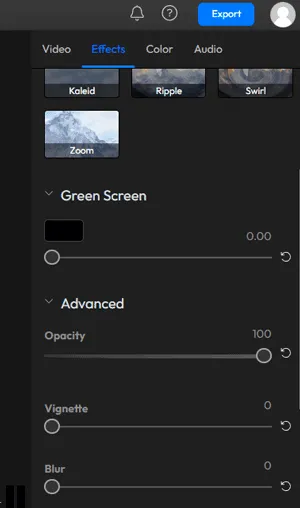
Step 3: Choose your video, and click "Affects" on the right panel. Then scroll down to the "Advanced" feature.
Step 4: Then click "Color" to adjust the video color manually. Finally, click "Export" to save the video.
Part 5: How to Improve Video Resolution via Mobile Video Editing Apps
If you want to improve your video quality on your mobile phone or tablet, you can install a video editing app on your Android or iOS device. Then you can enhance your video without a computer.
5.1 Using InShot
InShot is a reliable application for video and photo editing on Android and iOS devices. With simple touches, you can make your videos clearer on your mobile device.
Pros:
+ Enable you to apply filters that enhance brightness, contrast, and saturation to make your video look sharper.
+ Save your videos at a high resolution.
+ Easy to add voice effect to videos.
Cons:
- Have no specific sharpening tool.
- Have no advanced clarity enhancement option, so the clarity of the final video will largely depend on the quality of the original footage.
Here's how to use InShot on a mobile phone:
Step 1: Download InShot from the Google Play Store or Apple App Store to your Android phone or iOS device.
Step 2: Open it, and click "Video" under "Create New". Then select one or more videos from your device, and click the "OK" icon at the bottom.
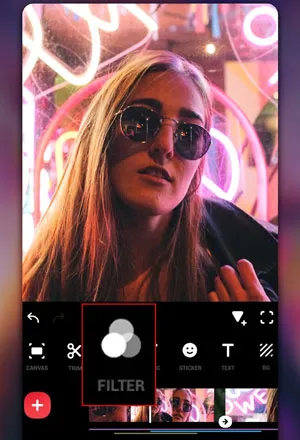
Step 3: Choose the "Filter" tab, and click "Adjust" to edit the video's lightness, contrast, warmth, color, hue, and more. Once done, save the video.
5.2 Using VN
Similar to InShot, VN is a versatile video editing app for Android and iOS devices. It allows you to adjust the brightness, contrast, color, and saturation to improve your video quality. If you want to use all features in this app, you need to purchase it first.
Pros:
+ Make your video special by adding text and music content.
+ Change your video color easily.
+ Provide many beautiful filters.
+ Have the Sharpen feature.
Cons:
- Not a free app, which costs $15.49/month.
- Cannot remove noise from videos.
Here's how to use VN to enhance video quality:
Step 1: Install the VN app on your smartphone, and then open it.
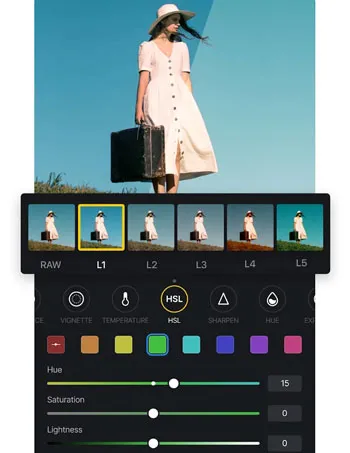
Step 2: Click "New Project" to import the video you want. Then choose "Filter" to select the feature you want to improve your video. Then apply to the video.
Step 3: Export the processed video to your mobile device.
Part 6: How to Increase Video Quality via Video Capture Cards
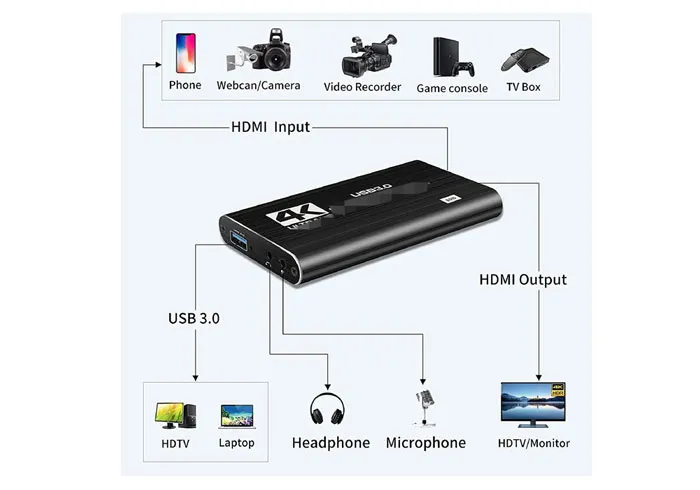
You can utilize hardware devices like video capture cards to improve your video quality. As long as you connect your smartphone, camera or other devices where you store your videos to a video capture card, it can cope with your videos.
Pros:
+ Enhance video resolution with ease.
+ Allow you to set the value freely.
+ Enhance your video when you are recording.
Cons:
- Cannot modify the resolution or other settings after saving videos.
- The quality depends on original video quality.
- The compatibility varies.
Here's how to use a video capture card to boost video quality:
Step 1: Connect a video capture to your computer, and install a suitable video capture app, which depends on the brand of your capture card. Please carefully read the instructions provided by the manufacturer.
Step 2: Then set the resolution, fame rates, and other values. Once done, save the settings, and connect the card to the device that you plan to record videos.
Step 3: Start to record your video, and save it. The card will increase your video quality based on your customized settings during the recording process.
Part 7: How to Make a Video Higher Quality via Video Players
Some video players can help you edit your video resolution, brightness, and more, so you can make your video clearer without downloading any other apps.
7.1 Using VLC Media Player
VLC Media Player is a open source multimedia player, supporting brightness, contrast, and saturation adjustment. It can also improve the resolution of videos.
Pros:
+ Allow you to adjust video parameters to improve video quality.
+ No difficult features.
+ Improve resolutions through the process of converting or transcoding videos.
Cons:
- Not a video editing tool, so there are few features to edit videos.
- Cannot change the playback resolution directly.
Here's how to clear up video quality with VLC Media Player:
Step 1: Install and open VLC Media Player on your computer, and open your video with this program.
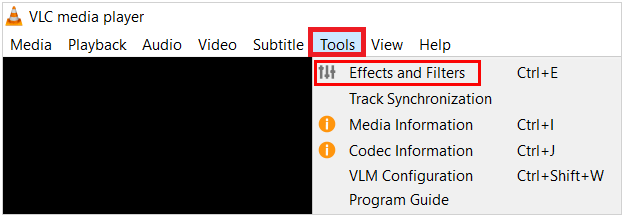
Step 2: Choose "Tools" > "Adjustments and Effects" > "Video Effects".
Step 3: Adjust the brightness, contrast, and more of your video, and click "Save".
7.2 Using GOM Player
GOM Player offers you some effects to enhance your videos quality, which is a simple tool without many video editing features. Besides, it cannot change the video resolution.
Pros:
+ Change video effects swiftly.
+ Have an Android version.
Cons:
- Cannot change resolutions of videos.
- You cannot save the video that you changed the settings.
Here's how to use GOM Player to enhance video quality:
Step 1: Install GOM Player on your PC or Android device, and find your video. Then open it with this app.
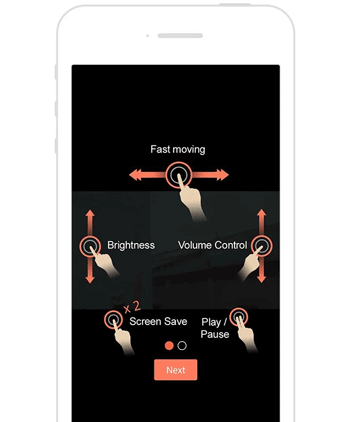
Step 2: Find the settings and adjust the brightness of your video. Also, you can capture the screenshots, and sync the subtitle.
Part 8: How to Fix Video Quality via Cloud-Based Editing Platforms
Cloud-based editing platforms are similar to online video editing websites, but they allow access from a cloud storage space. As long as you log in to your account, you can edit your video directly without device limitation.
8.1 Using Frame.io
Frame.io is a cloud-based video editing and sharing platform. If you want to make your video special or write down your feedback in videos, this tool will be suitable for you. Besides, it can improve your video production workflow, which may lead to better-quality final videos.
Pros:
+ Edit videos on different devices and save videos easily.
+ Allow you to check different versions of a video project.
+ Upload videos fast.
Cons:
- Require to log in when you use it.
- Fewer features for video editing.
- Cannot enhance video resolution or sharpness.
Here's how to use Frame.io to enhance video quality:
Step 1: Open https://frame.io/ on your computer, and click "Start Free Trail" on the upper right corner.
Step 2: Sign up with your Google Account or other email address. Once done, click the "Add" icon to upload your video.
Step 3: Double-click your video after uploading, and choose the "Original" resolution at the bottom right.
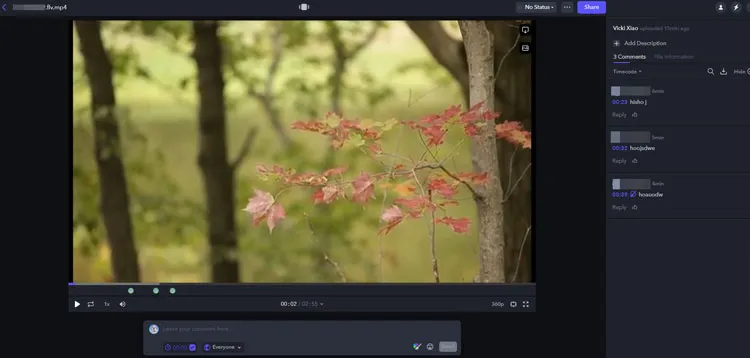
Step 4: Input your comments and click "Send". Then the platform will record your words. Once done, click "Go Back" icon, and your video will be saved automatically.
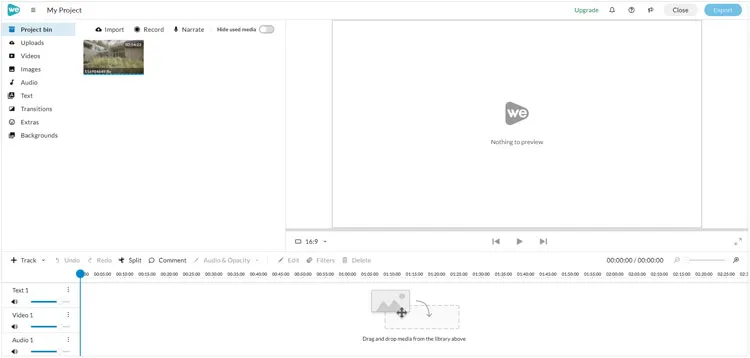
8.2 Using WeVideo
WeVideo is another cloud-based video editing platform to help users create, edit, and share videos on any device with a internet connection. This tool is suitable for multiple users to collaborate on a project at the same time.
Pros:
+ Allow you to add effects to videos with ease.
+ Edit the same video on different devices.
+ Enable you to select a resolution.
Cons:
- Need the registration.
- No advanced editing features.
- Only the premium allows you to edit videos without a watermark.
Here's how to increase video quality with WeVideo:
Step 1: Go to https://www.wevideo.com/ and click "Sign up free" to create your own account.
Step 2: Sign in with your account. Once done, click "Create project" on the interface.
Step 3: Drag and drop your video to it, or click "Import" to select your video from the device. Once done, drag and drop the video to the editing area.
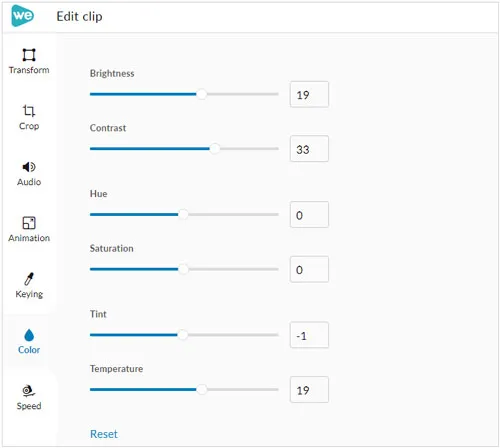
Step 4: Click "Edit" > "Color" to adjust the brightness, contrast, and other features. After that, click "Done".
Step 5: Tap "Filters" to select one and click "Apply". After that, click "Export", and select a resolution. Finally, click "Export" again to save the video.
Conclusion
With the 7 types of video enhancing software provided above, you can swiftly enhance your video quality with different features now. Please select the best video enhancer according to your requirements and their pros and cons. If you want to know more video enhancement tools and tricks, drop us a line or subscribe to our website. We will provide more useful reviews and guides for you.


