Video Editor is a versatile tool that simplifies video editing, making it accessible for everyone. Whether you're creating a simple video or a complex project, this software provides all the necessary features.
If you haven't yet installed Video Editor on your computer, don't wait any longer. Click the button below to download the software now and enjoy powerful editing tools that will elevate your video projects and bring your creative vision to life.
Part 1: Create a Video Quickly Using Fast Video Mode
Want to craft an impressive video or slideshow in just one click? The Fast Video Mode offers refined templates to help you create a polished video or slideshow accompanied by music. Here's how to utilize a template for your Fast Video.
Steps to Use Fast Video Mode
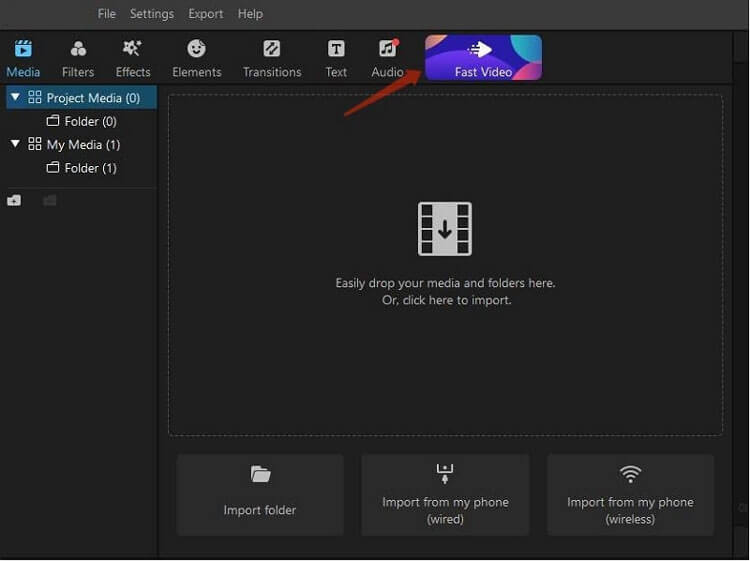
Step 1: Select the "Fast Video" option in the Media Library to enter Fast Video mode.
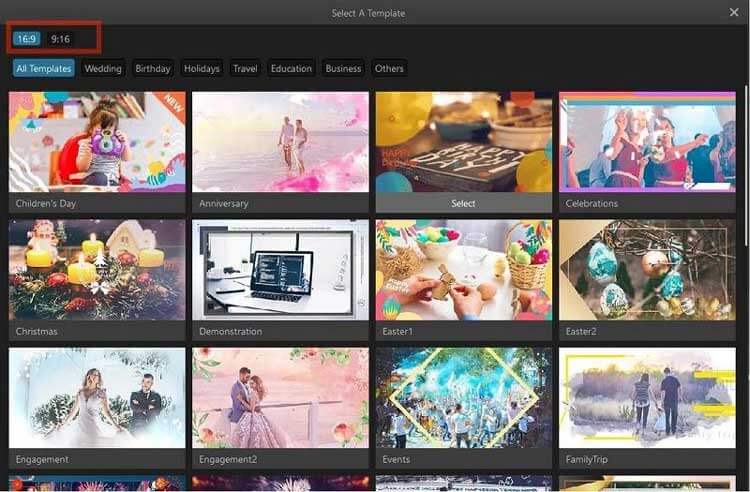
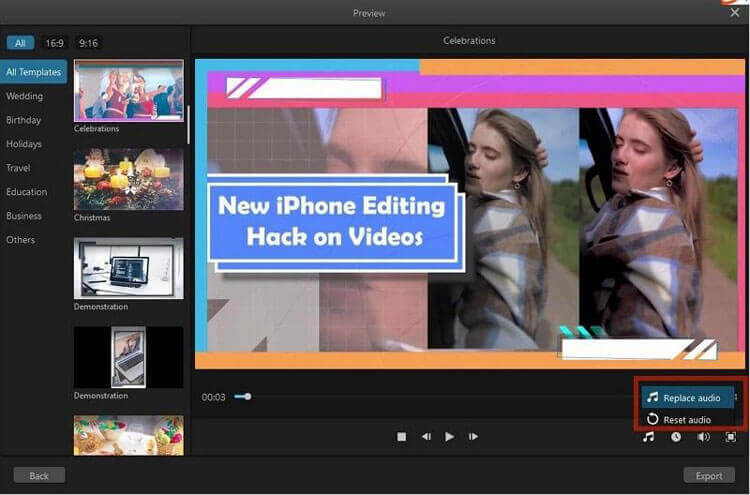
Step 2: Choose from seven template categories such as wedding, birthday, holidays, education, and business. Preview the selected template and choose your desired video aspect ratio (16:9 or 9:16).
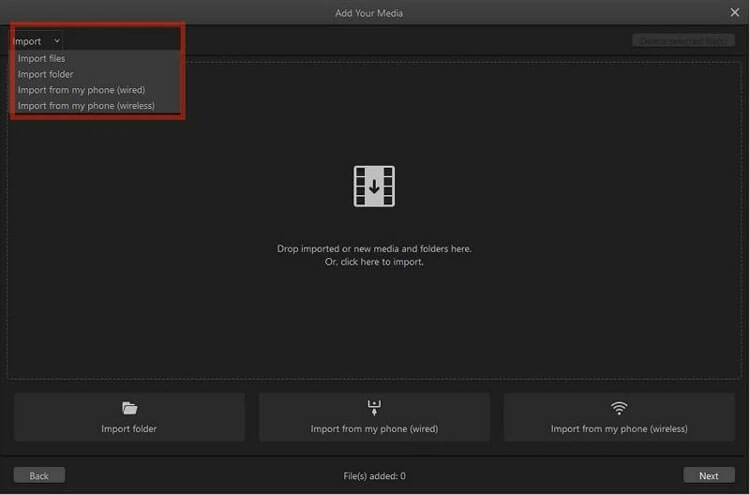
Step 3: Click "Add your media" to import your media files. You can do this in two ways:
- Click anywhere in the large window.
- Select "Import" to add individual files or an entire folder from your computer or phone.
Tips:
- To delete any file, select it and click "Delete selected file(s)".
- To return to the template selection, click "Back".
- Preview your video/slideshow by clicking "Preview".
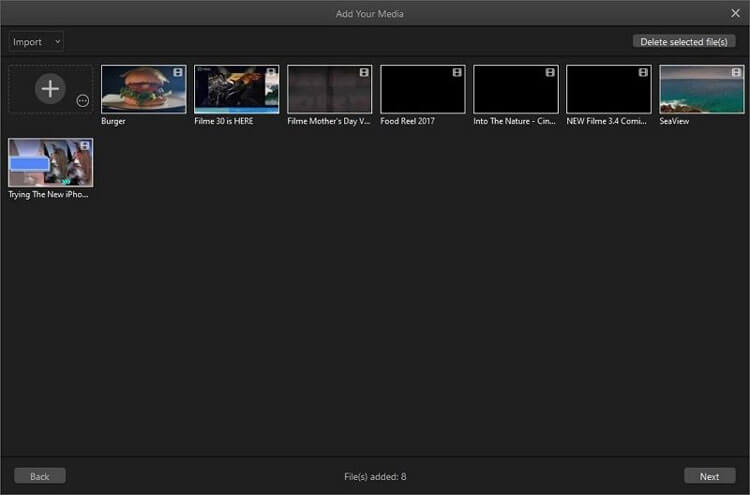
Step 4: After importing, rearrange files by dragging and dropping them. Adjust audio by clicking the music note icon and modify duration with the clock icon.
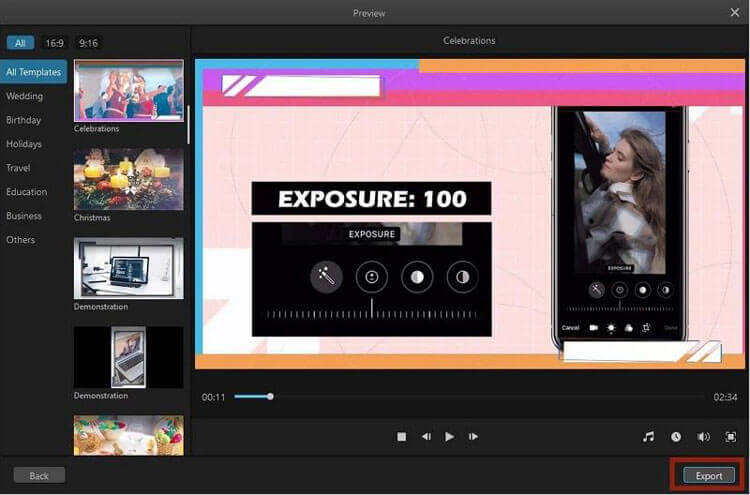
Step 5: When satisfied, click "Export" to finalize your video.
Part 2: Edit Videos in Video Editor
Once your media files (videos, images, and audio) are in the Media Library, you can start editing. This section covers key editing functions:
1. Delete Media Files in the Media Library
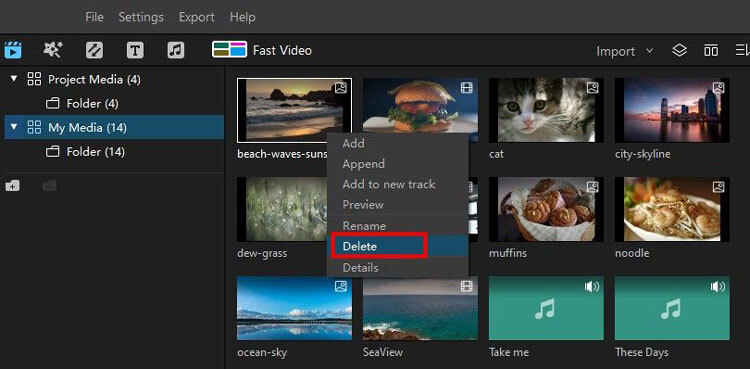
Right-click the media file in the Media Library and select "Delete". Note that this removes it from the Timeline but not from your computer.
2. Add Media Files to the Timeline
You can add files in three ways:
(1) Drag and drop the media files directly.
(2) Click the plus icon on the media file.
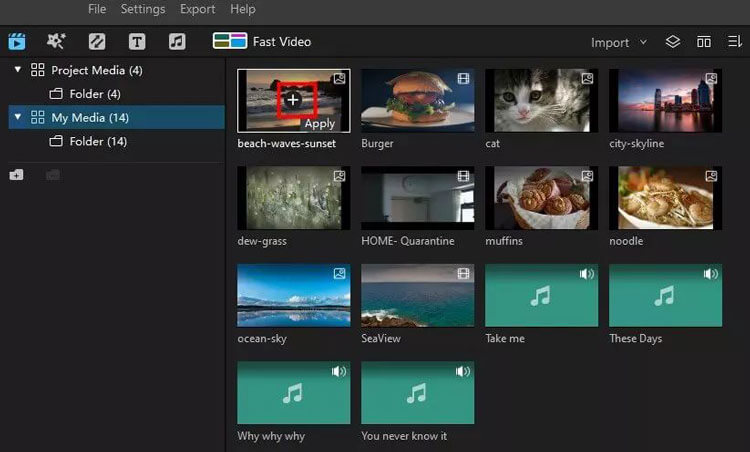
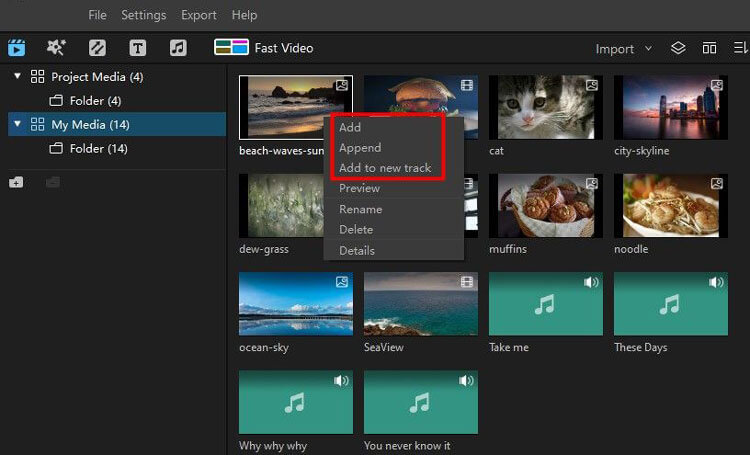
(3) Right-click the media file and choose "Add", "Append", or "Add to new track".
3. Copy & Paste Media Files
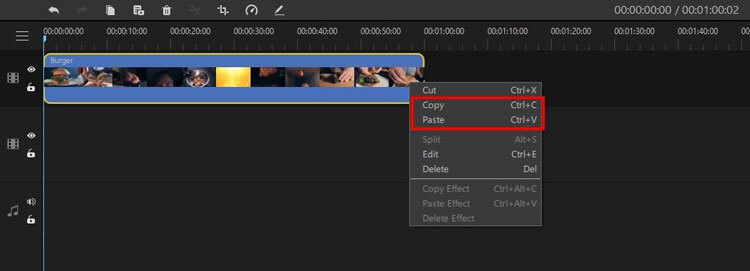
Right-click the clip, select "Copy", position the Playhead, and right-click to choose "Paste".
4. Delete Media Files in the Timeline
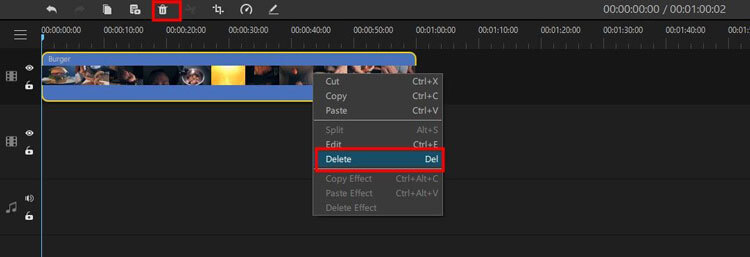
Select the clip and press the Delete icon or the Delete key.
5. Trim Video Clips
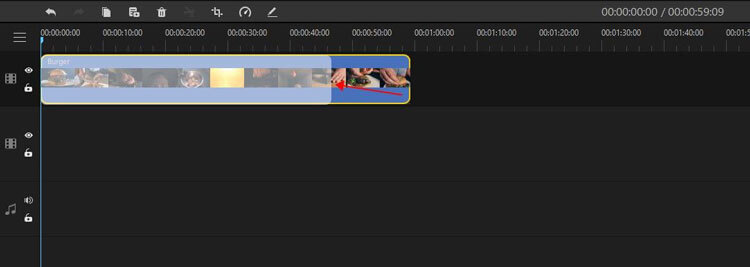
Pull the clip's edges in the Timeline to trim.
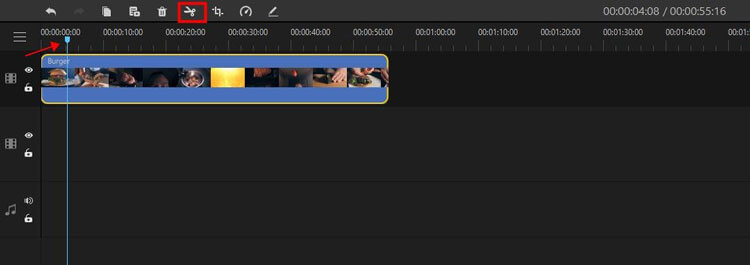
6. Split Video Clips
Position the Playhead where you want to split and press the Split icon or right-click and select "Split".
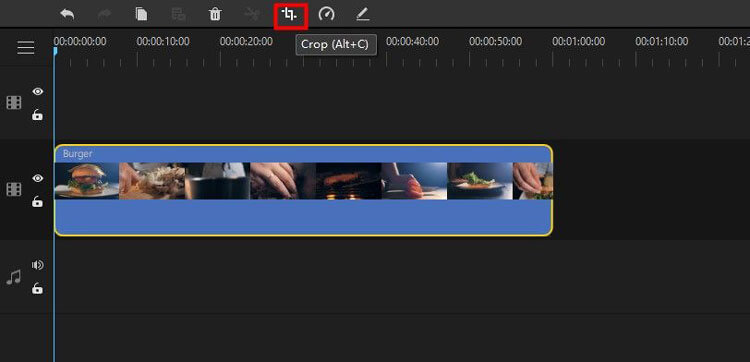
7. Resize/Crop Video Clips
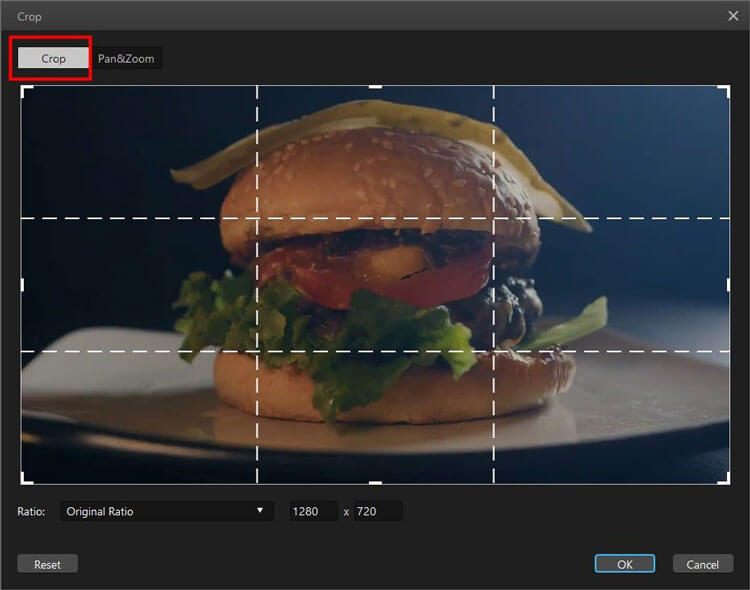
Select the clip and click the Crop icon to adjust dimensions.
Tips: On the Crop window, you can select the ratio options from the list, or input the ratio you want to crop.
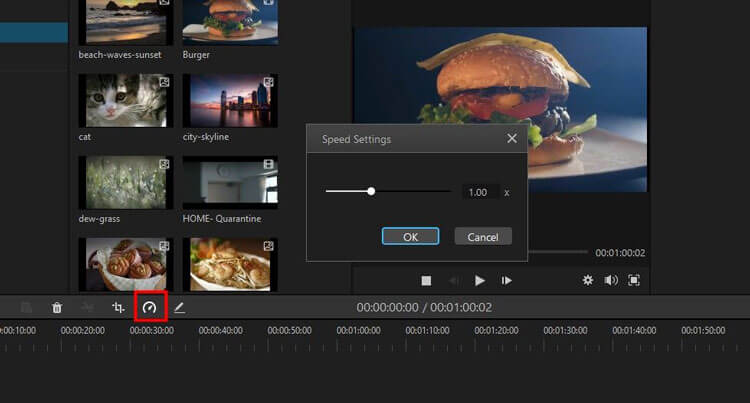
8. Change Video Clip Speed
Select the clip and press the Speed icon to adjust playback speed.
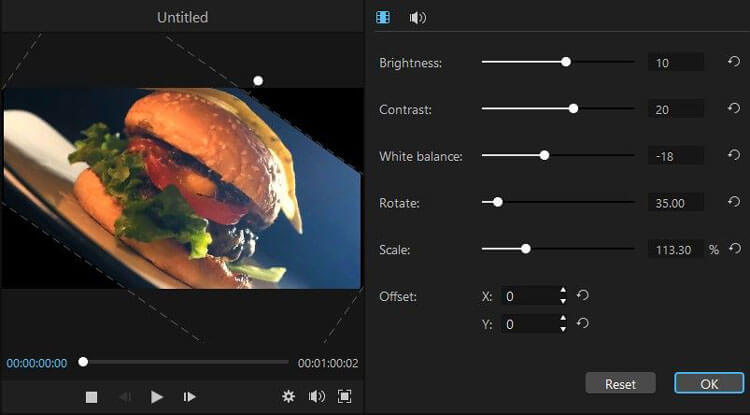
9. Adjust Video Settings
Double-click the clip to adjust brightness, contrast, white balance, scale, offset and rotate of the video.
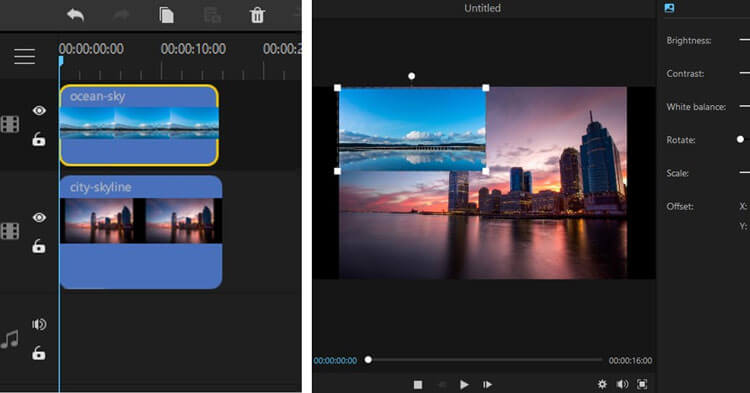
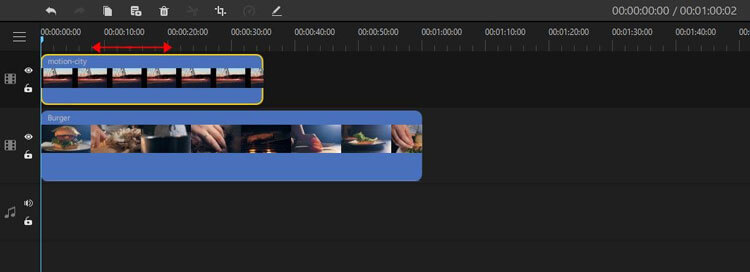
10. Picture-in-Picture Effects
Stack two media files in different tracks for a layered effect.
11. Zoom in/out the Timeline
Use the Plus and Minus icons to adjust the view.

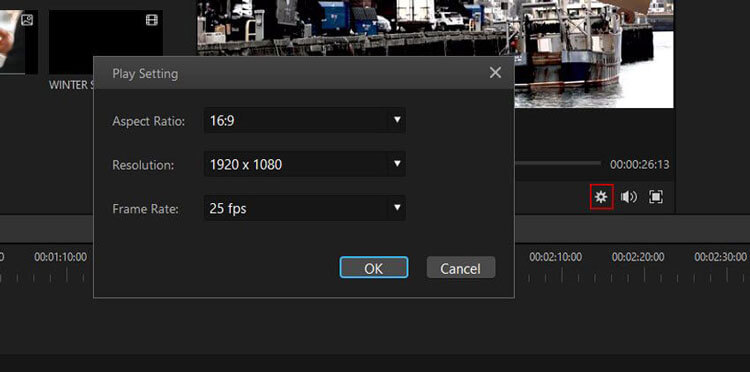
12. Change Playback Quality
Click the Play Settings icon to adjust preview settings.
Part 3: Edit Images
Editing images follows similar steps as video editing. Here's how:
1. Add an Image
Insert images into video tracks by positioning the Playhead and right-clicking to select "Add".

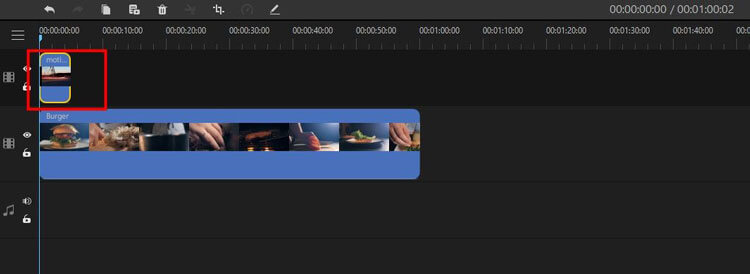
2. Apply Overlay
Drag the image to a new track above the video clip.
3. Change Image Duration
Adjust the clip length in the Timeline.
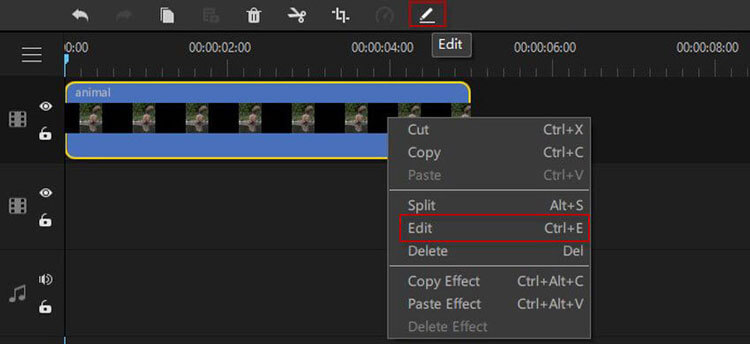
4. Edit Images
Right-click the image and select "Edit" option.
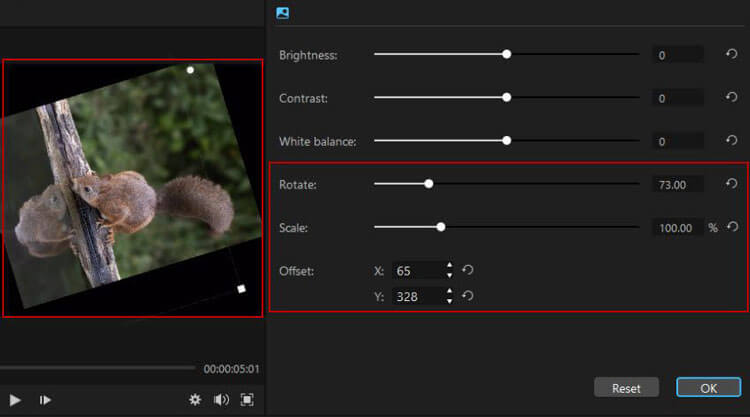
On the Edit window, you can adjust the brightness, contact, white balance, rotate, scale, offset.
Part 4: Apply Effects, Transitions, and Text
Add filters, transitions, and text to enhance your video:
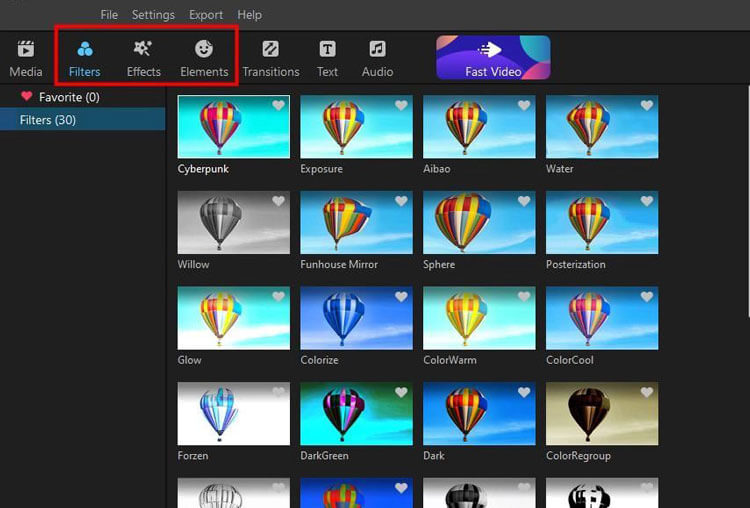
1. Apply Filters/Effects/Elements
Choose from the "Filters", "Effects", or "Elements" tabs, then add them to the Timeline.
2. Remove Filters/Effects/Elements
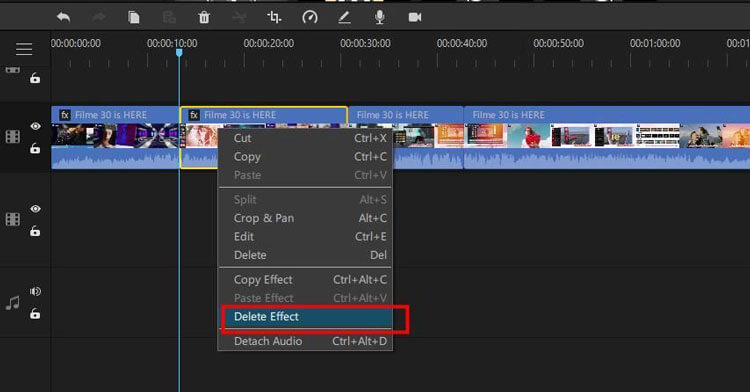
Right-click the effect in the Timeline and select "Delete Effect".
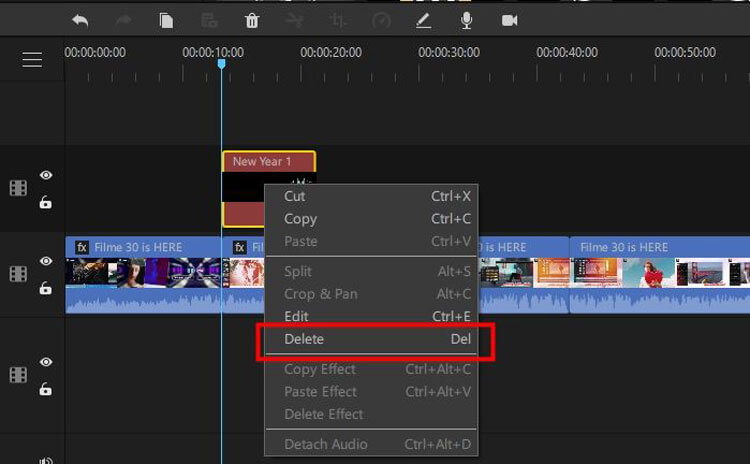
Right-click on the animation in the Timeline and select "Delete" from the popup menu.
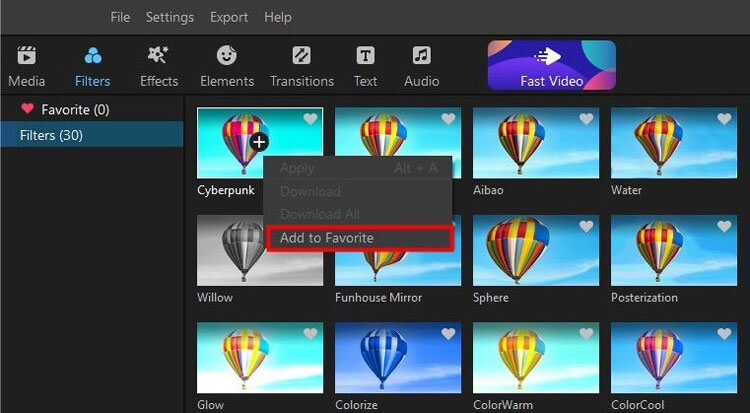
3. Favorite Effects/Transitions
Right-click and select "Add to Favorite" , or click the heart icon for quick access.
4. Add Transitions
Click the Transition option, select a style, and apply it between clips.
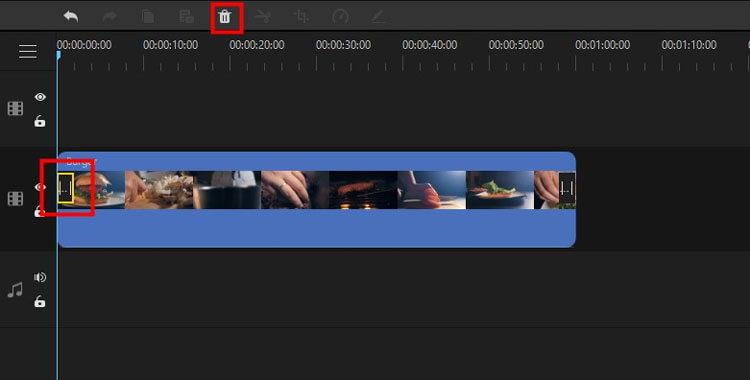
5. Remove Transitions
Click the transition and then click the "Delete" icon in the toolbar.
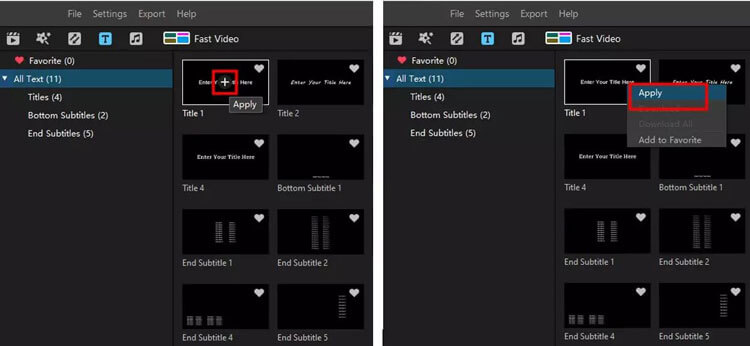
6. Edit Text
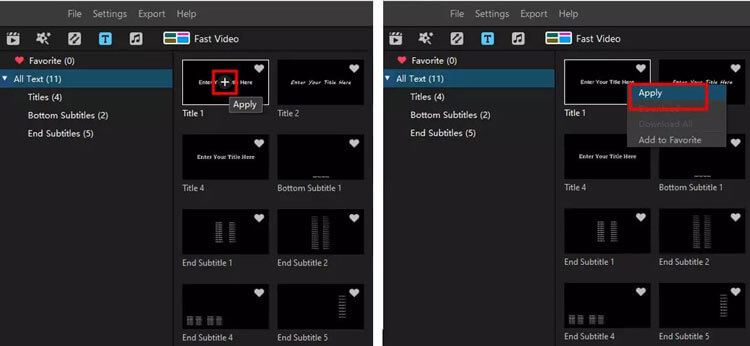
Use the "T" tab to add text.
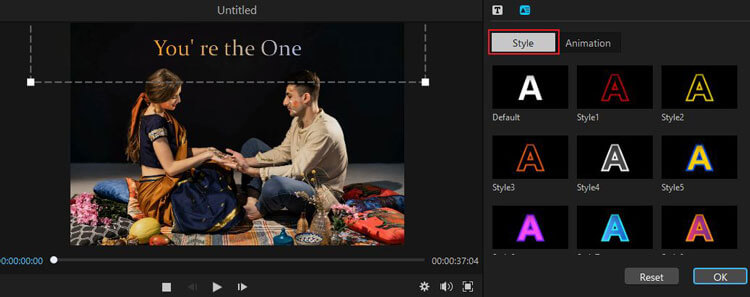
Then edit text animation, styles, and duration in the editing panel.
Part 5: Edit Audio
Enhance your video with audio editing capabilities:
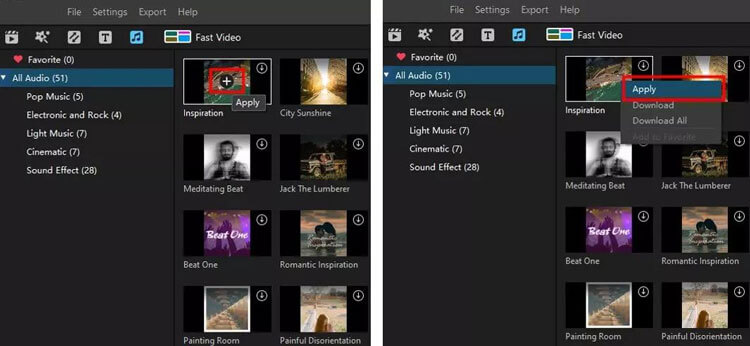
1. Add Background Music
Use the built-in library or import your own audio files.
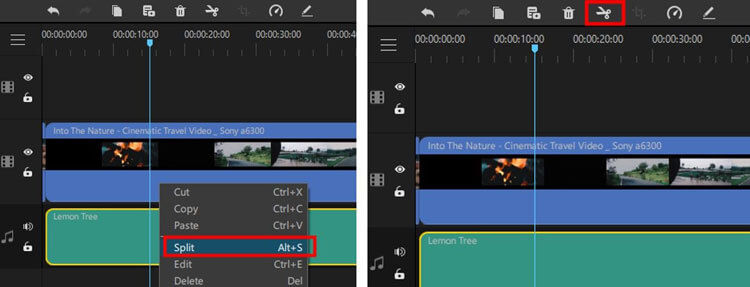
2. Split Audio
Position the Playhead and right-click to select "Split".
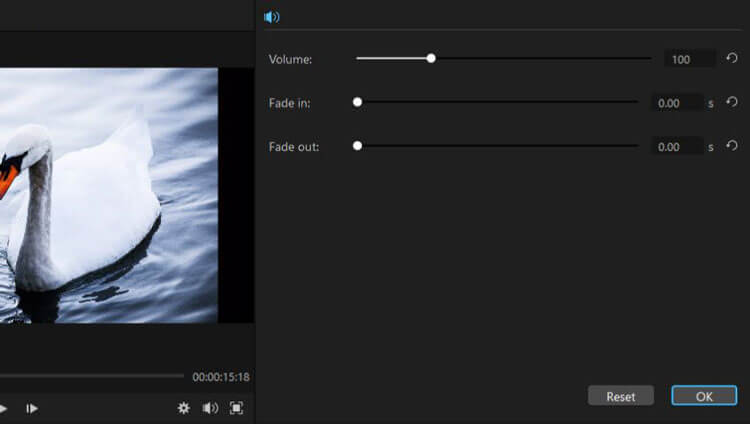
3. Adjust Volume
Double-click the audio clip to open the editing panel.
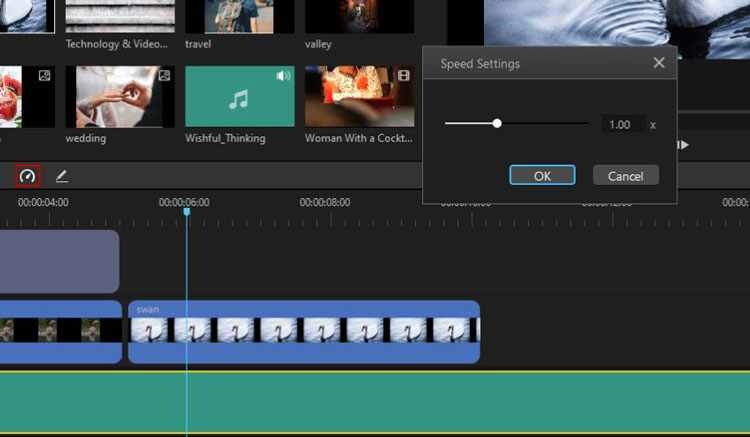
4. Adjust Audio Speed
Click on the "Speed" icon to adjust the audio speed.
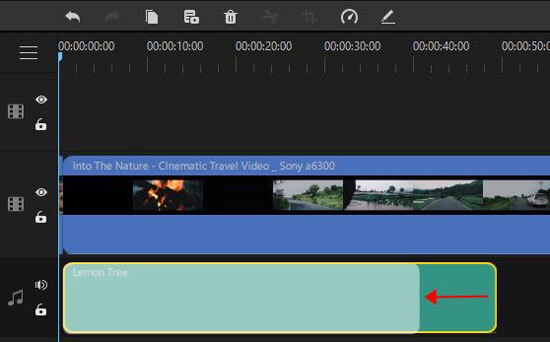
5. Trim/Split Audio Clips
Adjust the clip length directly in the Timeline.
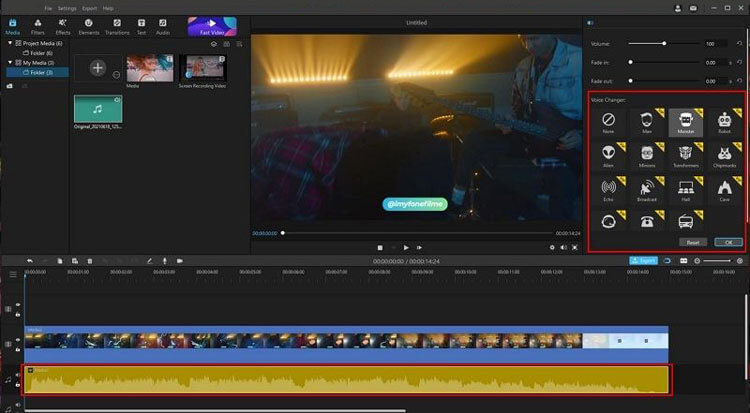
5. Voice Changer
Modify existing audio tracks or record new audio with effects.
Part 6: Record Screen and Audio
Video Editor allows you to record your screen and audio:
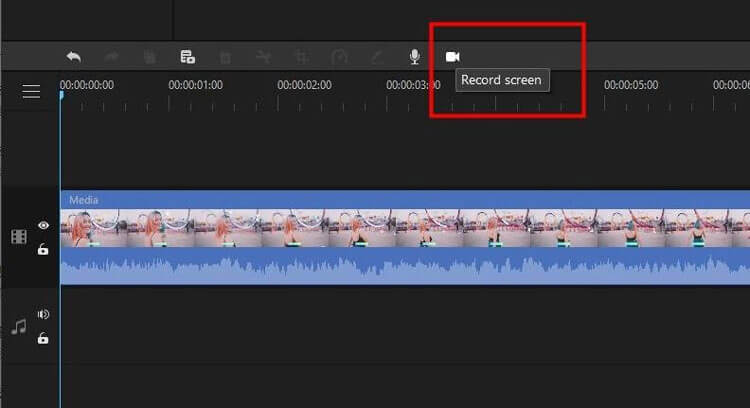
1. Screen Recording
Set up your recording area and click the "Record" button to capture your screen.
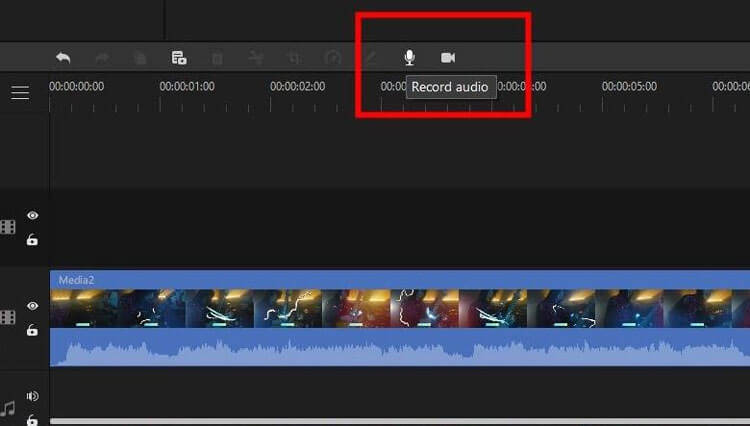
2. Audio Recording
Select an audio track, click the "Microphone" icon, and start recording.
Part 7: Export Your Project
Once editing is complete, you can export your video/audio project:
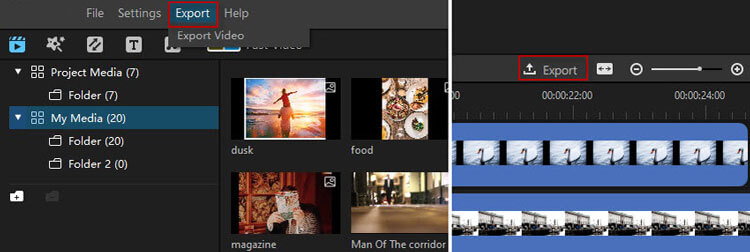
1. Export to Computer
Choose your desired format and quality, then click "Export".
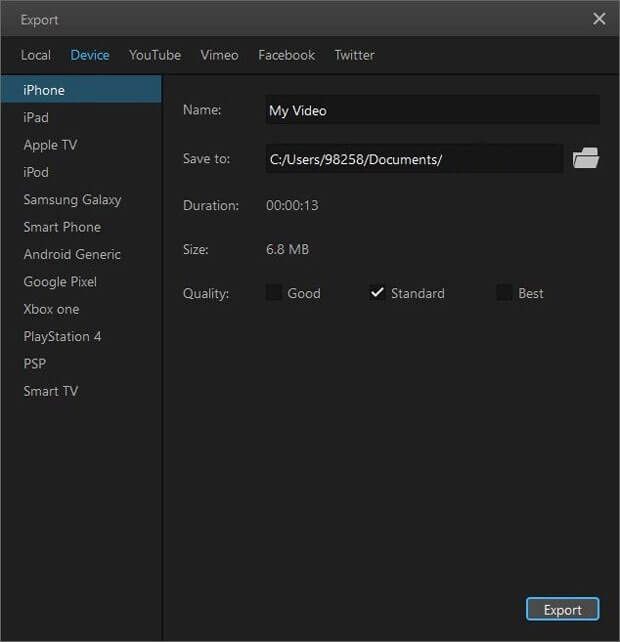
2. Export to Devices
Select a device from the Export window for optimized playback.
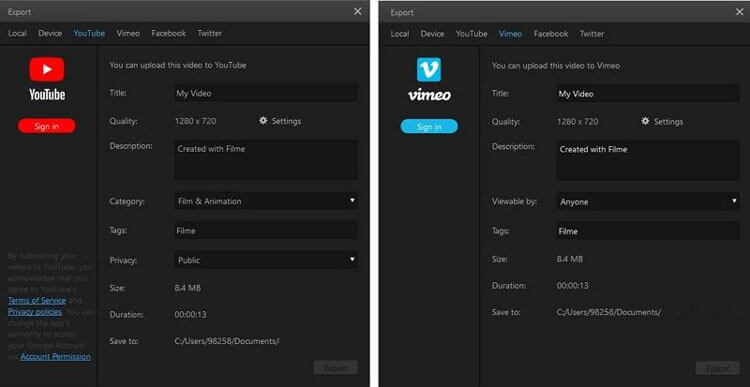
3. Export to Social Media
Sign in to your social media account like YouTube, Vimeo, Facebook or Twitter, and share your project directly.
Summary
Video Editor stands out as a comprehensive solution for all your video editing needs. With its intuitive interface and robust features, you can easily create, edit, and share videos, making it an essential tool for both beginners and experienced creators.


