Video Cropper is an essential tool for anyone looking to crop their videos efficiently. With its intuitive interface and powerful features, you can easily remove unwanted edges and enhance your visual experience.
Now, please follow these steps to use the Video Cropper to crop your video as you like.
Part 1: Getting Started
To begin, you need to download and install the Video Cropper on your computer. Click the download button below to download it for your Windows PC.
Once installed, launch the software and go to the "More Tools" tab. Locate "Video Cropper" and open it to start using the tool.

Part 2: How to Trim and Crop Your Video
Step 1: Add a Video
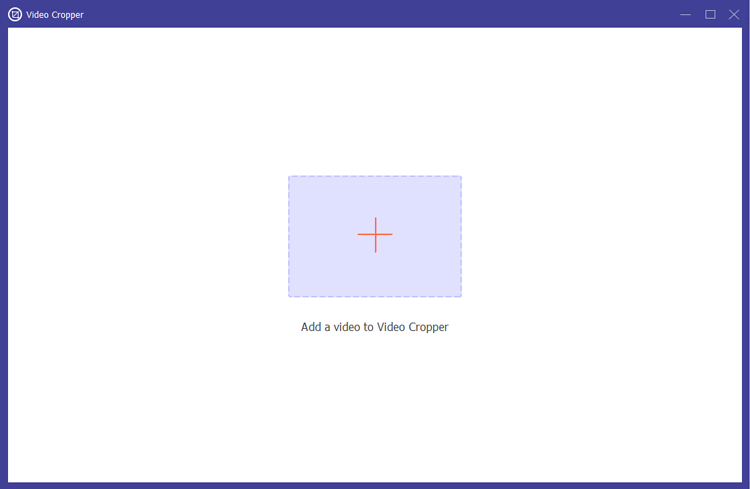
Once you opened the Video Cropper, you can import a video you wish to crop.

Step 2: Define the Crop Area
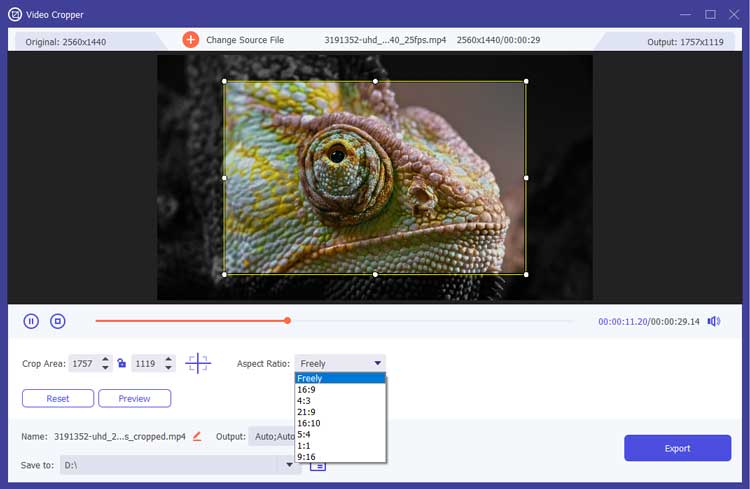
Utilize the yellow rectangle overlay on the video to adjust the cropping area. You can drag the corners to select the desired portion, or input specific dimensions for precise video cropping.
The software also allows you to choose from various aspect ratios, including Freely, 16:9, 4:3, 21:9, and 1:1, ensuring your video fits perfectly for any platform.

Step 3: Preview Your Cropped Video
Click on the "Preview" button to review the cropped output. If you are satisfied with the results, proceed to the next step.

Step 4: Export Your Cropped Video
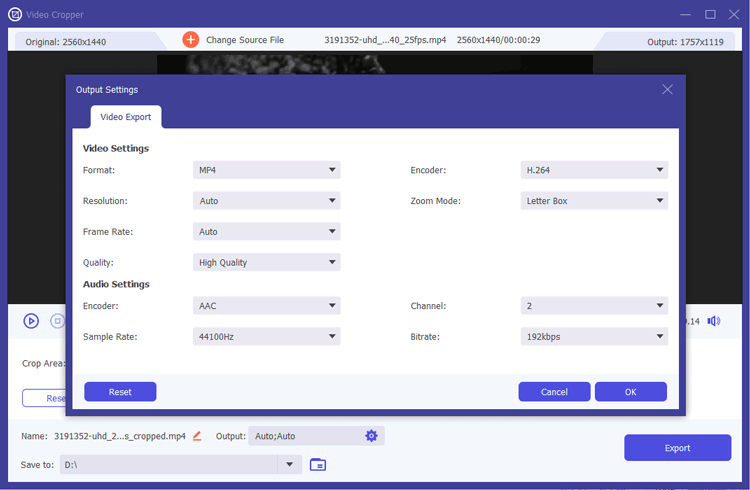
Before exporting, you can rename your video and adjust various output settings such as format, resolution, frame rate, and quality. Video Cropper supports saving your files in multiple formats, including MP4, MOV, MKV, WMV, AVI, and GIF. You can also export audio in formats like MP3, AAC, AC3, and WAV.
Once prepared, click the "Export" button to save your cropped video on your computer.

Conclusion
With Video Cropper, you can effortlessly crop your videos offline, tailoring them to your specific needs. Whether you are looking to adjust video dimensions or refine the visual presentation, this tool provides all the necessary features for effective video cropping.


