Welcome to the Video Converter guide. This powerful software enables you to convert videos, including 4K formats, into popular options like MP4, M4V, MKV, and MOV. With conversion speeds up to 30 times faster, you can efficiently transform video formats while enjoying a variety of editing features.
This guide will walk you through the essential functions and tools available in Video Converter.
- Getting Started
- Part 1. Convert Video/Audio to Various Formats
- Part 2. Make a Split Screen Video
- Part 3. Make MV
- Part 4. Edit Video/Audio with Multiple Effects
- Part 5. More Tools for Video Conversion and Editing
- 5.1 Video Watermark Remover
- 5.2 Video Compressor
- 5.3 Video Enhancer
- 5.4 Video Merger
- 5.5 Video Trimmer
- 5.6 Video Cropper
- 5.7 GIF Maker
- 5.8 3D Maker
- 5.9 Add Video Watermark
- 5.10 Video Speed Controller
- 5.11 Color Correction
- 5.12 Video Reverser
- 5.13 Video Rotator
- 5.14 Volume Booster
- 5.15 Noise Remover
- 5.16 Audio Sync
- 5.17 Audio Compressor
- 5.18 Image Converter
- 5.19 File Date Changer
- 5.20 Video Player
- 5.21 Media Metadata Editor
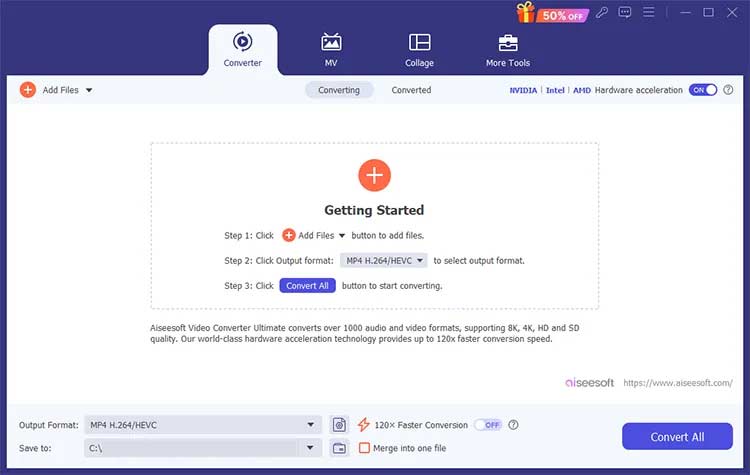
Getting Started
To begin, install Video Converter on your computer and register using the email address and registration code provided to you. Once installed, you can access a user-friendly interface designed for seamless navigation.
Part 1. Convert Video/Audio to Various Formats
Step 1: Add Files
Click "Add File" to import your video or audio files. You can also drag and drop files directly into the program. Once added, you'll see details such as the original format, screen size, and duration.
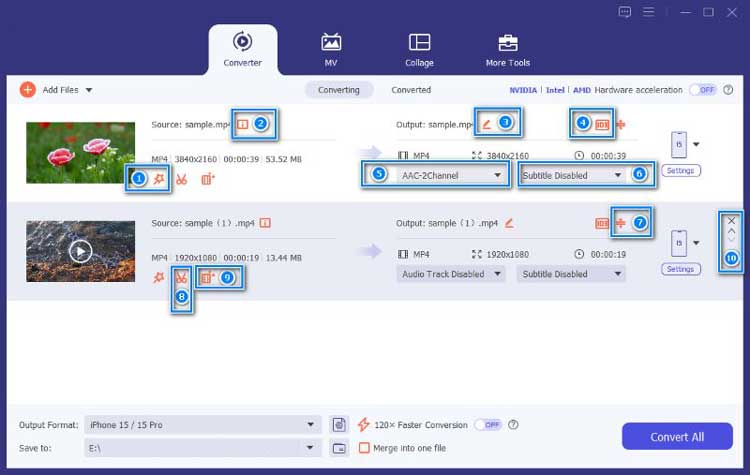
Step 2: Edit Video Information
Quickly adjust settings by clicking on the relevant buttons to:
- Edit the video
- Check file information
- Rename files
- Change metadata
- Manage audio tracks
- Manage subtitles
- Compress the video
- Trim the video
- Enhance the video
- Move the file position
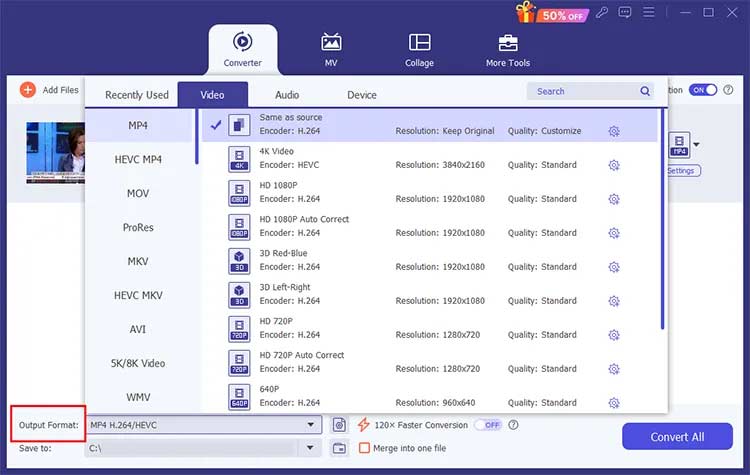
Step 3: Choose Output Format
Select the desired output format from the presets menu next to each file. For more customization, click the gear icon to adjust parameters such as quality, resolution, and bitrate for both video and audio formats.
Step 4: Set Save Path and Acceleration Options
Choose where to save your converted files and enable hardware acceleration for faster processing. The 120x Faster Conversion feature is available for specific formats, making the conversion nearly instantaneous.
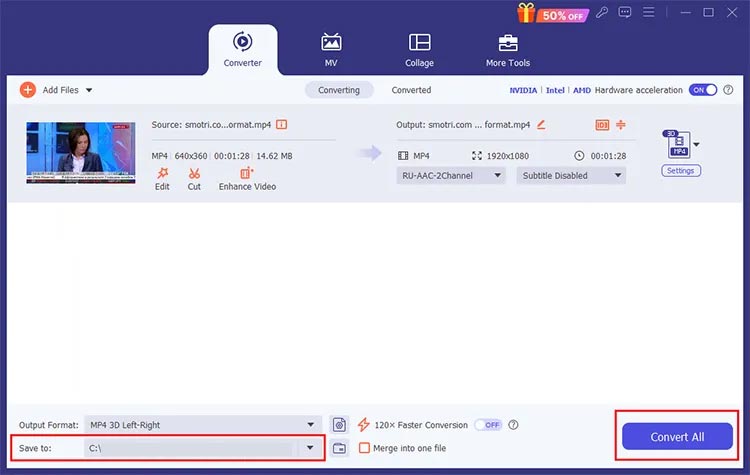
Step 5: Start Conversion
Click "Convert All" to initiate the conversion process. If you wish to merge multiple videos into one file, check the "Merge into one file" option. The output format will default to MP4 for merged files.
Part 2. Make a Split Screen Video
Combine multiple clips into a single screen using the split-screen feature.
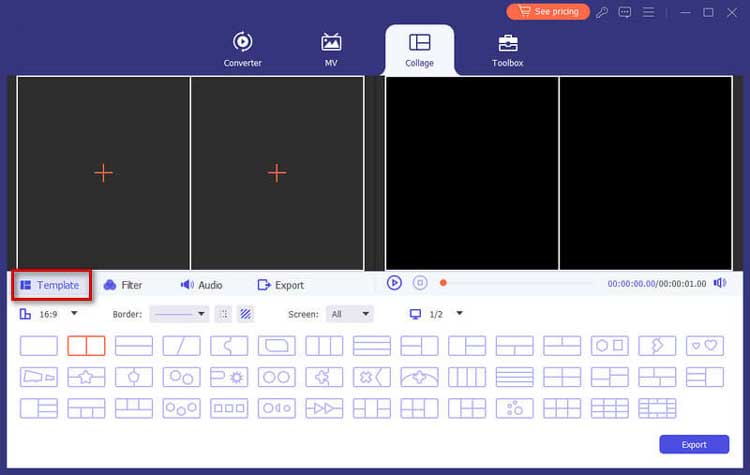
Step 1: Select Split-Screen Style
Choose the Collage feature and pick a layout from the Template tab.
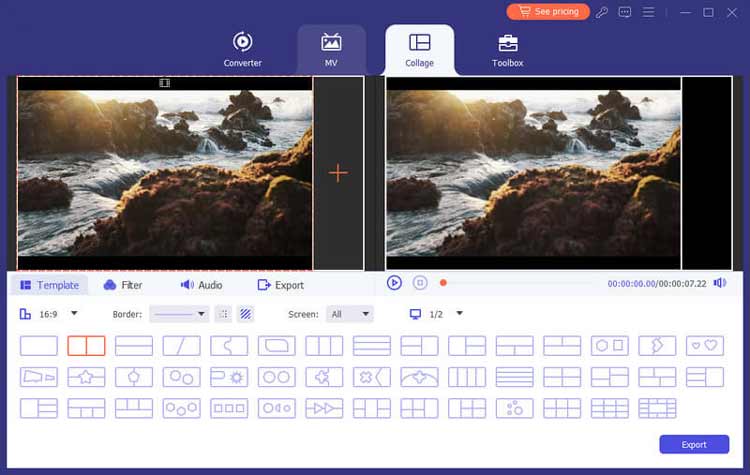
Step 2: Add Video Files
Click "+" to add videos to the split screen and adjust their sizes as necessary.
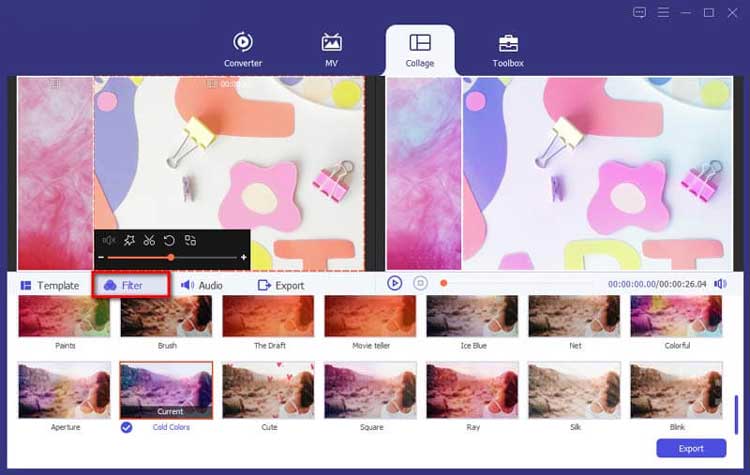
Step 3: Edit Clips and Apply Filters
Edit individual clips and apply filters to enhance their appearance.
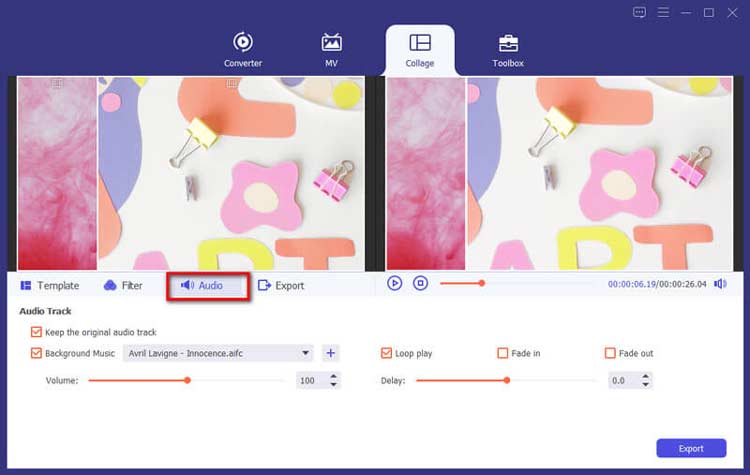
Step 4: Add Background Music
Enable original audio or add background music, adjusting settings like volume and fade effects.
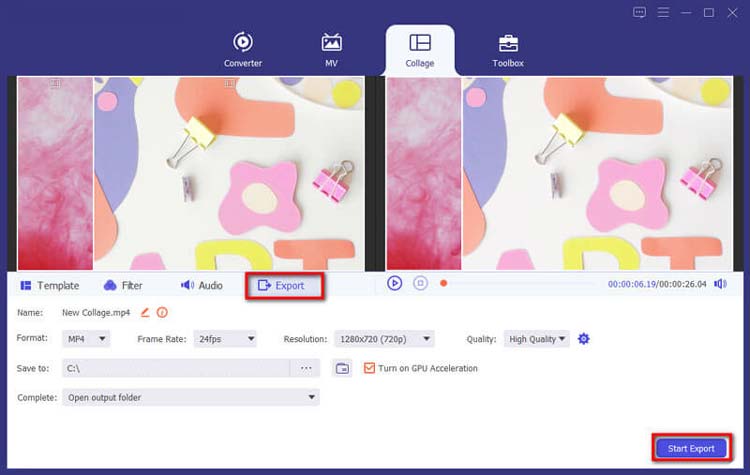
Step 5: Export and Share
Change project details, select output settings, and click "Start Export" to save or share your split-screen video.
Part 3. Make MV
With Video Converter, you can create stunning music videos (MVs) using your own footage and images.
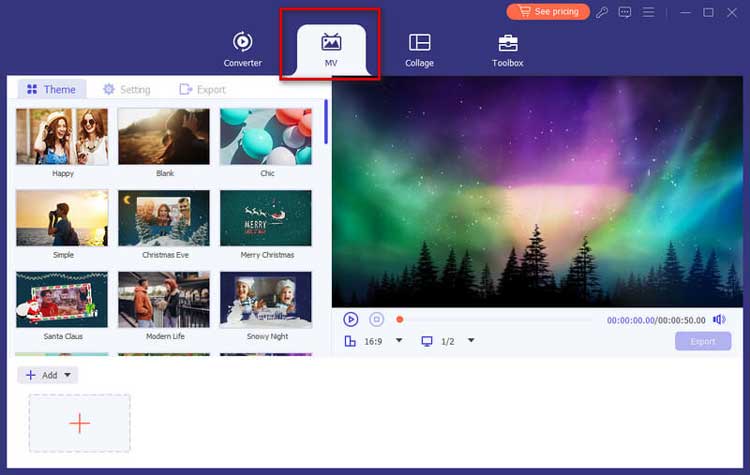
Step 1: Access MV Maker
Launch the program and select the MV tab to enter the MV creation interface.
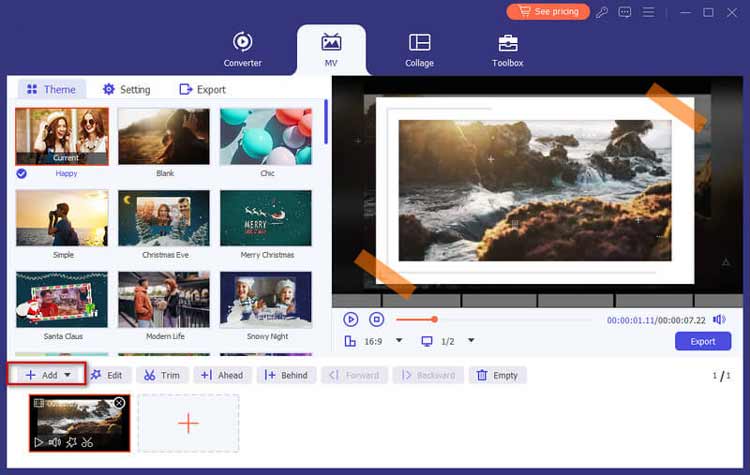
Step 2: Import Files
Click "Add" to import your video clips or images. You can rearrange them as needed in the preview player.
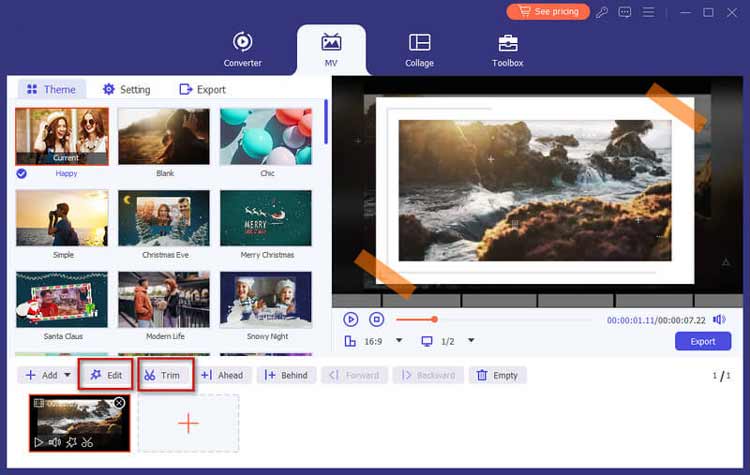
Step 3: Edit Your Videos
Edit or trim your videos before finalizing your MV by using the Edit or Trim buttons.
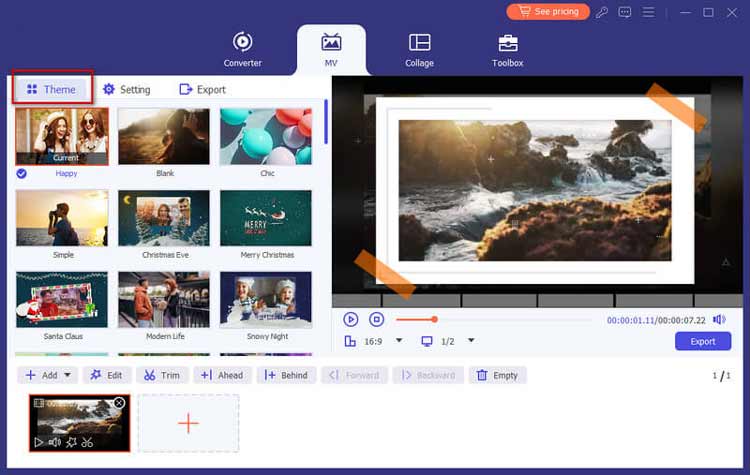
Step 4: Choose a Theme
Select a theme for your MV from the Theme tab to enhance its visual appeal.
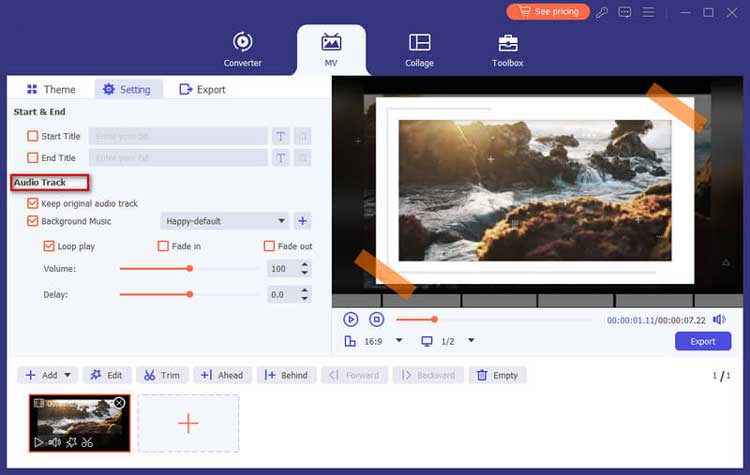
Step 5: Configure Title and Audio Settings
Add titles at the beginning or end, select background music, and enable looping if desired.
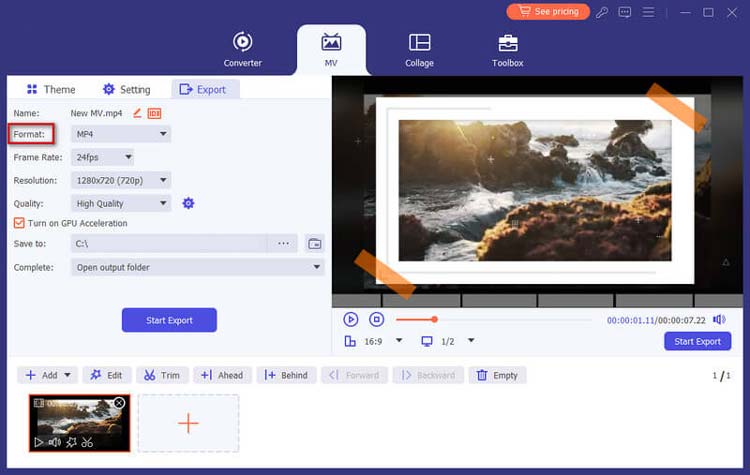
Step 6: Export Your MV
Choose your output format and set the export path. Click "Start Export" to create your MV.
Part 4. Edit Video/Audio with Multiple Effects
4.1 Rotate & Crop Video
Step 1: Access Edit Menu
Find the Rotate & Crop feature and adjust the video orientation as needed.
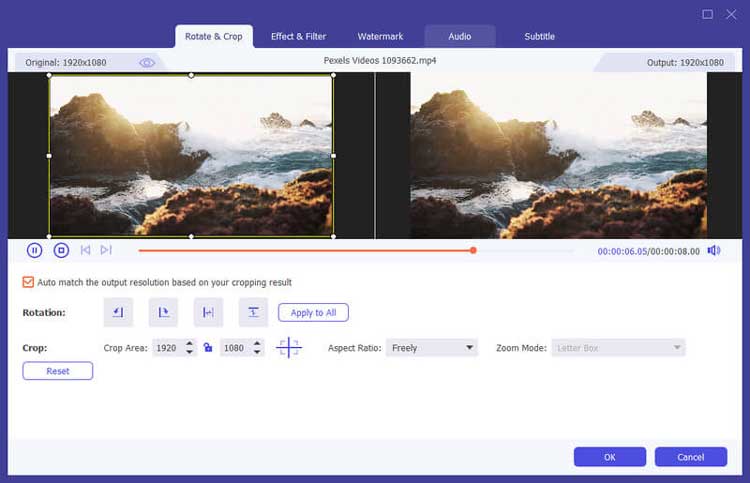
Step 2: Rotate the Video
Use the rotation buttons to adjust the video orientation. You can rotate the video 90 degrees clockwise or counterclockwise as needed.
Step 3: Crop the Video
Drag the cropping frame to select the area of the video you want to keep. You can also input specific dimensions for precise cropping.
Step 4: Preview and Save Changes
Click the "Preview" button to see the changes. If satisfied, click "OK" to apply the adjustments, and then proceed to export your edited video.
4.2 Trim & Split Video
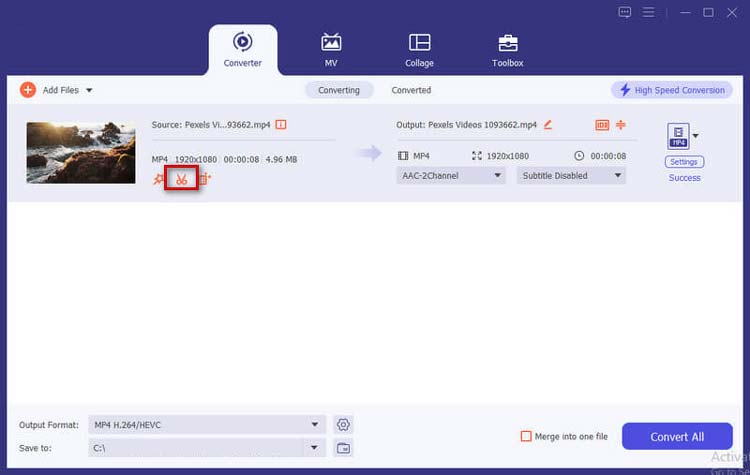
Step 1: Select Video File
Click the Cut button to choose the video you wish to trim.
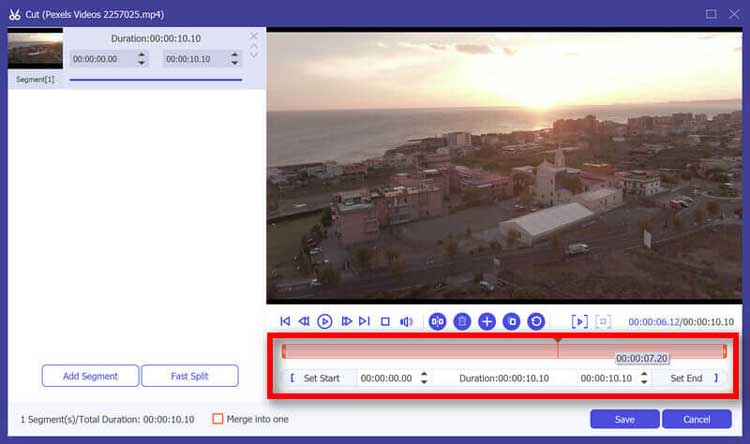
Step 2: Trim Unwanted Parts
Use the clipper on the progress bar to select the desired segment. You can click "Add Segment" to add multiple segments if needed.
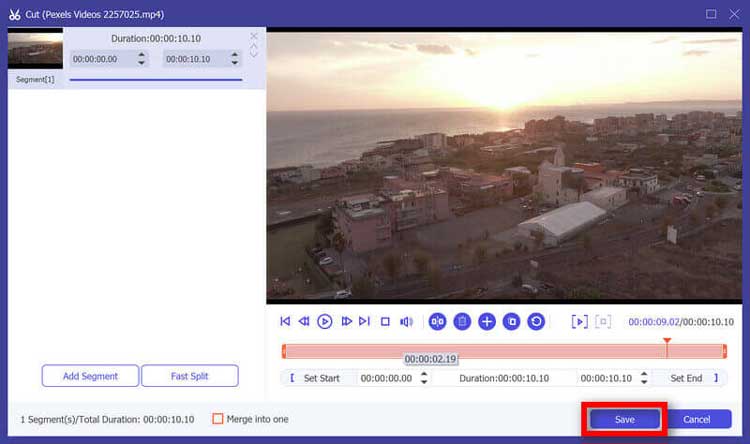
Step 3: Save Changes
Click Save to finalize your edits. If you want to merge clips, check "Merge into one".
4.3 Effect & Filter
Step 1: Access the Effects & Filters Menu
In the editing interface, navigate to the "Effects" tab where you will find various filters and effects.
Step 2: Choose Effects
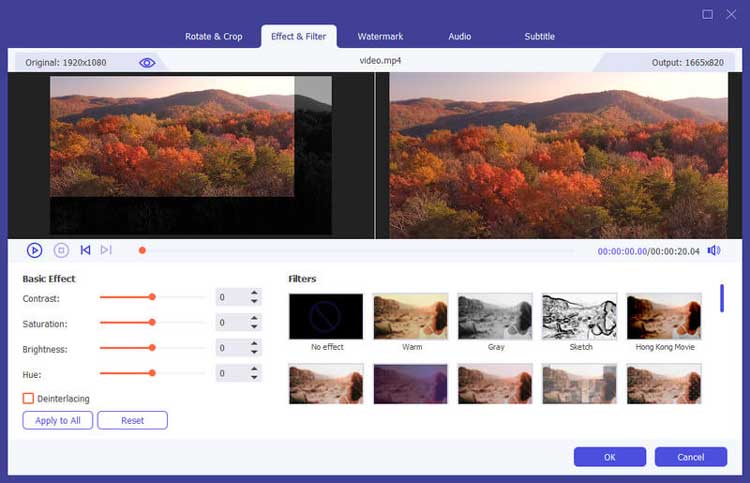
Select from a range of effects such as brightness adjustment, contrast enhancement, and color filters. You can apply multiple effects to achieve the desired look.
Step 3: Adjust Effect Parameters
Use sliders to fine-tune the intensity of each effect. You can preview the changes in real-time.
Step 4: Apply and Save Effects
Once you are satisfied with the effects, click "Apply" to save the changes. You can then export your video with the new effects applied.
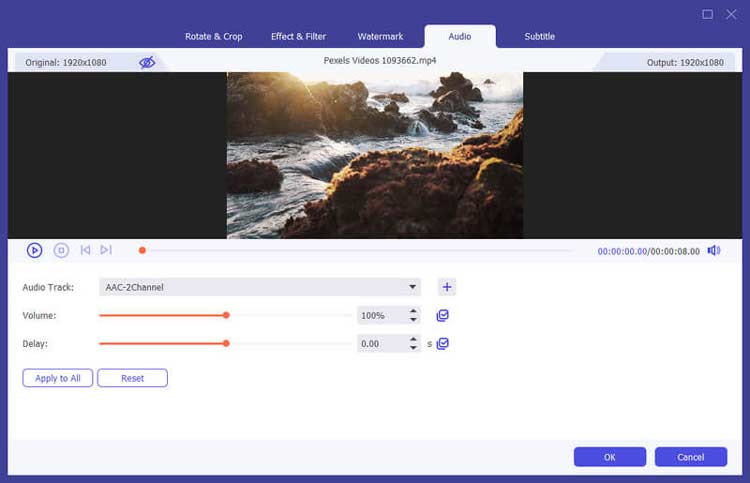
4.4 Audio Editing
Step 1: Access Audio Editing Tools
Open the "Audio" editing section from the main editing interface.
Step 2: Adjust Audio Levels
Use the audio sliders to adjust the volume levels of the video. You can increase or decrease the overall volume or adjust specific audio tracks if there are multiple.
Step 3: Save Audio Changes
Once you have made your adjustments, click "Save" to apply the changes to the audio track of your video.
4.5 Subtitle Editing
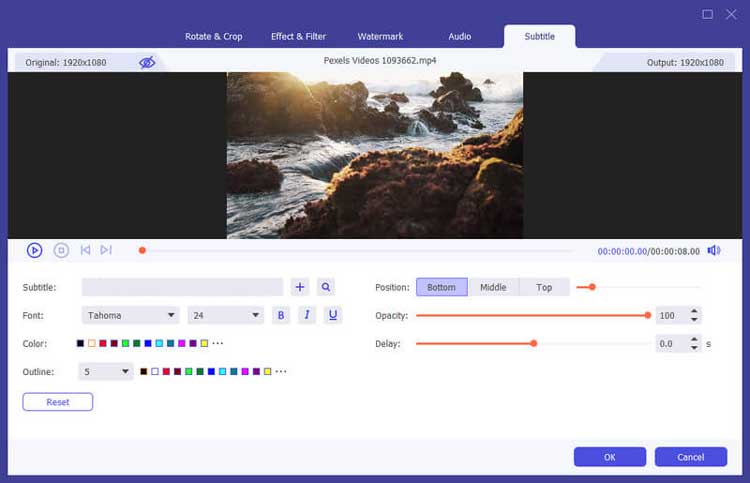
Step 1: Open Subtitle Editor
Navigate to the "Subtitle" section of the editing interface.
Step 2: Add or Import Subtitles
You can manually add subtitles by typing them in or import a subtitle file (e.g., SRT format).
Step 3: Adjust Subtitle Timing
Sync the subtitles with the video by adjusting the start and end times for each subtitle line. You can preview the video to ensure proper synchronization.
Step 4: Style Subtitles
Customize the font, size, color, and position of the subtitles to enhance visibility and aesthetics.
Step 5: Save Subtitles
Click "Save" to apply the subtitles to your video. When you export the video, the subtitles will be embedded or available as a separate file, based on your settings.
4.6 Add Watermark
Step 1: Open the Watermark Tool
Select the "Watermark" option from the editing menu to add a watermark to your video.
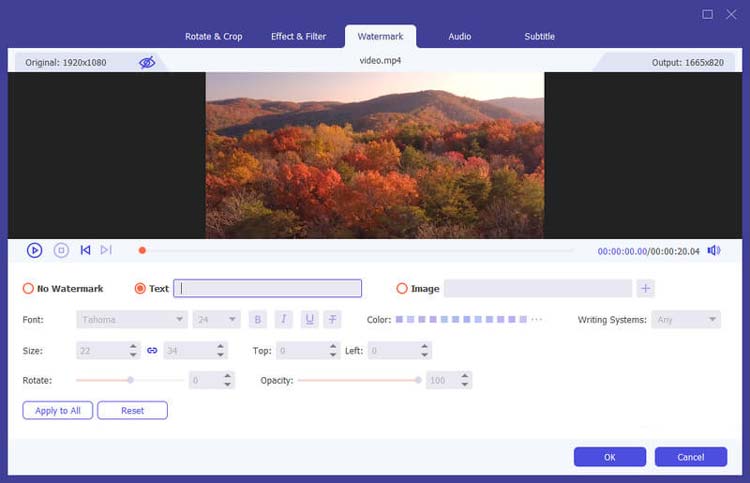
Step 2: Choose Watermark Type
You can add either a text or an image watermark. For text, type in your desired message and customize the font, size, and color.
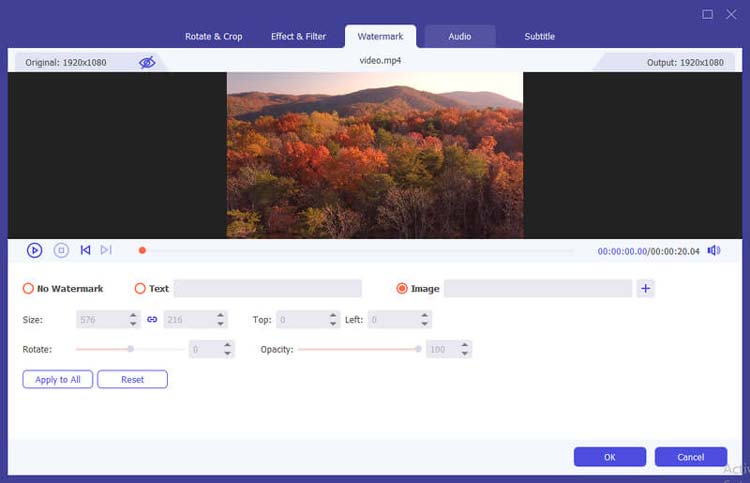
For images, upload the logo or graphic you wish to use.
Step 3: Position the Watermark
Drag the watermark to position it on the video. You can adjust its transparency and size to ensure it doesn't distract from the content.
Step 4: Save Watermarked Video
Click "OK" to apply the watermark. When you're ready, export the video to save your changes.
Part 5. More Tools for Video Conversion and Editing
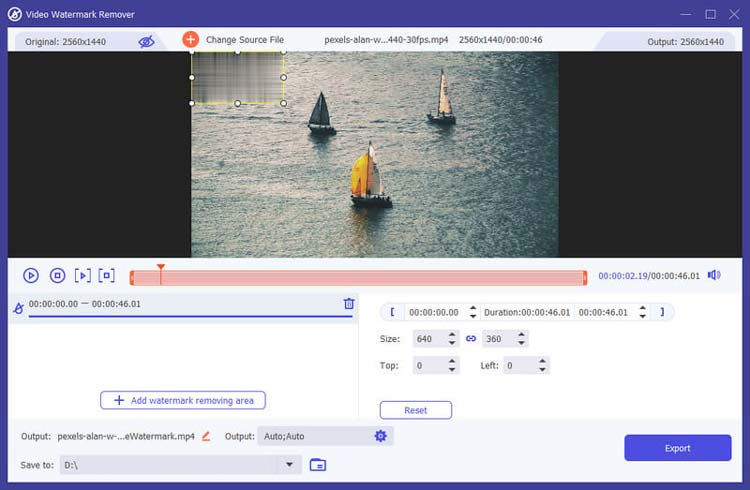
5.1 Video Watermark Remover
Step 1: Open Watermark Remover
Select Video Watermark Remover from the Toolbox.
Step 2: Add Video
Import the video containing the watermark.
Step 3: Define Removal Area
Click to add a watermark removal area and adjust its size and position.
Step 4: Preview and Export
Preview the result and click Export to save the video without the watermark.
5.2 Video Compressor
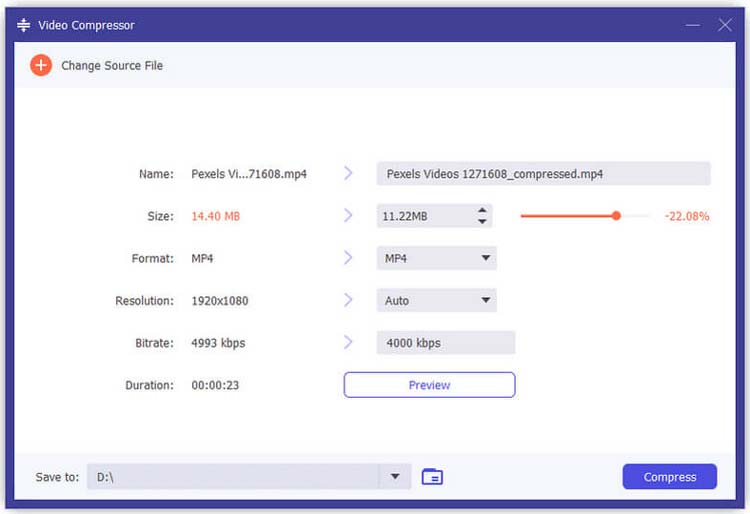
Step 1: Open Video Compressor
Access the Toolbox and select Video Compressor.
Step 2: Add Video
Import the video file you wish to compress.
Step 3: Adjust Settings
Modify size, format, resolution, and bitrate as needed.
Step 4: Set Save Path
Choose a destination for the compressed file and click the Compress button.
5.3 Video Enhancer
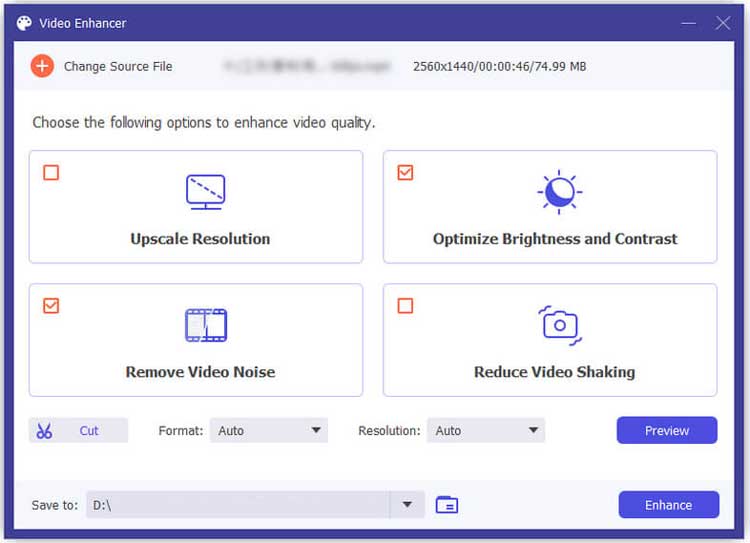
Step 1: Open Video Enhancer
Select Video Enhancer from the Toolbox.
Step 2: Add Video
Import the video you want to enhance.
Step 3: Choose Enhancement Options
Select options like Upscale Resolution, Optimize Brightness, Remove Noise, or Reduce Shaking.
Step 4: Enhance Video
Click Enhance to apply the selected improvements.
5.4 Video Merger
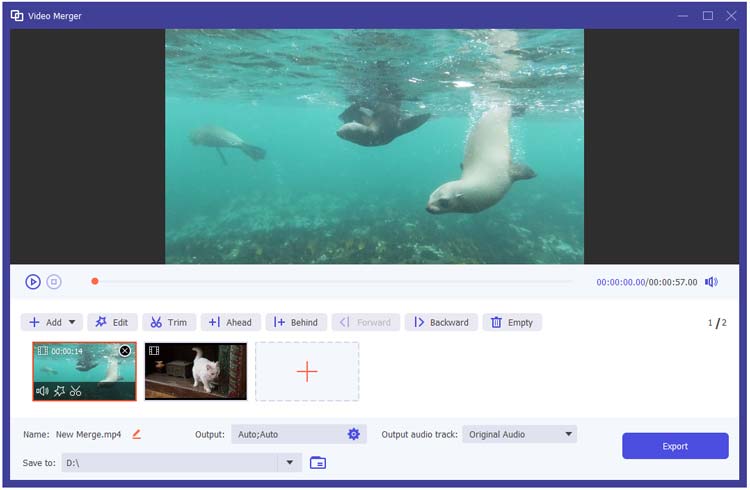
Step 1: Open Video Merger
Select Video Merger from the Toolbox.
Step 2: Add Videos
Import the videos you wish to merge.
Step 3: Adjust Order
Rearrange the clips as needed and edit individual segments if necessary.
Step 4: Export Merged Video
Click Export to save the combined video.
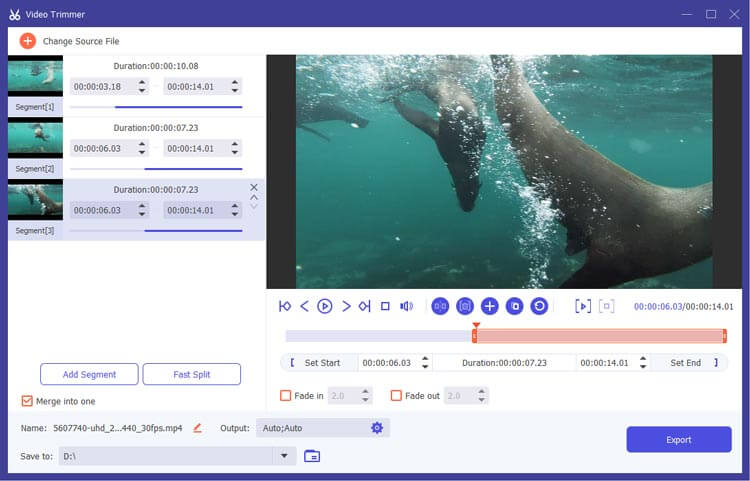
5.5 Video Trimmer
Step 1: Open Video Trimmer
Select Video Trimmer from the Toolbox.
Step 2: Add Video
Import the video file you want to trim.
Step 3: Trim Video
Use the clipper to select the segment you wish to keep and add more segments if needed.
Step 4: Export Trimmed Video
Click Export to save the trimmed version.
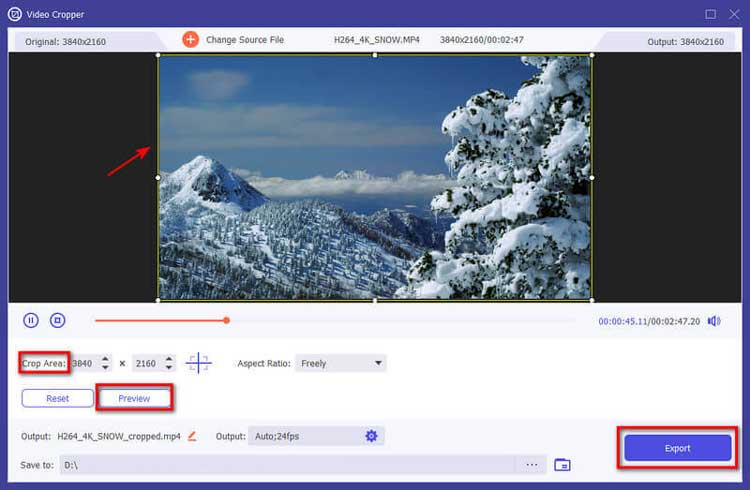
5.6 Video Cropper
Step 1: Open Video Cropper
Select Video Cropper from the Toolbox.
Step 2: Add Video
Import the video you want to crop.
Step 3: Crop the Video
Drag the cropping frame to select the desired area or adjust the Crop Area values.
Step 4: Preview and Export
Click Preview to check the output and Export to save the cropped video.
5.7 GIF Maker
Step 1: Open GIF Maker
Select GIF Maker from the Toolbox.
Step 2: Add Video
Import the video you want to convert into a GIF.
Step 3: Edit GIF Settings
Use the editing features to trim and set the output size and frame rate.
Step 4: Generate GIF
Click Generate GIF to create your animated image.

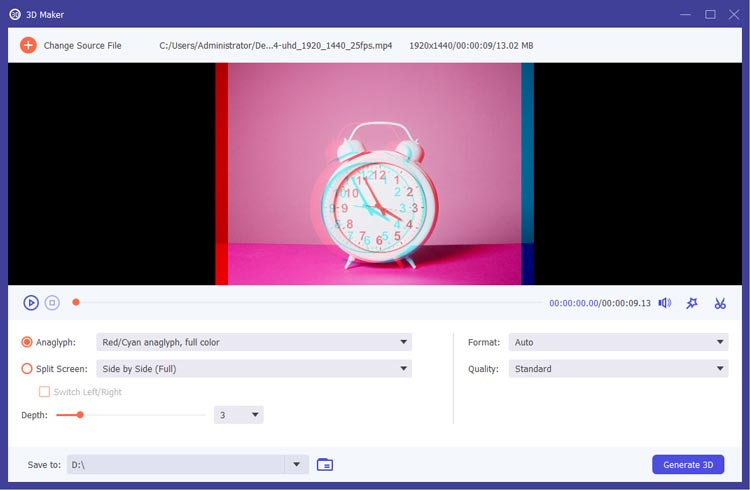
5.8 3D Video Maker
Step 1: Open 3D Maker
Select 3D Maker from the Toolbox.
Step 2: Add Video
Import the video you wish to convert to 3D.
Step 3: Choose 3D Options
Select an anaglyph or split-screen option and adjust depth settings.
Step 4: Generate 3D Video
Click Generate 3D to produce your 3D video.
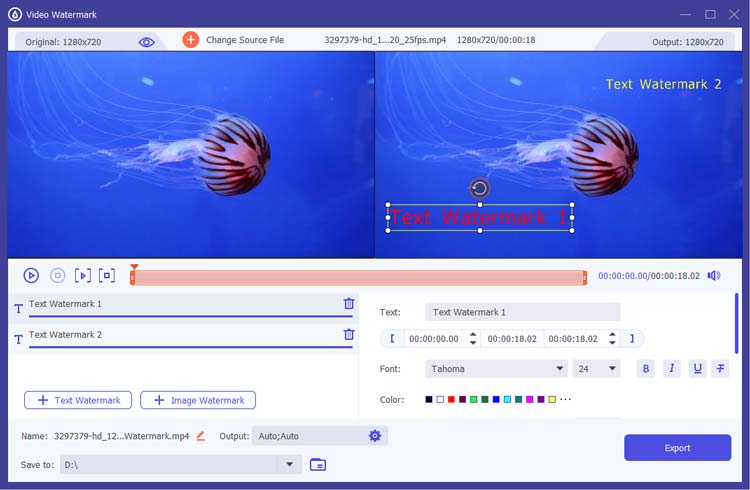
5.9 Add Video Watermark
Step 1: Open Video Watermark
Select Video Watermark from the Toolbox.
Step 2: Add Video
Import the video to which you want to add a watermark.
Step 3: Choose Watermark Type
Decide between adding a text or image watermark and customize its position and appearance.
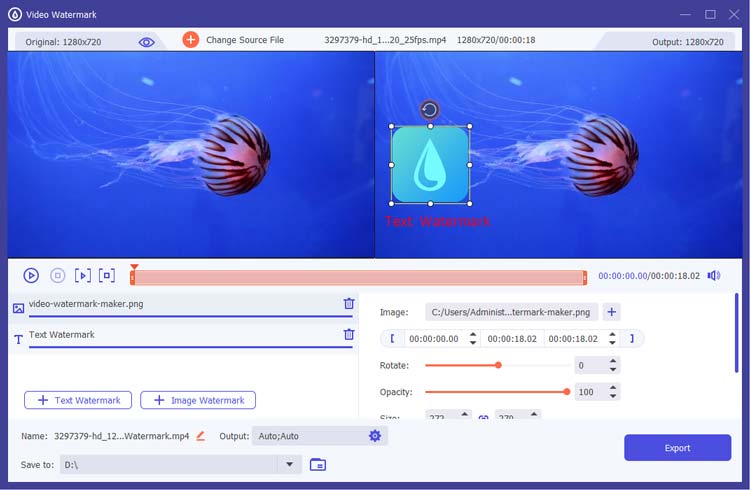
Step 4: Export Video
Click Export to save the video with the watermark applied.
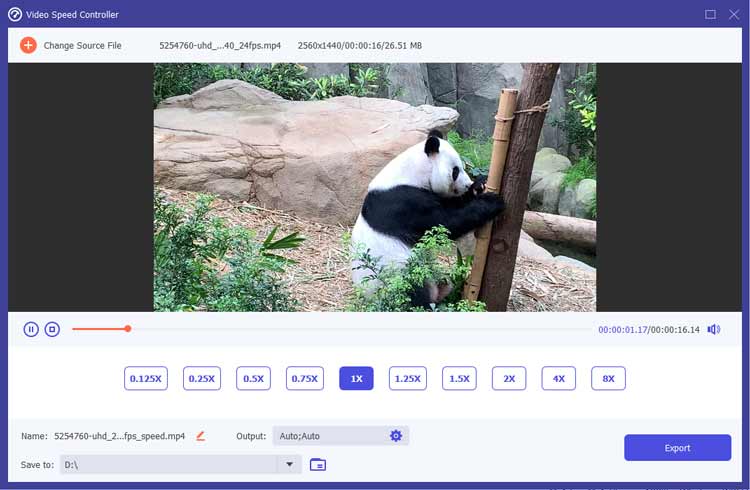
5.10 Video Speed Controller
Step 1: Open Speed Controller
Select Video Speed Controller from the Toolbox.
Step 2: Add Video
Import the video file whose speed you want to adjust.
Step 3: Adjust Playback Speed
Choose the desired playback speed and preview the changes.
Step 4: Export Video
Click Export to save the video with the new speed settings.
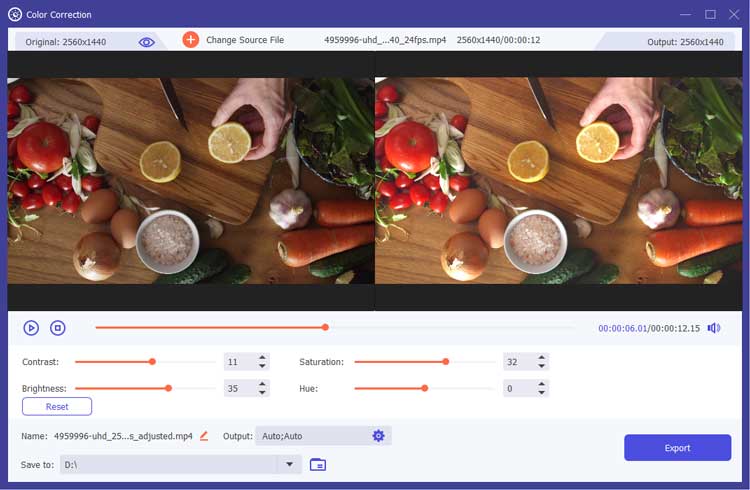
5.11 Video Color Correction
Step 1: Open Color Correction
Select Color Correction from the Toolbox.
Step 2: Add Video
Import the video you want to adjust.
Step 3: Adjust Color Settings
Modify contrast, saturation, brightness, and hue as needed.
Step 4: Export Corrected Video
Click Export to save the adjusted video.
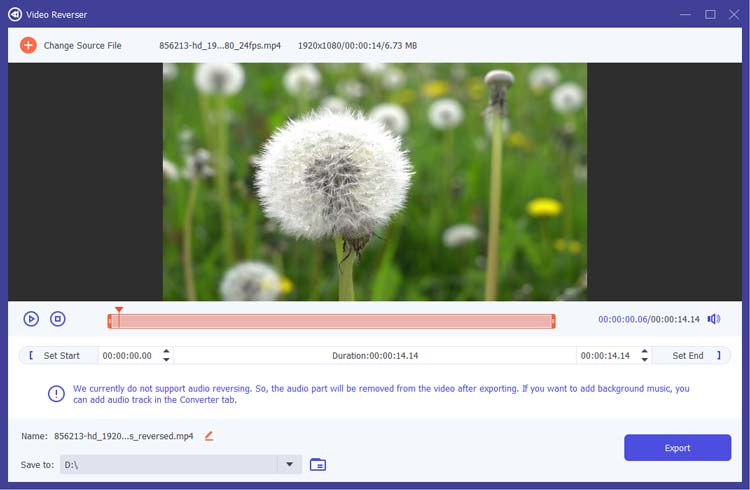
5.12 Video Reverser
Step 1: Open Video Reverser
Select Video Reverser from the Toolbox.
Step 2: Add Video
Import the video you want to reverse.
Step 3: Select Clip
Choose the segment to reverse using the progress bar.
Step 4: Export Reversed Video
Click Export to save the reversed video.
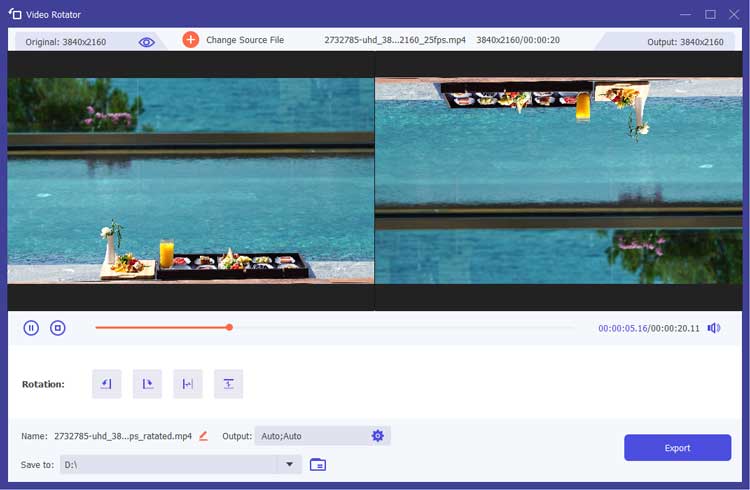
5.13 Video Rotator
Step 1: Open Video Rotator
Select Video Rotator from the Toolbox.
Step 2: Add Video
Import the video you want to rotate.
Step 3: Choose Rotation Angle
Select the desired rotation direction and angle.
Step 4: Export Rotated Video
Click Export to save the rotated video.
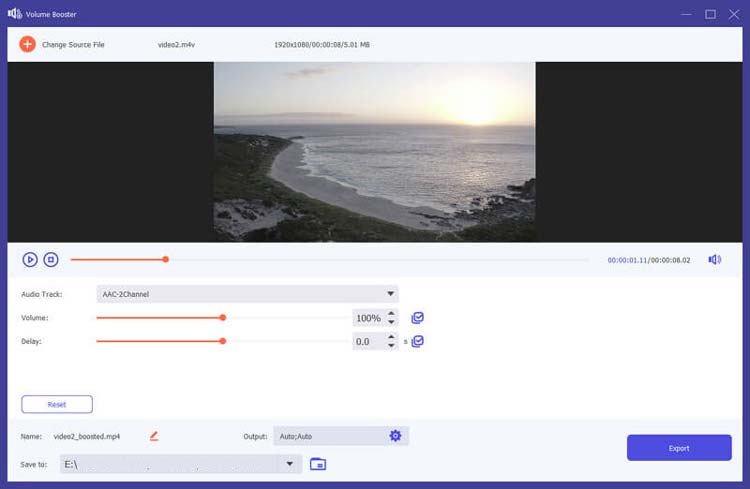
5.14 Volume Booster
Step 1: Open Volume Booster
Select Volume Booster from the Toolbox.
Step 2: Add Video
Import the video you want to adjust the volume for.
Step 3: Adjust Volume Level
Use the slider to increase or decrease the volume as needed.
Step 4: Export Adjusted Video
Click Export to save the video with the new volume level.
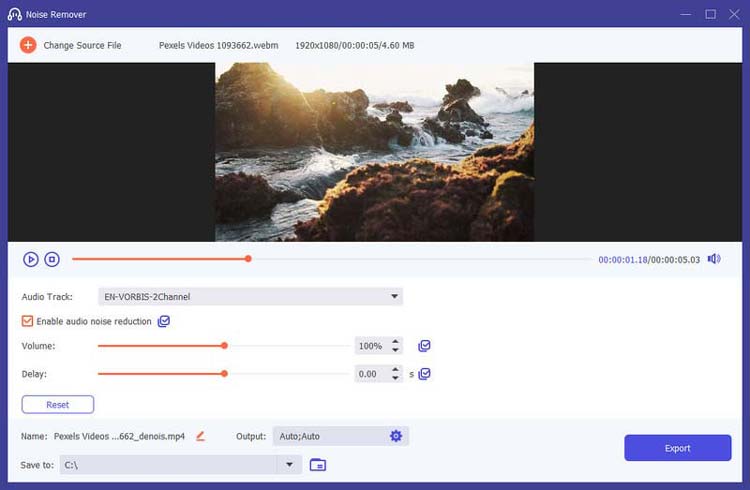
5.15 Noise Remover
Step 1: Open Noise Remover
Select Noise Remover from the Toolbox.
Step 2: Add Video
Import the video that contains unwanted noise.
Step 3: Enable Noise Reduction
Check the box to enable audio noise reduction.
Step 4: Export Cleaned Video
Click Export to save the video with reduced noise.
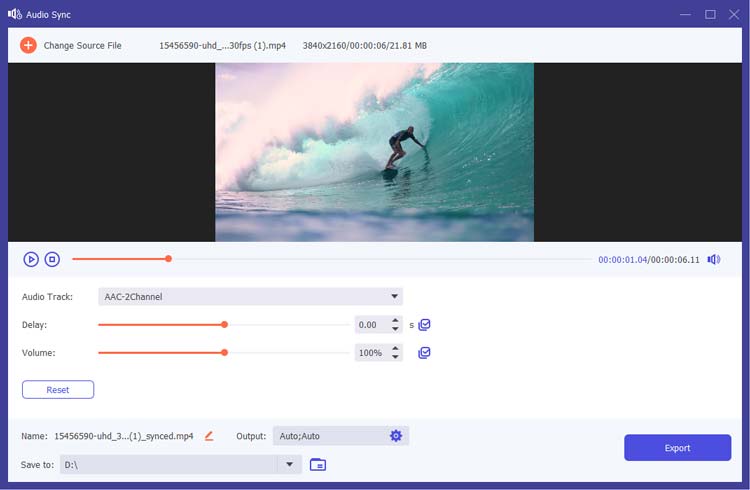
5.16 Audio Sync
Step 1: Open Audio Sync
Select Audio Sync from the Toolbox.
Step 2: Add Video
Import the video file that requires audio synchronization.
Step 3: Adjust Audio Track
Use the slider to align the audio track with the video.
Step 4: Export Synced Video
Click Export to save the synchronized video.
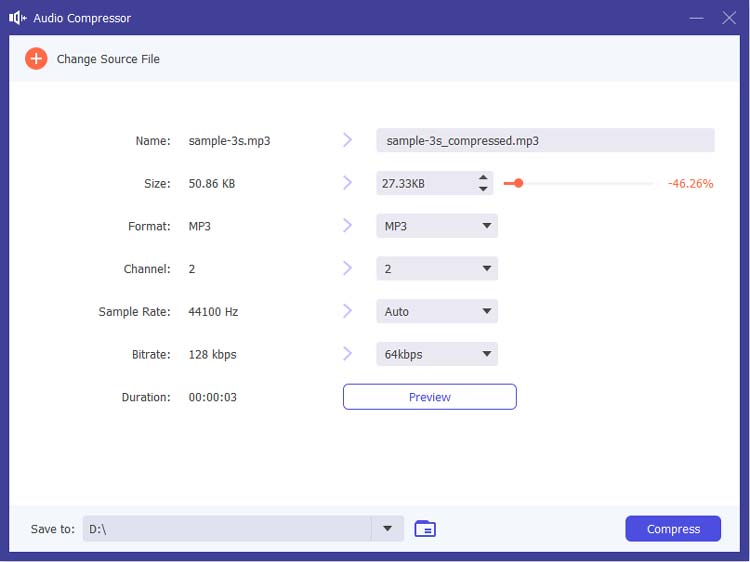
5.17 Audio Compressor
Step 1: Open Audio Compressor
Select Audio Compressor from the Toolbox.
Step 2: Add Audio File
Import the audio file you wish to compress.
Step 3: Adjust Compression Settings
Modify file name, format, channel, sample rate, and bitrate as needed.
Step 4: Compress Audio
Click the Compress button to start the compression process.
5.18 Image Converter
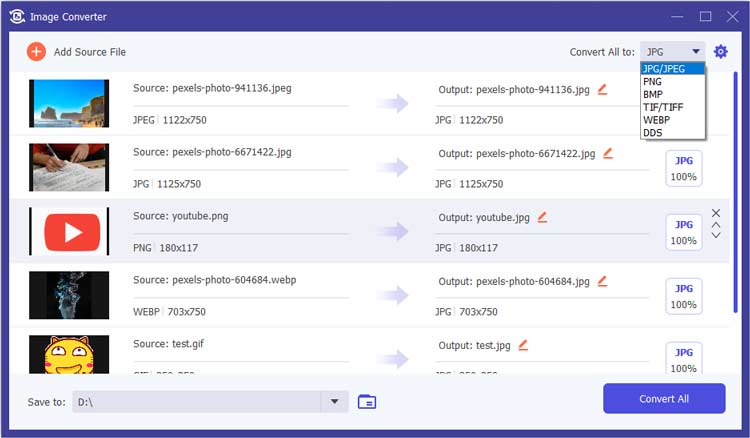
Step 1: Open Image Converter
Select Image Converter from the Toolbox.
Step 2: Add Images
Import multiple images to convert.
Step 3: Set Output Format
Choose the desired output format for the images or set a fixed format for all.
Step 4: Export Images
Click Export to save the converted images.
5.19 File Date Changer
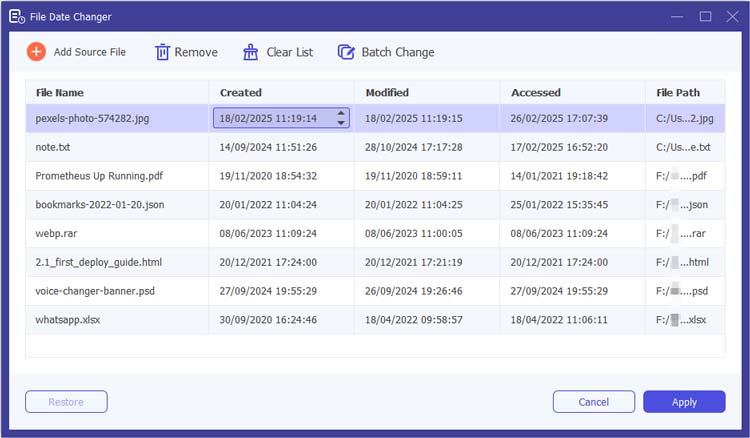
Step 1: Open File Date Changer
Select File Date Changer from the Toolbox.
Step 2: Add Files
Import the files for which you want to change the date.
Step 3: Adjust Dates
Modify created, modified, and accessed dates as needed.
Step 4: Apply Changes
Click Apply to save the changes.
5.20 Video Player
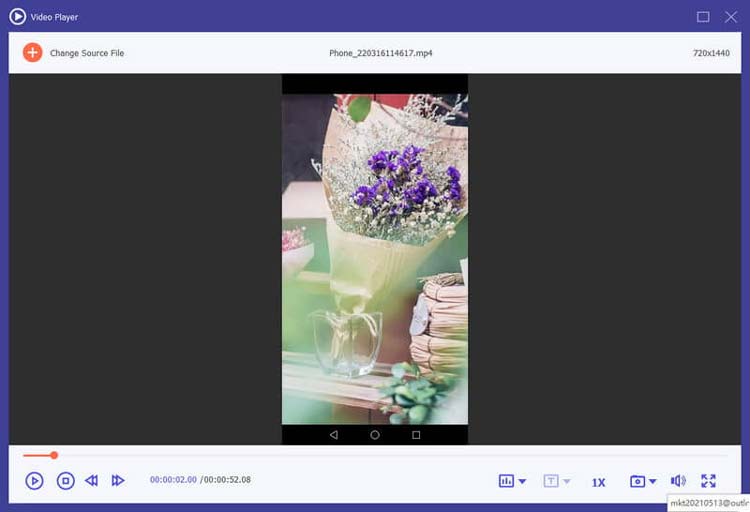
Step 1: Open Video Player
Select Video Player from the Toolbox.
Step 2: Add Video File
Import the video file you want to play by clicking the "Add" button or dragging the file into the player.
Step 3: Control Playback
Use the playback controls to play, pause, stop, rewind, or fast forward through the video. You can also adjust the volume and toggle full-screen mode for a better viewing experience.
Step 4: Take Snapshots
If you want to capture a still image from the video, use the snapshot feature available in the player interface.
Step 5: Close the Player
Once you finish watching, simply close the Video Player window to return to the main interface of Video Converter.
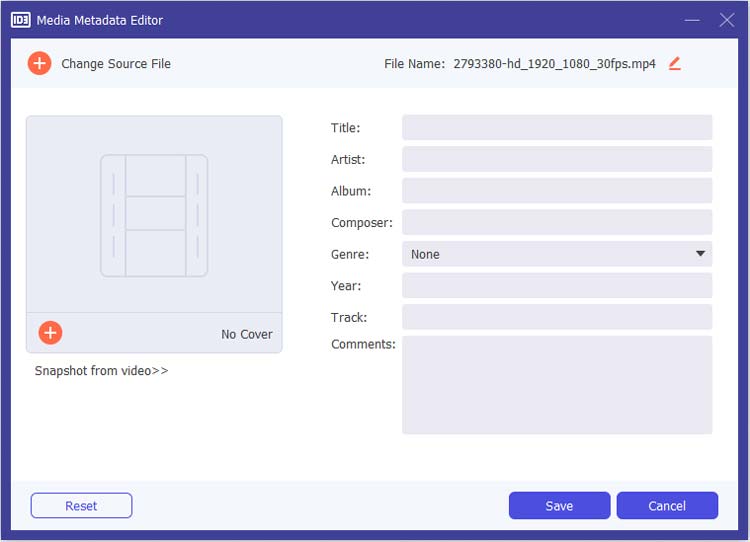
5.21 Media Metadata Editor
Step 1: Open Media Metadata Editor
Select the Toolbox option and find the Media Metadata Editor.
Step 2: Add a File
Import a supported file format, such as MP4 or MP3.
Step 3: Edit Metadata
Modify details like cover art, file name, artist, album, genre, and year.
Step 4: Save Changes
Click the Save button to apply your edits.
Conclusion
Video Converter is your all-in-one solution for transforming and editing videos effortlessly, which offers a robust set of tools for anyone looking to convert video files, create engaging content, and edit with precision. Let's dive into the world of video editing and conversion today.


