Welcome to the comprehensive user guide for the Photo Enhancer by iReaShare. Learn how to enhance your images and preview the effects for an engaging experience with our AI-powered image enhancer.
Part 1: Download and Install
Visit the official Photo Enhancer webpage to obtain the official installation package. If you're new to using the Photo Enhancer, please follow the setup instructions carefully.
Part 2: Batch Enhance Your Images
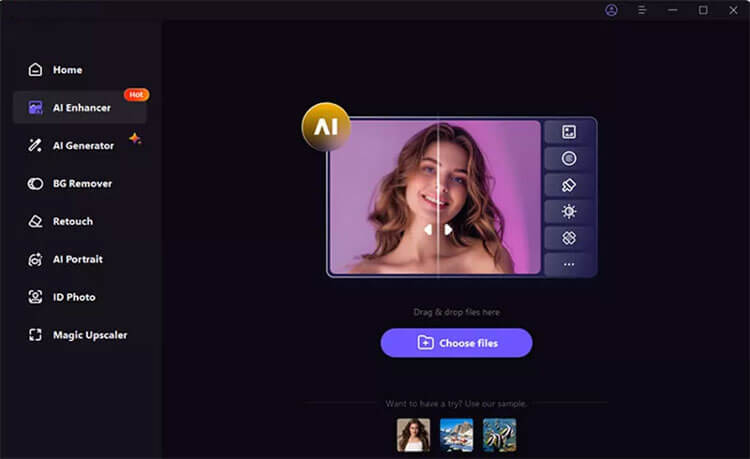
Step 1: Upload One or Multiple Original Photos
After installing the software, import the photo(s) you wish to enhance. You can either click the "Choose file" button or simply drag and drop your image into the application. The Photo Enhancer supports common formats such as PNG, JPEG, JPG, WEBP, and TIFF.
Note: Click on the sample images provided by Photo Enhancer to see the enhancement effects in action.
Step 2: Choose an AI Model
Once your photo is uploaded, choose an AI model and click the Preview button to begin processing. This may take a few seconds.
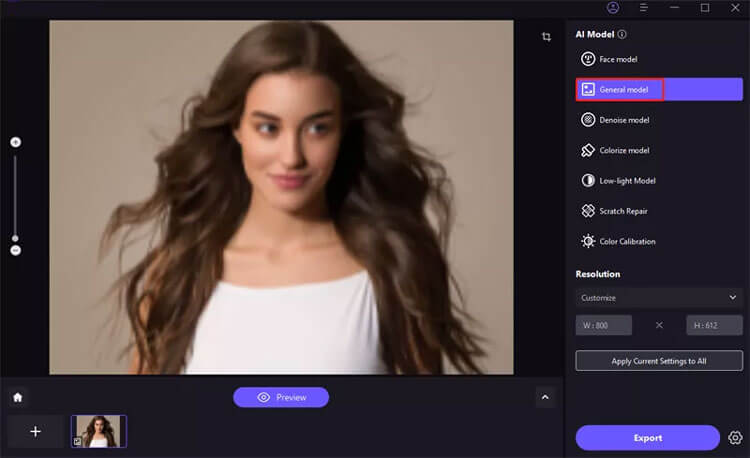
7 Available AI Models:
- Face Model: Perfect for reducing blur in portraits and restoring old photos.
- General Model: Ideal for enhancing real-life scenes like landscapes, buildings, and wildlife.
- Denoise Model: Effective for high-ISO or low-light images, as well as cartoon enhancements.
- Colorize Model: Revives black and white photos, adding vibrant colors.
- Color Calibration: Best for correcting underexposed or low-saturation images.
- Scratch Repair: Fixes damaged old photos, making them smooth and seamless.
- Low-light Model: Enhances images taken in dim lighting.
Note: For optimal results for batch image enhancement, we recommend processing images of the same type together.
Step 3: Preview and Export
After previewing the effect, click the Export button to save your enhanced image once you're satisfied with the results.
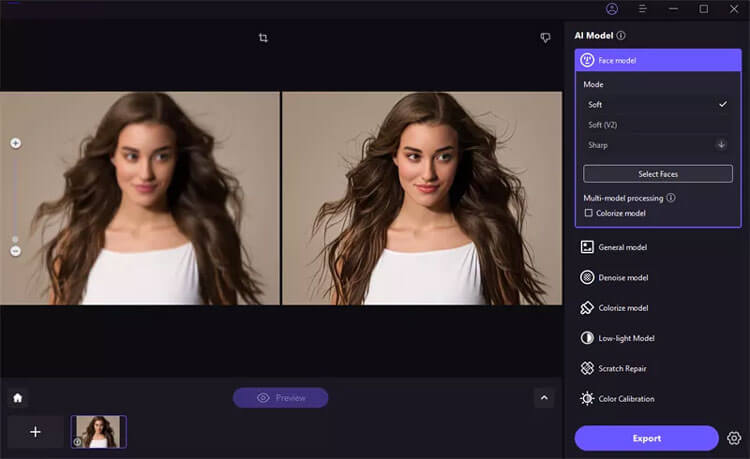
Note: If using the free version, exporting enhanced photos is not available. Please check the Buy Now button to purchase the full version for saving and utilizing your enhanced images.
Part 3: Multi-Model Processing
Step 1: Upload Your Image and Select the First Model
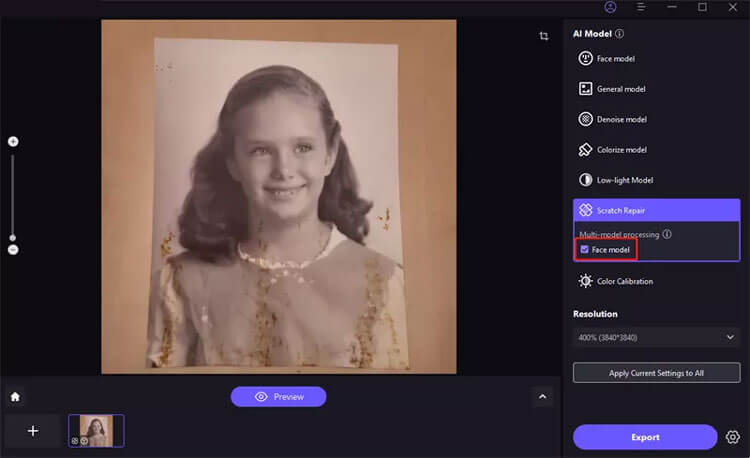
After uploading your image, select the face model. For this example, we'll use Scratch Repair, but feel free to choose any model initially.
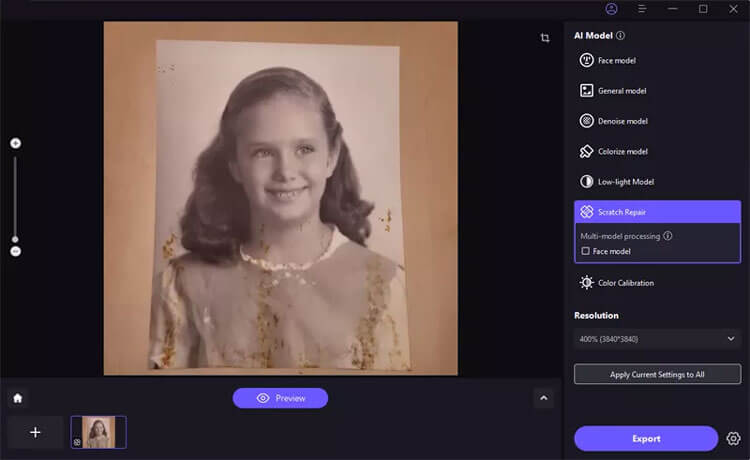
Step 2: Choose the Second Model
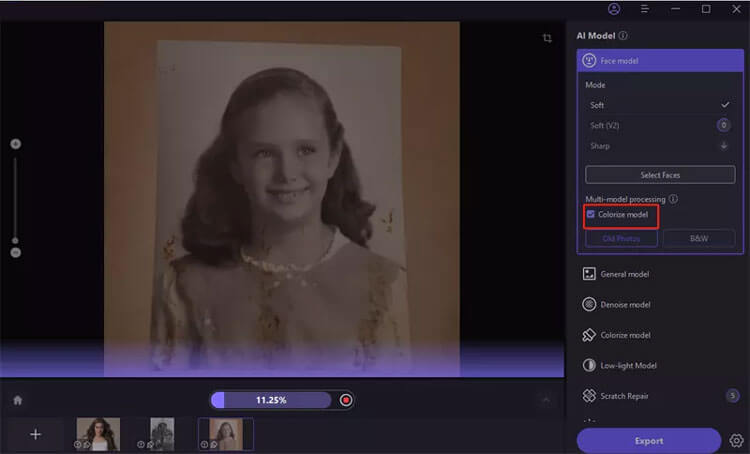
Select the second model, and the image will be processed using both Scratch Repair and Face Model, effectively enhancing old portraits. Choose based on your image type.
Step 3: Preview and Export
Click Preview to view the enhanced effect, and export if you are satisfied.
Note: If using the free version, exporting enhanced images is restricted. Check the Buy Now button for the full version to save and utilize your processed images.
Part 4: Customize Your Photo Size
Step 1: Upload Your Image
Import the image you want to resize into the software.
Step 2: Access Customization Options
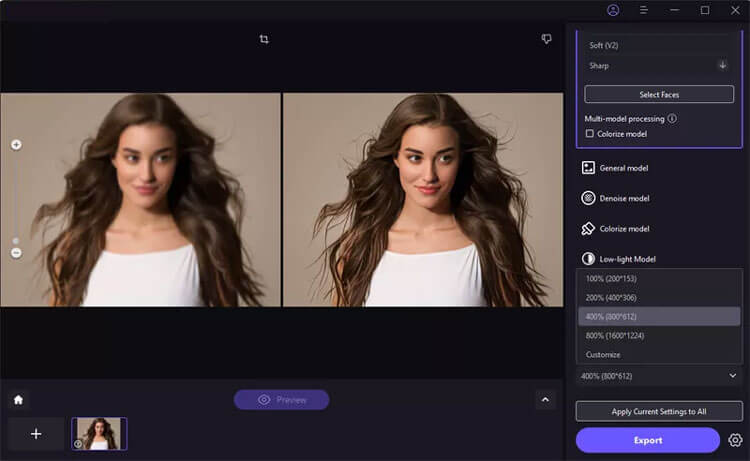
Click the resolution drop-down menu to find customization options.
Step 3: Set Desired Width/Height
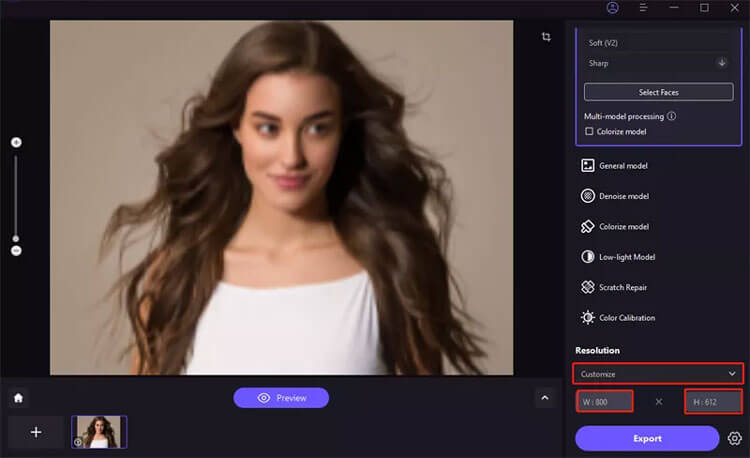
You can freely adjust the width or height, with the other dimension automatically adjusting to maintain the original aspect ratio.
Step 4: Preview and Export
Click Preview to see the adjustments and export if you are satisfied.
Note: If using the free version, exporting enhanced images is not permitted. Check the Buy Now button to purchase the full version for saving and utilizing your enhanced images.
Conclusion
This concludes our guide on using the Photo Enhancer. We welcome your comments and questions below, and we will respond within one business day.


