When losing important documents, images, videos, audio files, emails, etc., from a PC, you can utilize PC Data Recovery to recover your files. This software can scan your local disks and drives, external hard drives, and memory cards, and repair damaged images with AI. Follow this guide to use PC Data Recovery step by step.
Part 1: How to Recover Files from PC Lock Disks
Step 1: Please download the PC Data Recovery software on your Windows computer.
Step 2: Install and open the software on your PC.
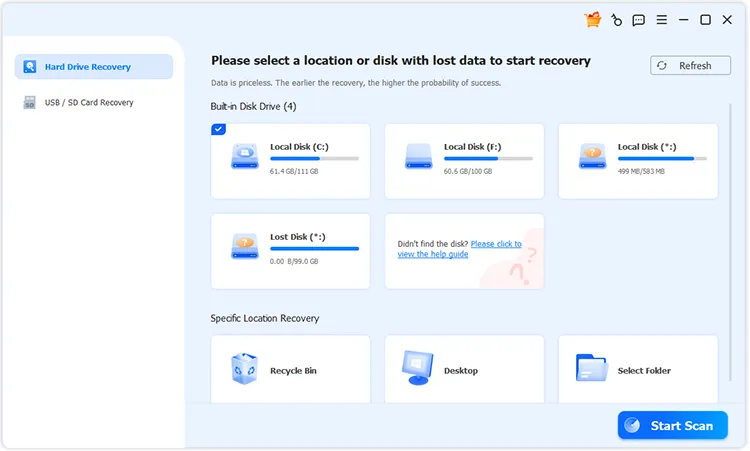
Step 3: Tap "Hard Drive Recovery" and choose a local disk. Then click "Start Scan". The software will start to scan the selected disk and retrieve your lost data.
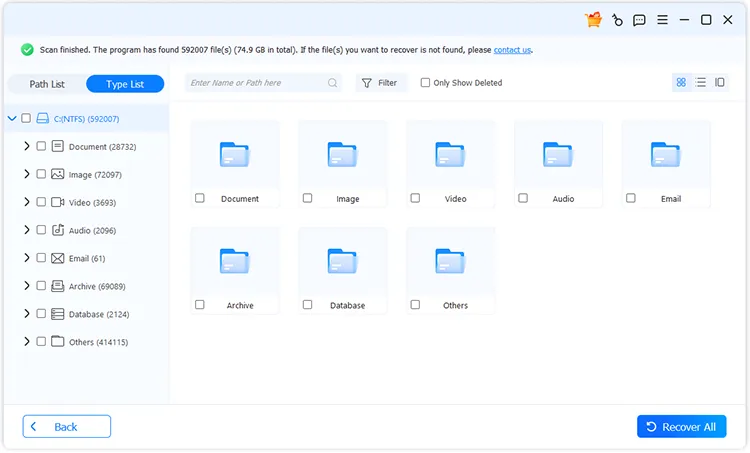
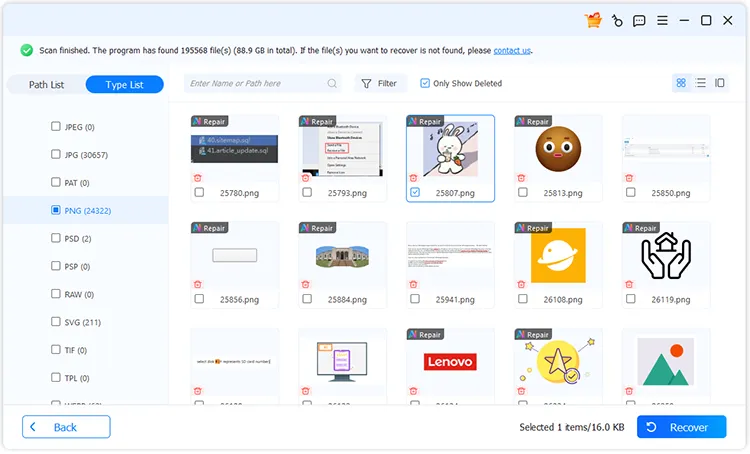
Step 4: After scanning, you can preview your deleted and existing files on the interface. You can turn on "Only Show Deleted" to view deleted files only. Then opt for your target files, and click "Recover All".
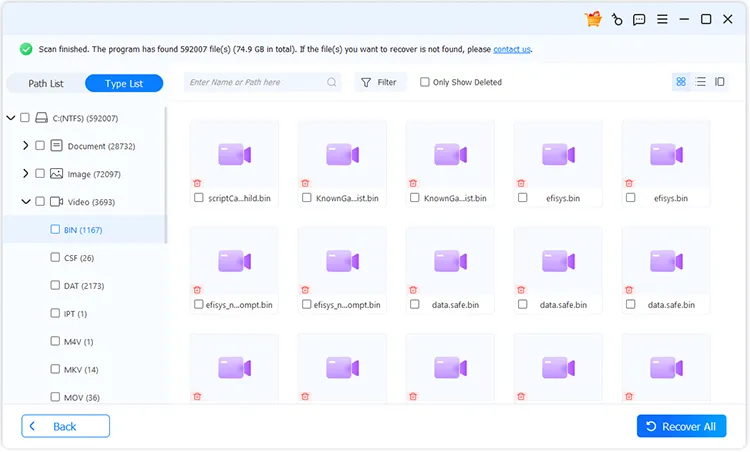
Note: You can click "Filter" to locate the files you want swiftly.
Part 2: How to Recover Files from External USB Drives and SD Cards
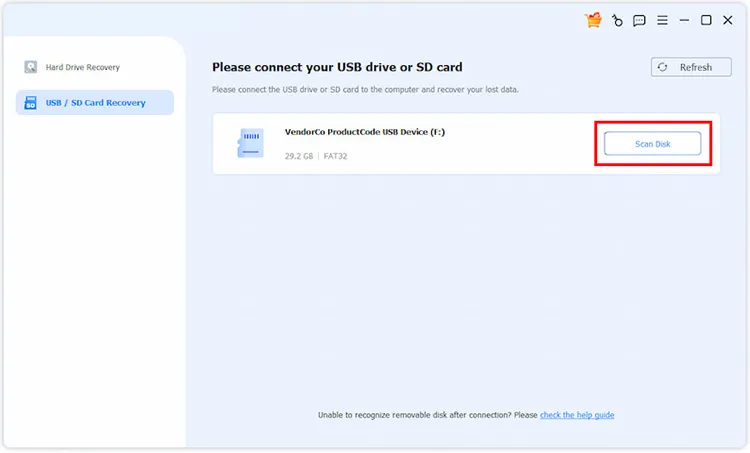
Step 1: To recover files from an external USB drive or SD card, you need to insert the external storage device into your PC. Then open PC Data Recovery and choose "USB/SD Card Recovery".
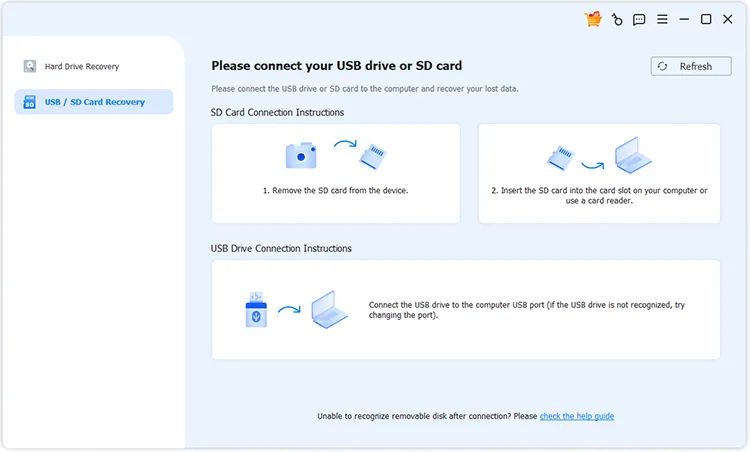
Step 2: Tap "Refresh" and click "Scan Disk" next to your connected USB drive or SD card.
Step 3: Select the desired files after scanning. and click "Recover" to restore them to your PC.
Part 3: How to Repair Damaged Photos with AI
Step 1: You can repair your damaged pictures with AI. Please launch the recovery software, and choose a disk to scan. Then choose the "Image" category.
Step 2: Tap one image format, like "PNG". Then you can view the specific photos on the PC.
Step 3: Double-click the "AI Repair" icon on the top of a target photo. Then click "AI Repair" again. The program will start to repair the photo, making it clearer.
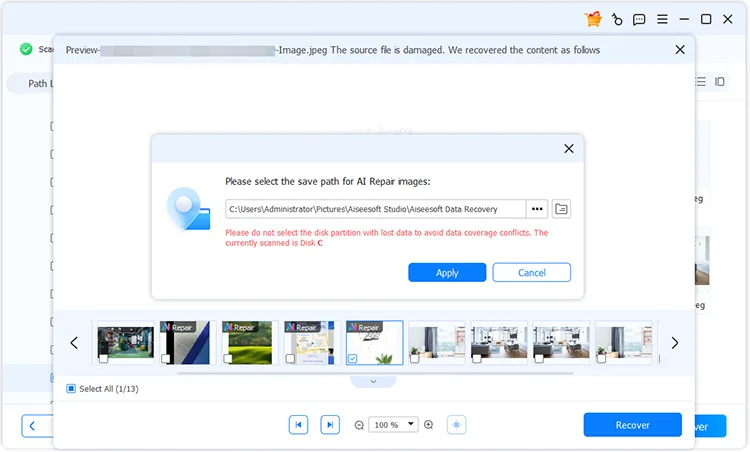
Step 4: Select a folder to save the repaired photo, and click "Apply".
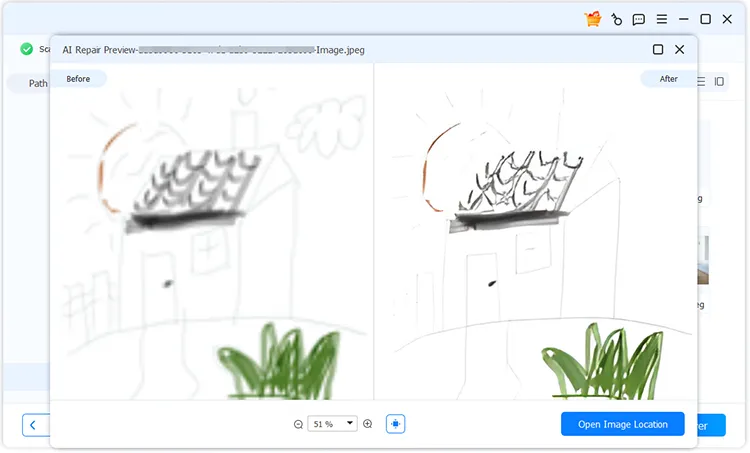
Step 5: After that, you will see the photos before and after repairing. Click "Open Image Location" to access the photo directly.
Note: At present, the AI repairing feature supports JPG, JPEG, and PNG formats only.
Conclusion
It's easy to recover files from PCs, external USB drives, and SD cards with PC Data Recovery after reading through this guide. Also, you can quickly repair your photos with AI.


