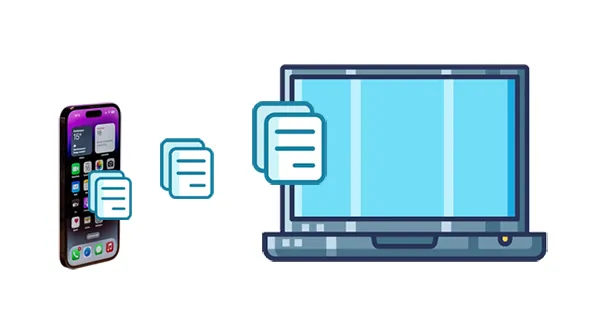
Want to transfer files from an iPhone to a PC? Actually, this is a common task, whether you're backing up precious photos, moving important documents, sharing media, etc. While Apple's ecosystem doesn't offer seamless integration between iOS and Windows devices, you can use other reliable methods to bridge the gap. This article will guide you through six effective ways to transfer files from your iPhone to your PC, catering to different needs and preferences.
- Part 1: Transfer Files from iPhone to PC via iReaShare iPhone Manager
- Part 2: Move Files from iPhone to PC via iTunes
- Part 3: Send Files from iPhone to PC Using iCloud
- Part 4: Share Files from iPhone to PC via Google Drive
- Part 5: Send Files from iPhone to Computer via Email
- Part 6: Get Files from iPhone to Computer via USB Manually
- Part 7: FAQs About iPhone to PC Transfer
Part 1: Transfer Files from iPhone to PC via iReaShare iPhone Manager
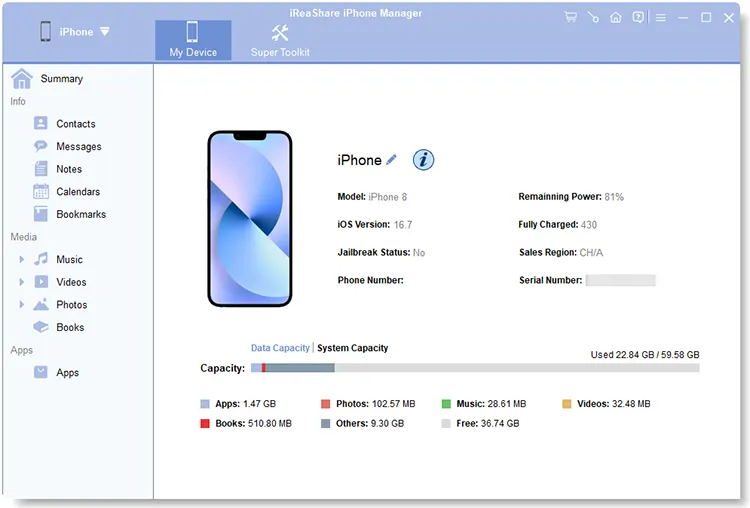
One of the easiest and most efficient ways to transfer files from your iPhone to your PC is by using the professional software like iReaShare iPhone Manager. This tool allows you to transfer photos, videos, music, contacts, text messages, documents, and more from your iPhone to your computer seamlessly.
Main features of iReaShare iPhone Manager:
* Easily transfer various files from an iOS device to a computer.
* Display your iPhone data on the interface, so you can preview and select files directly.
* Enable you to manage iPhone data on a computer, such as adding new contacts/bookmarks, uninstalling apps, etc.
* Import contacts, notes, bookmarks, etc., from a computer to an iOS device.
* Back up iPhone data in 1 click to the default iTunes backup location or other folders on your PC.
* Support iOS 5.0 and upper, including iOS 18.
Download the iPhone data management software.
Download for Win Download for Mac
Here's how to copy files from an iPhone to a PC:
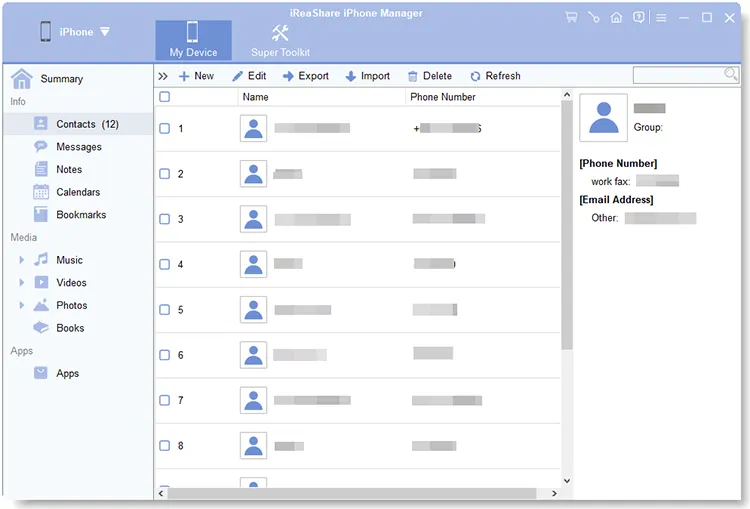
Step 1: Download and install iReaShare iPhone Manager on your PC, and connect your iPhone to the PC using a USB cable.
Step 2: Launch iReaShare, and it will automatically detect your device. Click "Trust" when popping up on your iPhone.
Step 3: Select a category on the left side, and view your iPhone files on the screen. Then select the files you want to transfer, and click "Export" to copy them to your computer.
Part 2: Move Files from iPhone to PC via iTunes
iTunes, while primarily known for managing media, also offers file sharing capabilities for specific apps. This method is particularly useful for transferring documents created within certain iOS applications.
Here's how to transfer data from an iPhone to a laptop via iTunes:
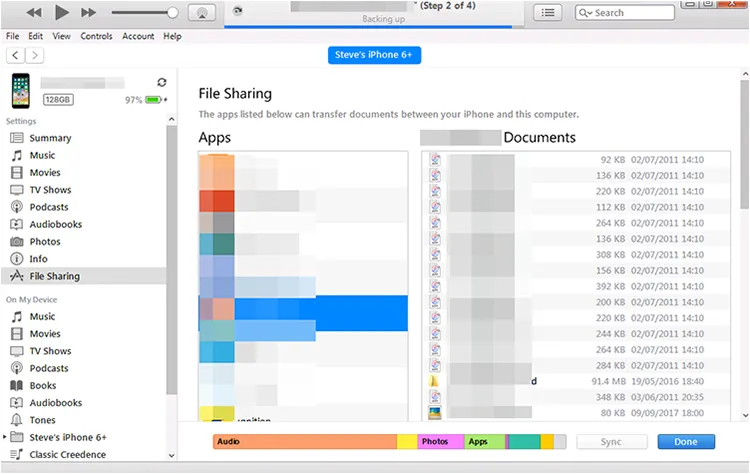
Step 1: Ensure you have the latest version of iTunes installed on your PC. You can download it from the Microsoft Store or Apple's website.
Step 2: Connect your iPhone to your PC using a USB cable. Unlock your iPhone and trust the computer if prompted.
Step 3: Click on the iPhone icon that appears in iTunes. In the sidebar, navigate to "File Sharing". A list of apps on your iPhone that support file sharing will appear. Select the app containing the files you want to transfer.
Step 4: In the right-hand pane, you'll see a list of files associated with the selected app. Select the files you want to transfer.
Step 5: Click the "Save to" button and choose a location on your PC to save the selected files. Finally, click "Save", and the files will be copied to your PC.
Part 3: Send Files from iPhone to PC Using iCloud
iCloud provides a convenient way to sync and share files across Apple devices and even with Windows PCs. iCloud Drive acts as a cloud-based storage solution for various file types.
Here's the guide:
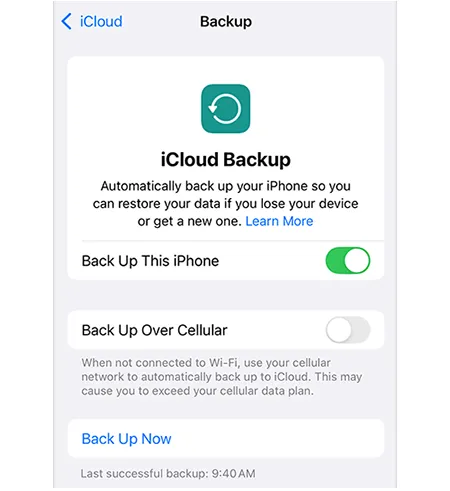
Step 1: On your iPhone, go to Settings > "[Your Name]" > "iCloud" > "iCloud Backup", and ensure "Back Up This iPhone" is turned on. Save the files you want to transfer to iCloud Drive using the Files app or within supporting applications.
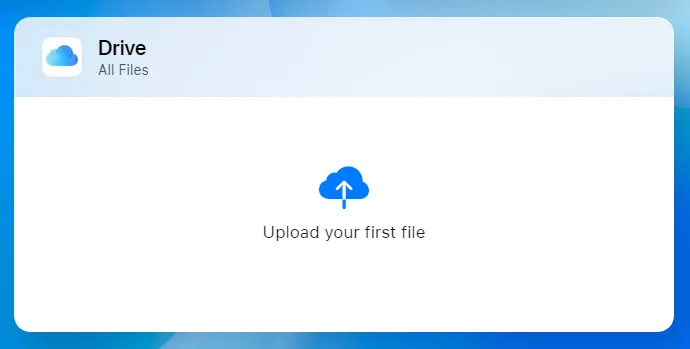
Step 2: Open a web browser on your PC and go to https://www.icloud.com/. Sign in with your Apple ID. Click on "Drive" to access your files and download them to your PC.
Part 4: Share Files from iPhone to PC via Google Drive
If you already use Google Drive, it can serve as a convenient way to transfer files between your iPhone and PC. Google Drive offers free storage (with the option to buy more), and the process is straightforward.
Here's how:
Step 1: Install the Google Drive app on your iPhone and sign in with your Google Account.
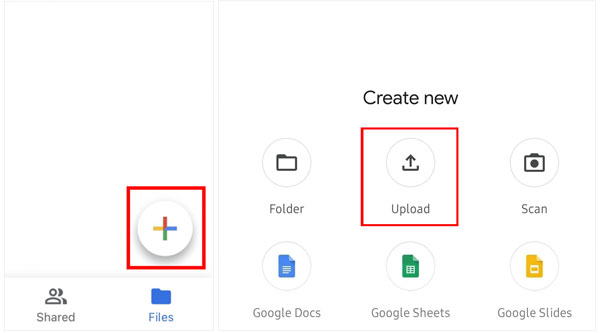
Step 2: Click "+" > "Upload" to upload your files from your iPhone to Google Drive.
Step 3: On your PC, open your browser and go to the Google Drive website (drive.google.com).
Step 4: Sign in with the same Google Account. Then download the files to the PC.
Part 5: Send Files from iPhone to Computer via Email
For transferring a small number of files, especially documents or photos, email can be a quick and simple method. However, please note that this way is not suitable for transferring large files or a large number of files due to email attachment side limitations.
Here are the steps:
Step 1: Open the Mail app on your iPhone and compose a new email. Next, tap the attachment icon (usually a paperclip) and select the files you want to transfer from your iPhone's Photos library or Files app.
Step 2: Enter your own email address as the recipient and send the email.
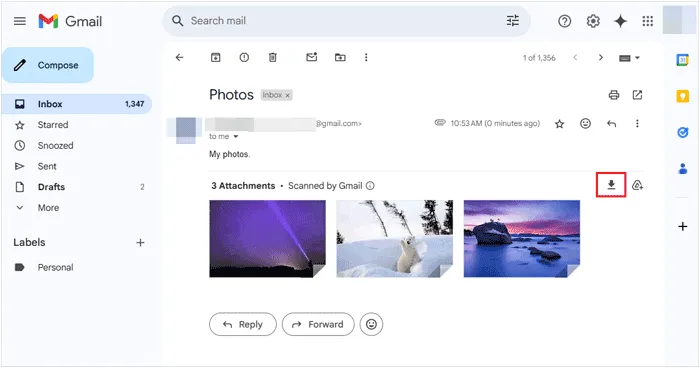
Step 3: Open your email client or webmail on your PC. Navigate to the email you sent and download the attached files to your desired location on your PC.
Part 6: Get Files from iPhone to Computer via USB Manually
If you prefer not to rely on software like iTunes or cloud services, you can manually transfer files from your iPhone to your PC using a USB connection.
Here's how you can do it:
Step 1: Connect your iPhone to your PC using a USB cable. Unlock your iPhone and trust the computer if prompted.
Step 2: On your PC, open File Explorer (Windows Key + E). Your iPhone should appear as a portable device under "Devices and drives".
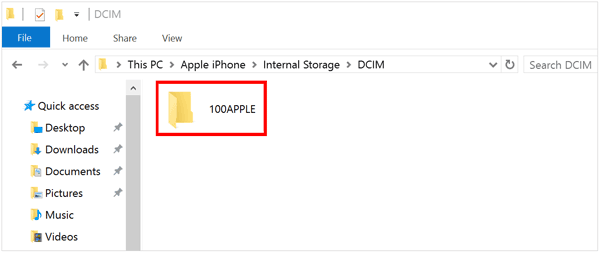
Step 3: Double-click on your iPhone's name, and you will likely see an "Internal Storage" folder, and then a "DCIM" folder (Digital Camera Images). Within the DCIM folder, you'll find subfolders containing your photos and videos, often organized by date.
Step 4: Select the photos and videos you want to transfer and drag and drop them to a folder on your PC or right-click and choose "Copy" and then "Paste" in your desired location.
Part 7: FAQs About iPhone to PC Transfer
Q1: Can I transfer files from an iPhone to a PC with the Apple Devices app?
The Apple Devices app allows you to sync files from a PC to an iOS device but not from iOS to PC, so you can't use it to transfer files from an iPhone to a PC.
Q2: Can I back up my iPhone to my PC in 1 click?
Yes, you can back up your iPhone to your PC in 1 click with iReaShare iPhone Manager. This software allows you to back up different data types, including contacts, messages, voice memos, calendar, camera rolls, photos, etc.
Conclusion
There are various ways to transfer files from your iPhone to your PC, each method offering different advantages depending on your needs. If you want a comprehensive tool to transfer and manage your iPhone files on a PC, you can choose iReaShare iPhone Manager. It can also back up contacts, messages, photos, calendars, and more in 1 click.
Download for Win Download for Mac
Related Articles
Solved: How to Sync Contacts from iPhone to Mac with Ease
How to Transfer Music from Computer to iPhone Without iTunes