File Repair is an advanced tool designed to restore corrupted videos, photos, and documents with ease. Available for Windows, it utilizes AI technology to recover damaged files from various sources including PCs, USB drives, external hard drives, SD cards, phones, etc.
Haven't yet installed the File Repair on your computer? Click the button below to download the software and get started now.
Part 1: Steps to Repair Broken Photos
File Repair can fix damaged photos in various situations, including pixelated or grey images and wrong colors. It supports different image formats such as JPG, JPEG, PNG, and GIF. Here's how to restore your images:
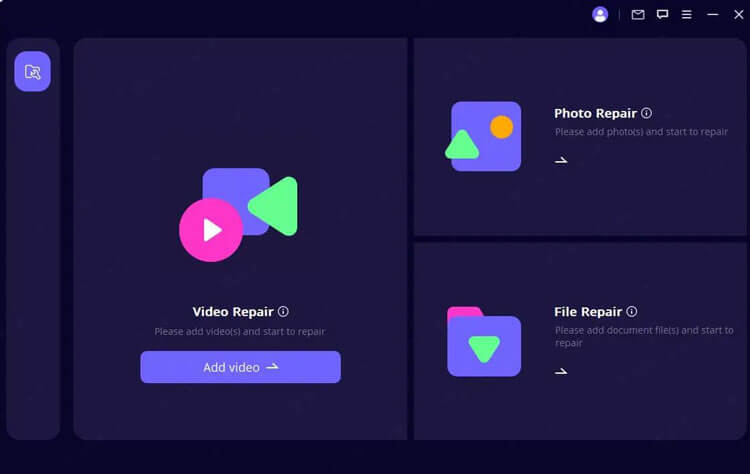
Step 1: Select Photo Repair
Click the picture icon or "Photo Repair" mode to upload the images you wish to repair. This AI photo restoration tool supports multiple formats, enabling batch repairs.
Step 2: Start Photo Repair
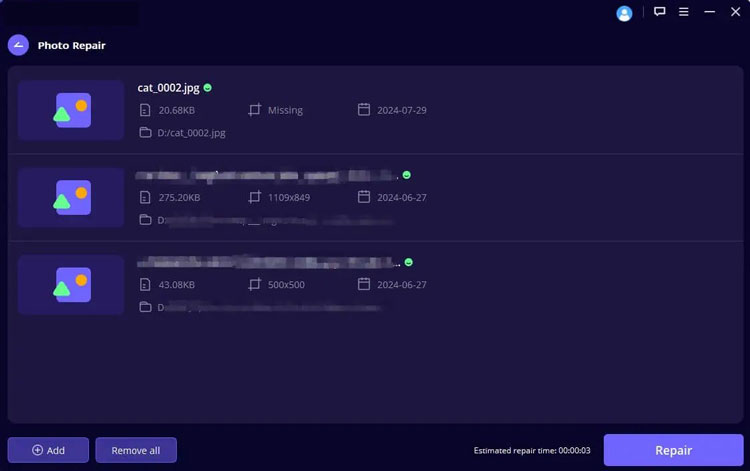
After uploading, click "Repair" and wait for the process to complete. You will receive a notification regarding the repair outcome.
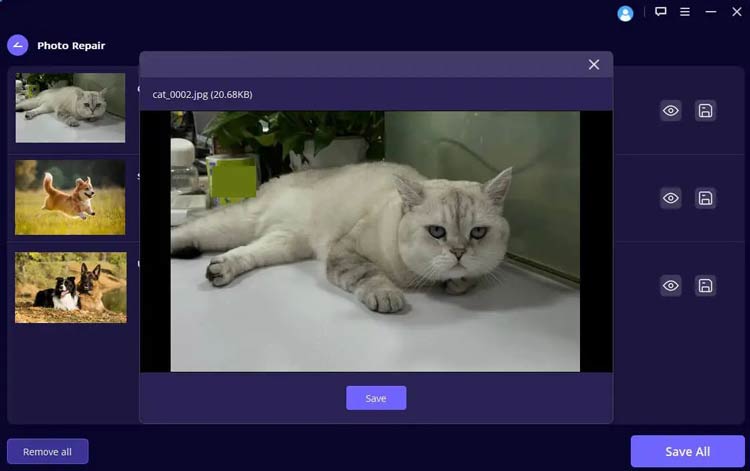
Step 3: Save Repaired Photos
Once the repair is successful, you can preview and save the restored photos to your preferred location.
Part 2: Steps to Repair Corrupted Videos
This AI video repair tool supports multiple formats such as MP4, MKV, FLV, MXF, AVI, MTS, and M2TS, allowing you to repair several videos simultaneously. Follow these steps to repair your corrupted video files:
Step 1: Select Video Repair
Click on the "Video Repair" mode and then press the "Add Video" button.

Step 2: Initiate Video Repair
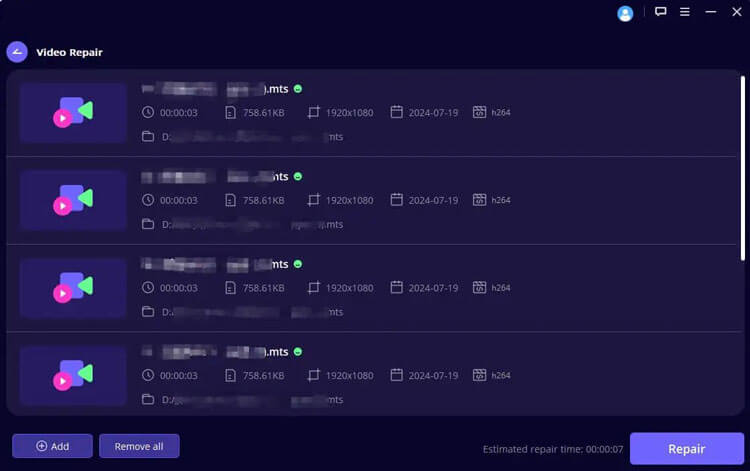
Once the videos are uploaded, the interface will display their details including file name, size, length, and resolution. Click "Repair" to begin the process.
Step 3: Save the Repaired Video
Upon completion, a notification will confirm the successful repair. You can then save the repaired videos by clicking "Save" or "Save All", ensuring to select the desired storage path.
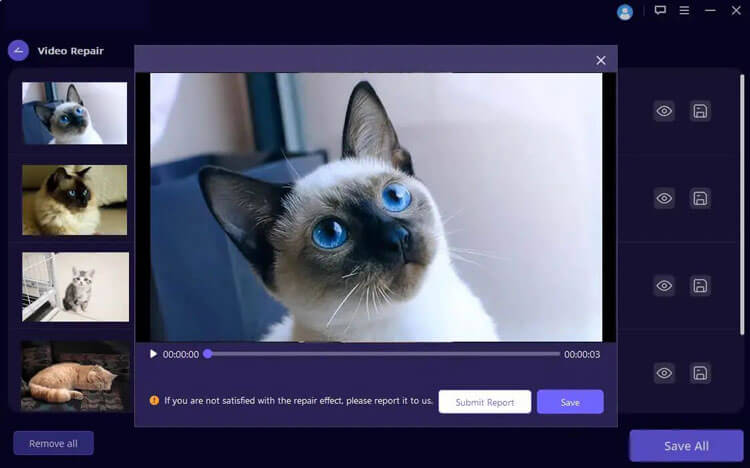
Note: If your video cannot be repaired, please fill out a problem report and email the damaged file to us, or contact customer support for assistance.
Part 3: Steps to Repair Unreadable Files
The File Repair mode is ideal for data recovery from SD cards, USB drives, external hard drives, memory card, digital camera and more.
Step 1: Begin File Repair
Select the "File Repair" mode from the main interface. This will open a browser window where you can navigate to the location of the corrupted files. You can upload multiple documents at once.

Step 2: Initiate File Repair
Choose Word, Excel, or PowerPoint files for repair. The program will display the progress as it loads the files. Click "Repair" to start the process.
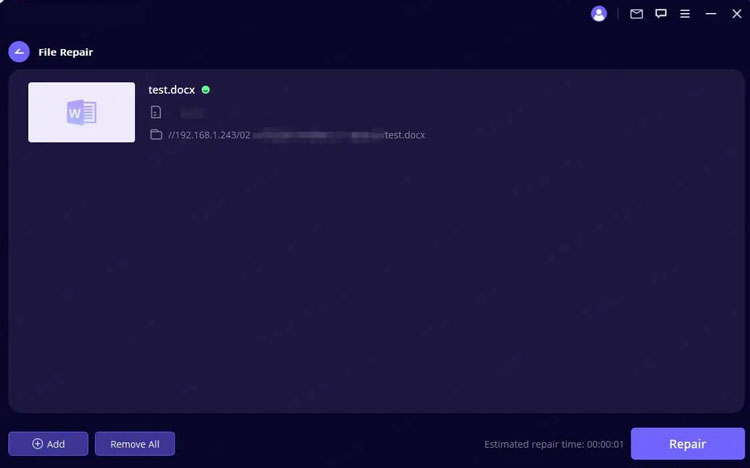
Note: If you upload the wrong file, you can remove it by clicking the trash can icon next to its details, or delete all files using the "Remove All" button.
Step 3: Complete File Repair
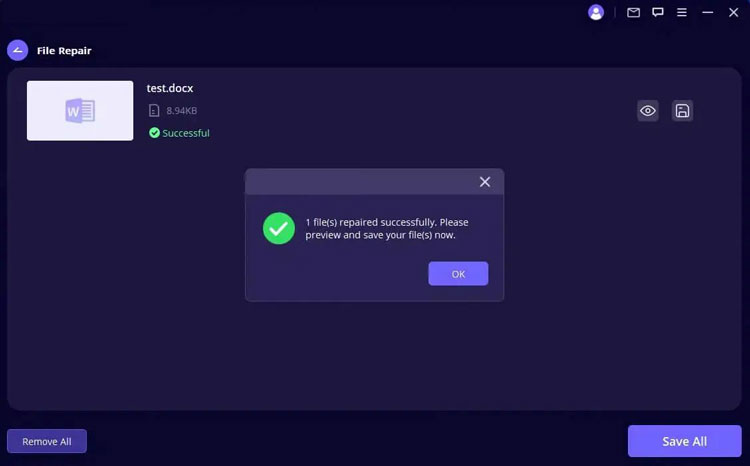
The application will scan and fix any detected issues within your documents. You can pause the repair process at any time. After completion, a pop-up message will indicate the repair results.
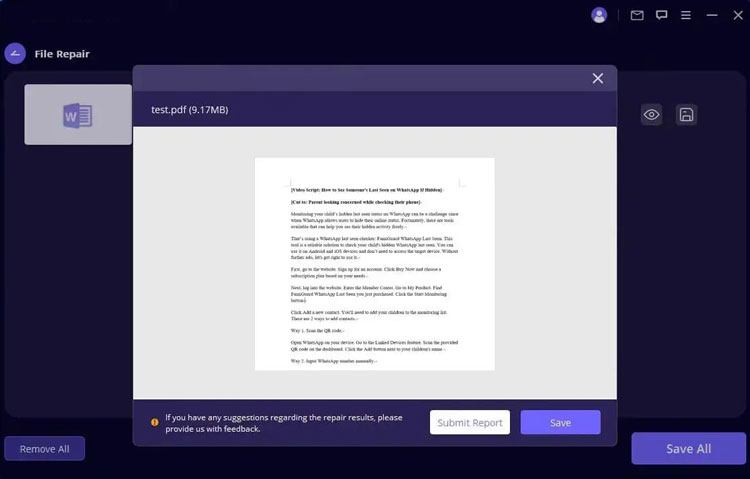
Step 4: Save the Repaired Files
Now, you can save the repaired files by clicking "Save" or "Save All", select the desired storage path and access them on your Windows PC.
Conclusion
File Repair simplifies the process of file restoration, ensuring that your corrupted videos, photos, and documents can be recovered effortlessly. Experience the power of AI-driven repair today.


