With iReaShare iPhone Data Eraser, you can completely erase all data on your iPhone/iPad/iPod touch. It can wipe out everything from iOS devices, and your content cannot be recovered from your device after using it. Thus, please back up your important data first.
Part 1: Connect iDevice to Computer
Download and install iReaShare iPhone Data Eraser on your Windows PC. Then you can easily connect your iDevice to your computer via USB before erasing your iOS data.
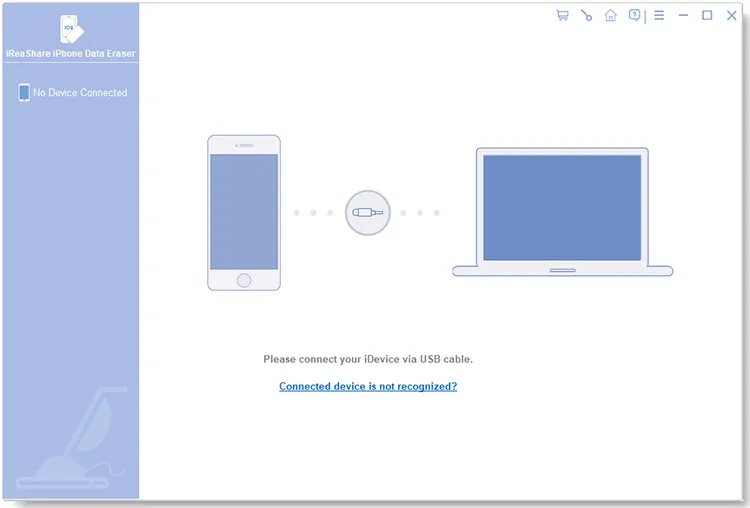
Step 1: Use a USB cable to connect your iPhone/iPad/iPod touch to the computer where you installed iReaShare iPhone Data Eraser. Then the software will detect your mobile device.
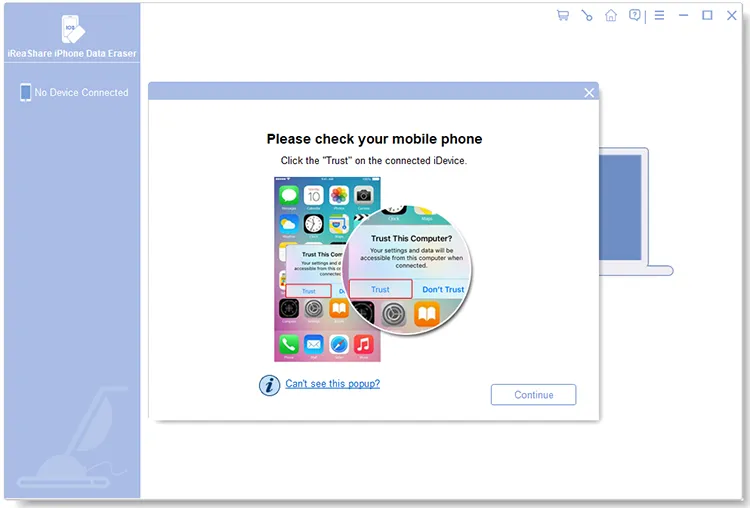
Step 2: Click "Trust" on your iOS device to make the program recognize the iDevice.
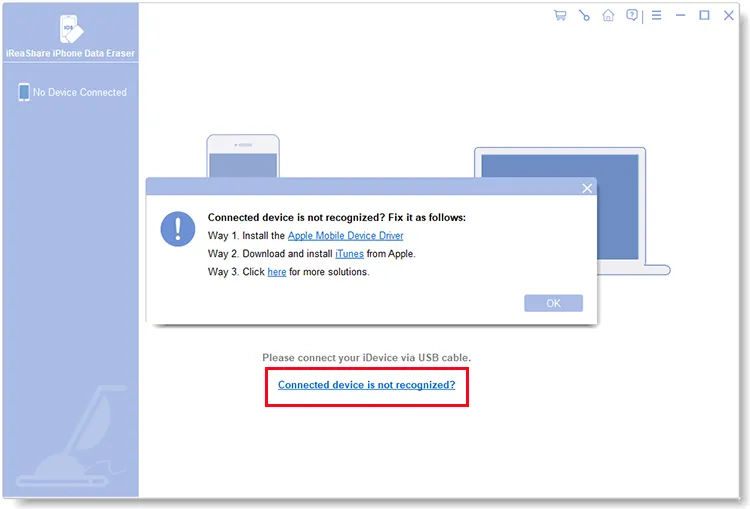
Step 3: If it fails to recognize your device, please click "Connected device is not recognized?" to get 3 solutions. Choose one to fix the issue, and then you will establish the connection.
Part 2: Erase iOS Data and Settings Permanently
As the connection is ready, you can follow the steps below to erase your iOS data and settings permanently with iReaShare iPhone Data Eraser.
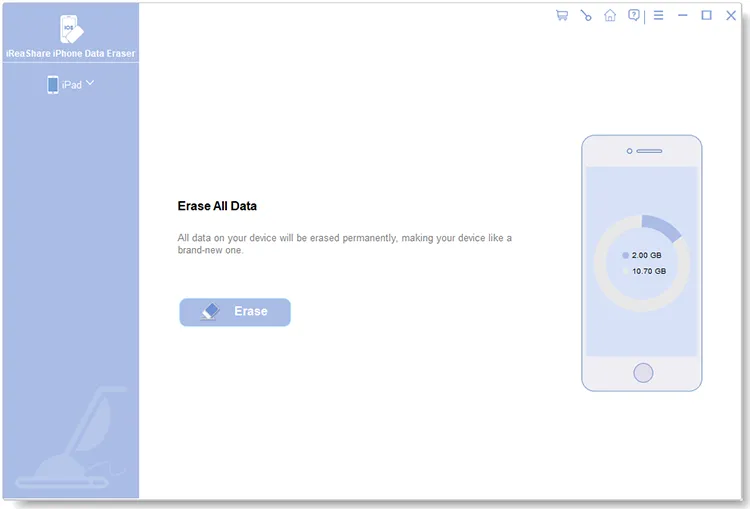
Step 1: Click the "Erase" icon on the connected interface. Aside from that, please close iTunes on your computer when using this program.
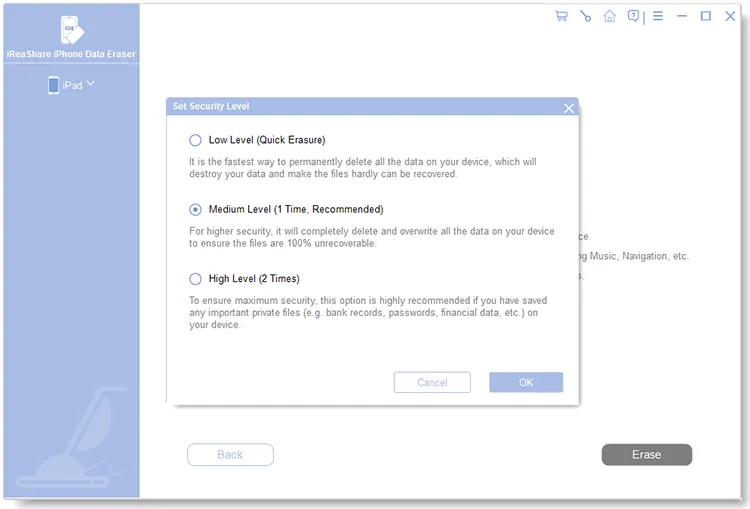
Step 2: Tap "Medium" to select a security level: Low Level, Medium Level, and High Level. Then click "OK".
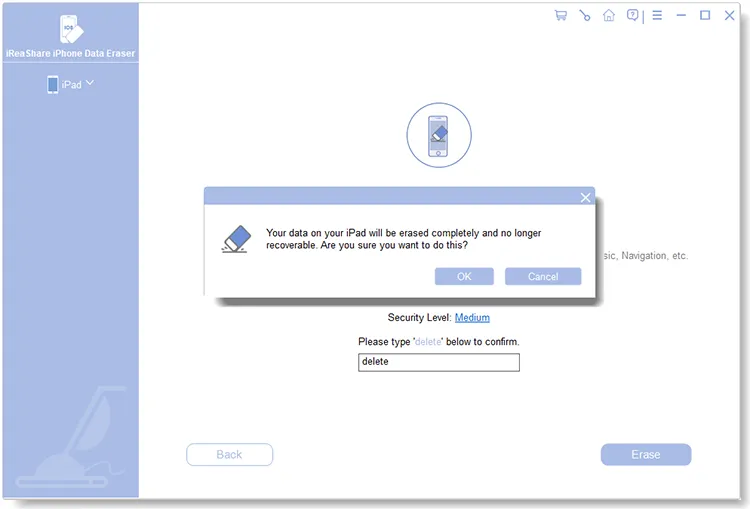
Step 3: Enter "delete" to the designated field, and click the "Erase" icon at the bottom. Next, click "OK" on the popup to confirm your action.
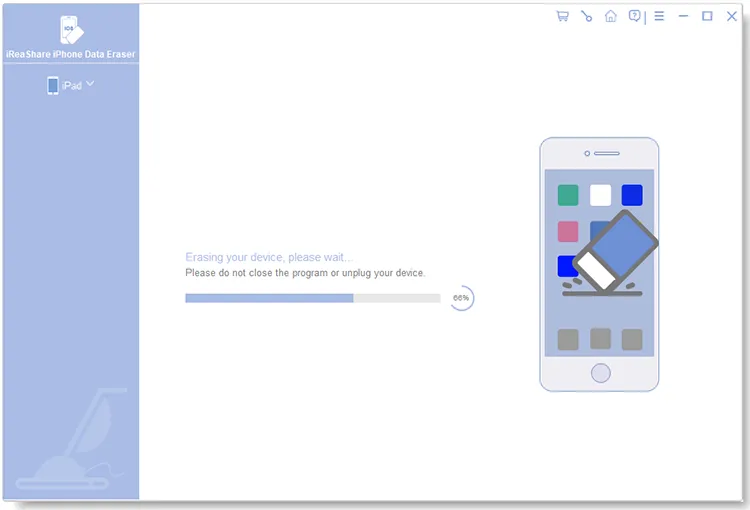
Step 4: After that, the software will begin to erase your iOS device.
Step 5: After erasing, the program will reboot your device.
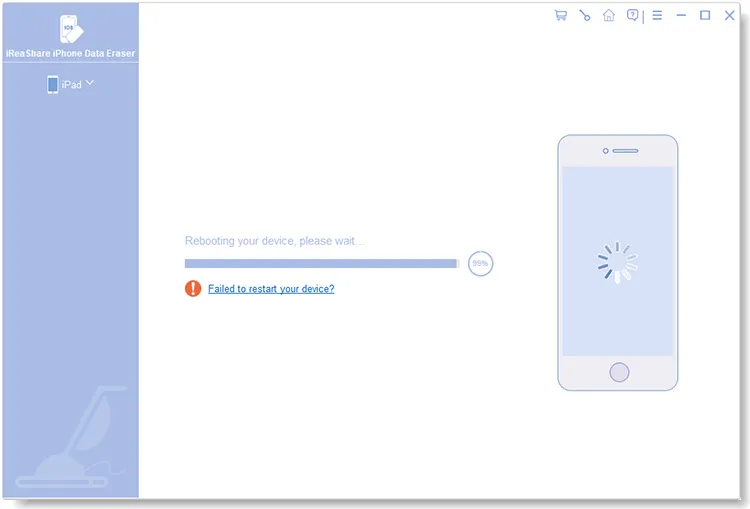
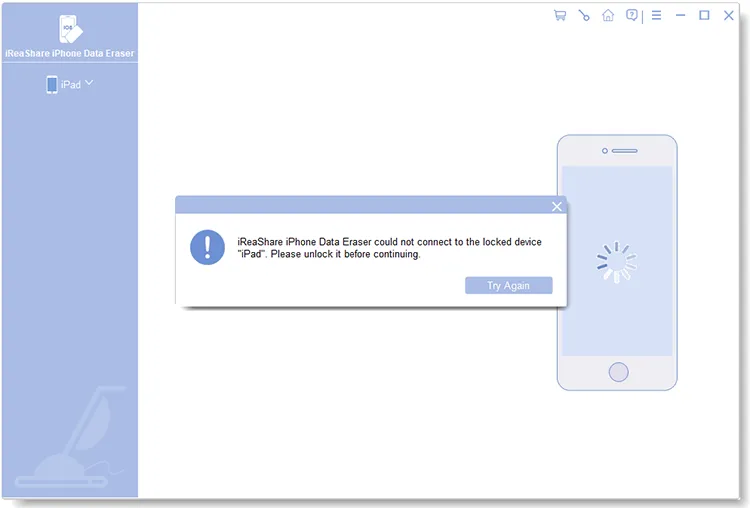
Step 6: Unlock your iOS device if prompted, and click "Try Again".
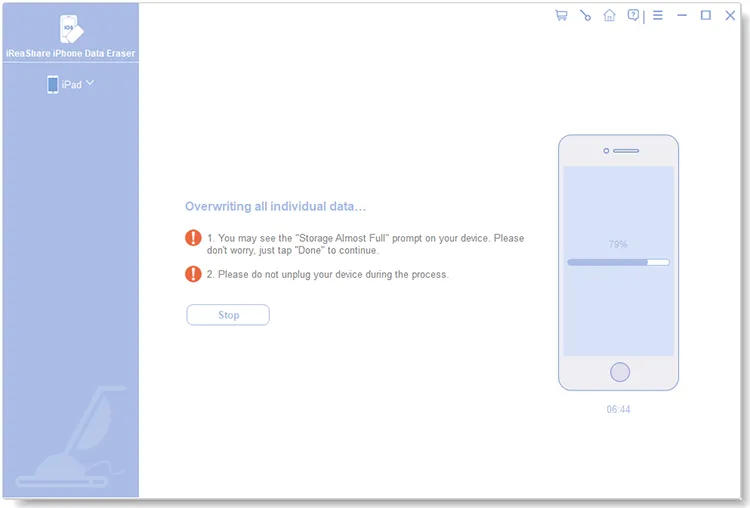
Step 7: Now, the iPhone Data Eraser software will overwrite your device. If you have chosen "High Level", the software will overwrite your data twice, which takes more time than other levels.
Step 8: When all the process is finished, your iOS data and settings will be erased thoroughly. Then you can remove your connected iOS device from your computer, and set it up.

Conclusion
That's how to use iReaShare iPhone Data Eraser to wipe out everything on iOS devices. All the steps are displayed above, so you can now erase your iOS data breezily.