Do you often use a thumb drive to store and transfer your data between different devices? Honestly, thumb drives are incredibly convenient to use. However, if you want to wipe a thumb drive completely to safeguard your privacy or prepare the thumb drive for reuse or disposal, you will need an effective solution. In this guide, we've provided 3 methods, hoping you can easily wipe your thumb drive.
Part 1: How to Wipe a Thumb Drive Completely via iReaShare Data Wipe
For users seeking a more robust and secure method of wiping a thumb drive, specialized data wiping software like iReaShare Data Wipe can be a reliable choice. This tool can wipe a whole external USB drive, and overwrite all the data, making data recovery virtually impossible.
Main features of this drive wiper:
* Completely wipe a thumb drive on a PC.
* Provide a Deep Erase mode to erase existing and deleted data from a device.
* Erase local hard drives on PCs with ease.
* Securely wipe an SSD to make data unrecoverable.
* Effectively wipe an SD card after connecting it to a PC.
Download this drive wiper.
Follow the steps to wipe a thumb drive effectively:
Step 1: Please install iReaShare Data Wipe on your Windows PC, and run it.
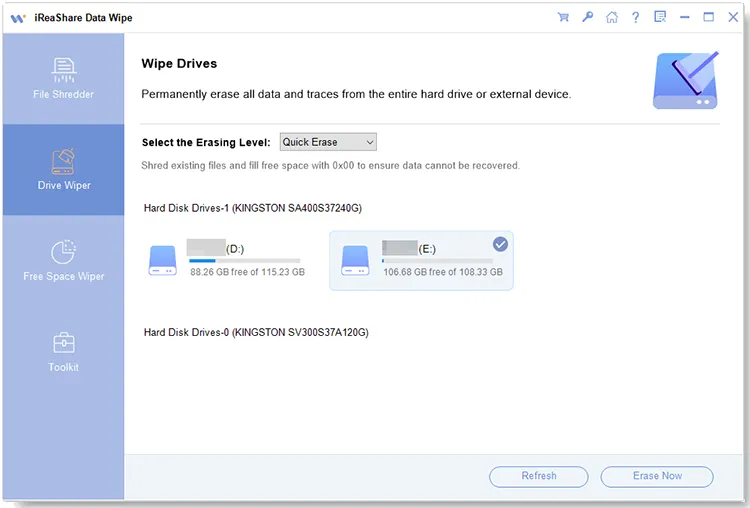
Step 2: Select "Drive Wiper", and choose the "Deep Erase" level if you want to overwrite the deleted data on your USB drive. Then choose your thumb drive.
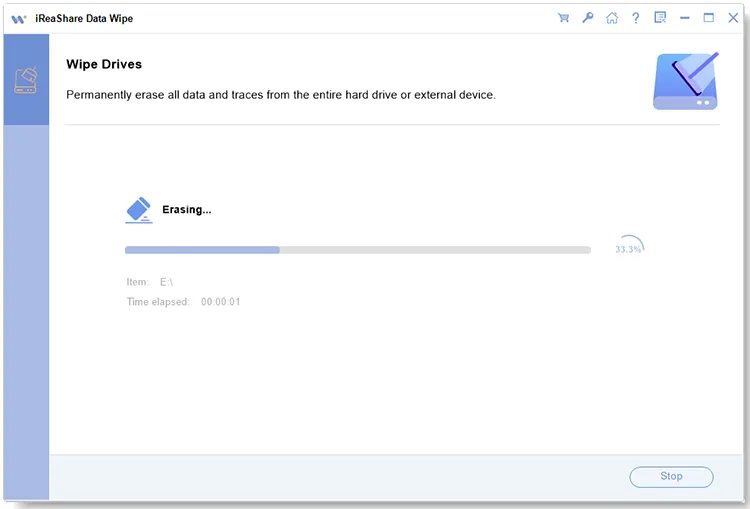
Step 3: Click "Erase Now" and choose "OK" to start the process. Then the software will wipe your thumb drive at once. After that, click "Home" and disconnect your protable drive safely.
Part 2: How to Wipe a Thumb Drive on PC via Formatting
Formatting a thumb drive on a Windows PC is a relatively quick and straightforward way to remove the data. While standard formatting doesn't securely overwrite the data multiple times, it removes the file system and makes the data inaccessible to typical users. For a more thorough wipe using Windows built-in tools, you can perform a full format.
Here are the steps:
Step 1: Plug the thumb drive into a USB port on your Windows PC, and press "Windows" + "E" to open File Explorer.
Step 2: Find your thumb drive under "Devices and drives". Note the drive letter assigned to it.
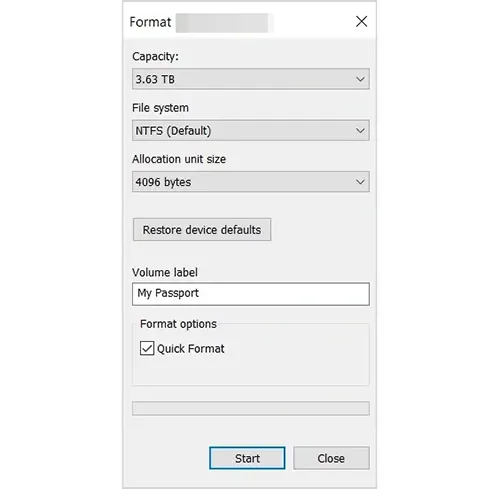
Step 3: Right-click on the icon representing your thumb drive. In the context menu that appears, click on "Format...". Then a "Format [Drive Letter]" dialog box will open.
Step 4: Verify that the displayed capacity matches your thumb drive.
Step 5: By default, "Quick Format" is usually checked, which performs a faster format by only removing the file system. If you want a more thorough wipe, uncheck the "Quick Format" box. This will perform a full format, which overwrites the entire drive with zeros, making data recovery more difficult.
Part 3: How to Wipe a Thumb Drive on Mac via Disk Utility
Mac users can take advantage of the built-in Disk Utility tool to wipe a thumb drive. Disk Utility offers a more secure erasure option than simply dragging files to the trash, making it a great option for those who want to ensure their data is completely wiped.
Here's how you can wipe a thumb drive on a Mac using Disk Utility:
Step 1: Plug the thumb drive into a USB port on your Mac, and go to "Applications" > "Utilities" and open the "Disk Utility" app.
Step 2: In Disk Utility, locate your thumb drive in the left sidebar. Click on it to select it.
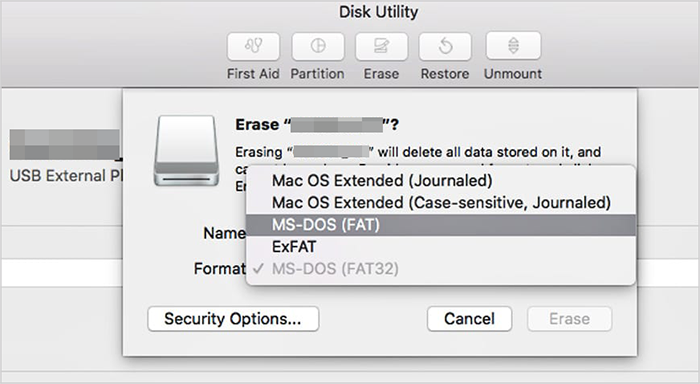
Step 3: Click the "Erase" button at the top of the window. In the pop-up window, choose the file format (usually exFAT for cross-platform compatibility) and a name for the drive.
Step 4: For a more secure wipe, click on the "Security Options" button. Here, you can select how many times you want the data to be overwritten. The more times it's overwritten, the harder it will be to recover the data. For maximum security, choose the option to overwrite the drive 7 times.
Step 5: After selecting your security options (if any), click "OK" to return to the main Erase dialog, and then click the "Erase" button. The process will begin, and the thumb drive will be wiped.
Part 4: FAQs About Wiping a Thumb Drive
Q1: When do I need to wipe my thumb drive?
You need to wipe your thumb drive in situations where you want to ensure the data on it is permanently unrecoverable. Here are the scenarios:
- Dispose of or sell the thumb drive.
- Transfer the thumb drive to an untrusted party.
- When sensitive data was stored on the drive.
- Before recycling.
- If you suspect malware infection (as a more thorough measure).
- Corporate or legal requirements.
Q2: Is wiping a thumb drive the same as formatting it?
Not exactly. Formatting a thumb drive removes the file system, making the data inaccessible, but the data may still be recoverable with the right software. Wiping, on the other hand, ensures that the data is overwritten and unrecoverable.
Q3: Does wiping a thumb drive delete all data permanently?
If done correctly using secure wiping methods, yes. A basic format may not erase the data completely, but secure wiping tools overwrite the data multiple times, making it virtually impossible to recover.
Conclusion
With the previous methods, you can completely wipe a thumb drive to protect your privacy. If you use iReaShare Data Wipe, you can erase existing and deleted data on your thumb drive at one go. No data can be recovered, which is safer than using formatting on a Windows PC. If you are a Mac user, you can also use Disk Utility to securely wipe your USB drive.
Related Articles
How to Shred Files: Practical File Shredder Tips for Windows PC
Clean Disk Using CMD Without Effort (Solved)