After using a computer for some years, it inevitably stores a wealth of your data. Even if this data is now obsolete for you, failing to clean it up promptly leaves it vulnerable. These files are like dormant threats, and should your computer be breached or infected with a virus, this data is highly likely to be exposed, putting your personal security at serious risk. For this reason, learning how to shred files is vital. This way, even though your system is compromised, the data you've shredded will be unrecoverable.
Part 1: Do We Need to Shred Files on Windows PC?
The need for file shredding on a Windows PC depends heavily on the nature of the data you're handling and what you intend to do with the storage device. Consider the following scenarios:
Selling or donating your computer: Before relinquishing ownership of your PC, it's crucial to ensure that your personal data is completely irretrievable. File shredding guarantees that your sensitive data won't fall into the wrong hands.
Disposing of old hard drives or SSDs: Similar to selling a computer, discarding old storage devices without properly wiping them puts your data at risk. Physical destruction is an option, but file shredding offers a more convenient and often sufficient alternative.
Dealing with highly sensitive information: If you work with confidential client data, financial records, medical information, or any other type of highly sensitive material, shredding these files after they are no longer needed adds an extra layer of security and helps comply with privacy regulations.
In a nutshell, when dealing with anything you wouldn't want someone else to see, file shredding is a vital security practice.
Part 2: How to Shred Files on Windows PC via iReaShare Data Wipe
One of the easiest and most user-friendly ways to shred files on a Windows PC is by using dedicated software like iReaShare Data Wipe. This software offers powerful wiping algorithms to suit different security needs. It allows you to select the files you want before shredding, so you can easily erase target files without impacting other files on the same hard drive. Also, it can wipe a whole hard drive at once if you use the Drive Wiper function.
Main features of iReaShare Data Wipe:
* Permanently shred files on a Windows computer.
* Allow you to select files and folders before starting to shred them.
* Erase files from PCs and overwrite deleted data without recovery.
* Wipe an entire hard drive completely.
* Support data erasure on SSDs.
* Support Windows 11/10/8/7.
Download this file shredder.
Follow the steps to shred files on a Windows PC:
Step 1: Please download and install iReaShare Data Wipe on your PC, and then open it.
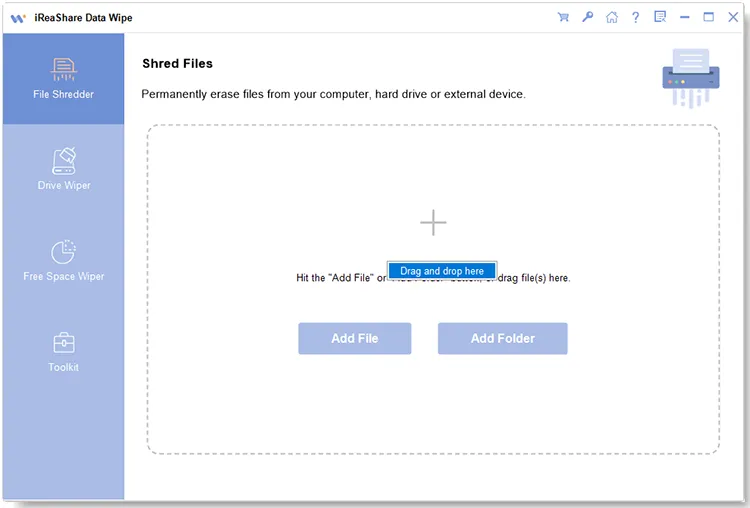
Step 2: Choose the "File Shredder" option, and click "Add File" to select the files you want to shred from your PC. Or you can drag and drop files to the designated area, and click "Drag and drop here".
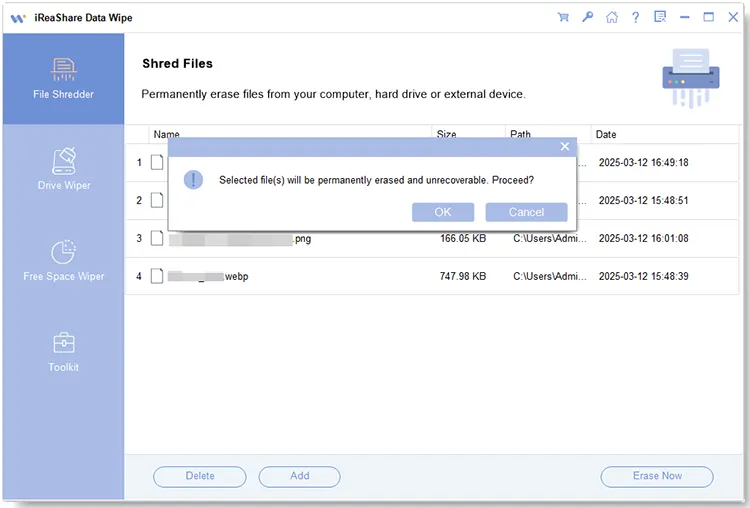
Step 3: After adding files, double-check the files to make sure you don't need them anymore. Then click "Erase Now" > "OK" to start shredding your files.
Part 3: How to Shred Files in Windows 11 via Windows PowerShell
Windows offers a built-in command-line tool called PowerShell that can be used for more advanced file operations, including secure deletion. While it requires a bit more technical know-how than using a GUI-based application, it's a powerful option as long as you follow the detailed steps below.
Here's how:
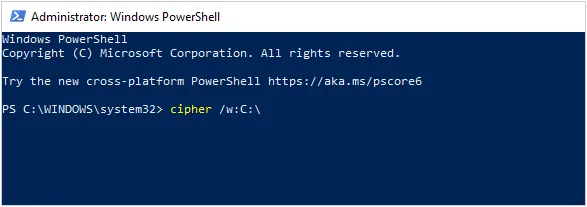
Step 1: Search for "PowerShell" in the Start Menu, right-click on "Windows PowerShell", and select "Run as administrator".
Step 2: Use the cd command to navigate to the drive where the files you want to make unrecoverable were previously stored. For example, if the files were on your C: drive, type cd "C:\" and press "Enter".
Step 3: Type "cipher /w:C:\", and replace "C:\" with the actual drive letter where the deleted files were located.
Step 4: The "cipher /w" command will overwrite all the unused space on the specified drive three times (once with zeros, once with ones, and once with random data). This process can take a significant amount of time depending on the size of the drive and the amount of free space.
Step 5: Once the process is complete, you can close the PowerShell window.
Part 4: How to Shred Files by Changing Recycle Bin Settings
If you prefer a more hands-off approach, modifying your Recycle Bin settings can provide an extra layer of security. By adjusting the settings, you can configure Windows to automatically overwrite files upon deletion, reducing the risk of file recovery. If you want to surely shred your deleted files, you can use the cipher command in the previous part to overwrite your deleted files.
Here's the guide:
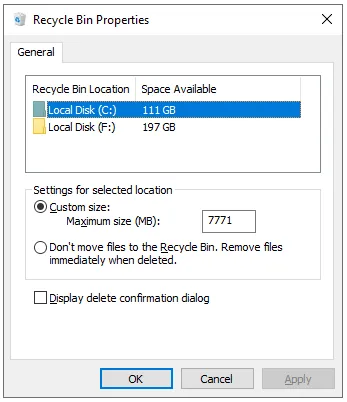
Step 1: Right-click on the "Recycle Bin" icon on your desktop and select "Properties".
Step 2: Under the "General" tab, check the box labeled "Don't move files to the Recycle Bin. Remove files immediately when deleted". This option ensures that files are permanently deleted from the get-go.
Step 3: You can also adjust the size of your Recycle Bin. The smaller the Recycle Bin, the more likely files will be permanently deleted rather than temporarily stored for recovery.
Part 5: FAQs About Shredding Files on Windows
Q1: Does shredding files make my computer more secure?
Yes, shredding files generally makes your computer more secure by making it significantly harder, if not practically impossible, to recover the deleted data. Besides, it should be part of a broader approach to security, which includes encryption, regular updates, and safe browsing habits.
Q2: Is there any risk of shredding the wrong files?
Yes, if you're not careful, you could accidentally shred important files. It's recommended to double-check the files before shredding them and use a shredding tool that offers a preview of the files you're about to delete.
Q3: Can I shred files on an external drive?
Yes, most shredding tools allow you to shred files from external drives (USB drives, external hard drives, etc.), such as iReaShare Data Wipe, just as you would on your internal drive. It can wipe your external drive completely.
Conclusion
Currently, simply deleting files is no longer enough to ensure privacy, so you need to shred files on your PC to safeguard your sensitive information. You can use specialized software like iReaShare Data Wipe to erase your files without hassle, or take advantage of PowerShell commands and tweak Recycle Bin settings to remove your files safely.
Related Articles
How to Clean Disk Using CMD Without Effort in 2025 (Solved)
How to Wipe an External Hard Drive on Windows 11/10 PC